Simple Doll Skirt Tutorial
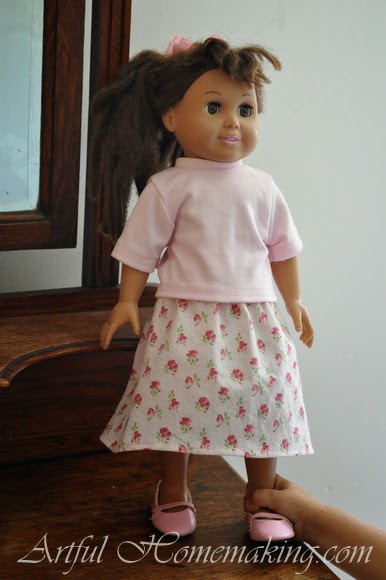
Last summer our daughter received some doll shoes and tops for her 18″ doll. The only problem was, she didn’t have any skirts to go with them! So, after the birthday party I ran down to my sewing area, grabbed some fabric scraps, draped them over the doll (for imprecise measuring!), and quickly sewed up two skirts for her doll. And then her younger sister wanted a skirt for her doll, so I sewed up another one. All in about an hour or less.
These are super-easy and fun to make. They would make a great first sewing project for a daughter learning to sew. I’m hoping to show my girls how to make them soon.
Here’s what you’ll need to make one:
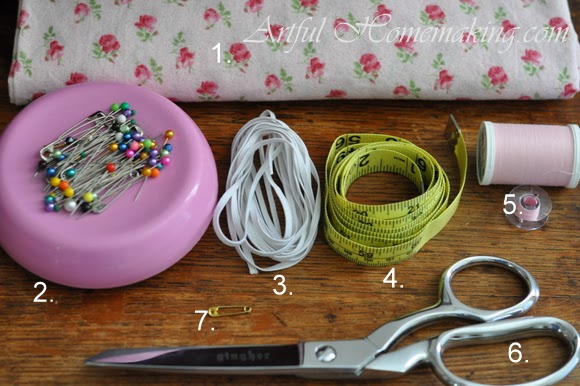
- Fabric (This is a great project for using up scraps.)
- Pins
- Narrow Elastic (I’m using 1/8″ elastic)
- A Measuring Tape
- Thread
- Scissors
- Small safety pin to thread elastic into the waistband casing.
- Sewing Machine (not pictured)
- Doll (I’m sewing for an 18″ doll, but you can use any size.)
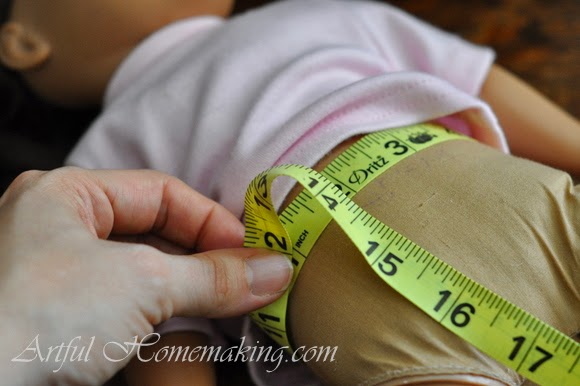
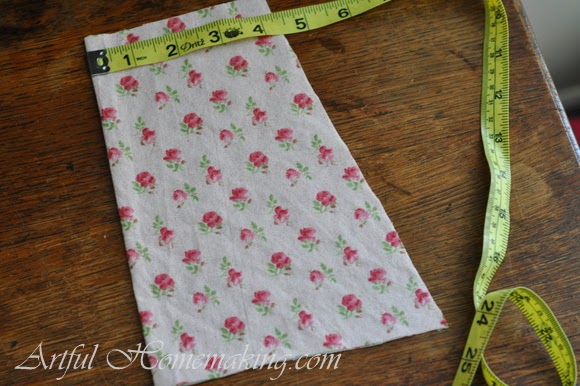
First, measure your doll’s waist. My doll’s waist is about 11″. For a full gathered skirt, you’d want to cut the fabric about twice the waist measurement. If you want the skirt to be narrower, adjust the measurement accordingly.
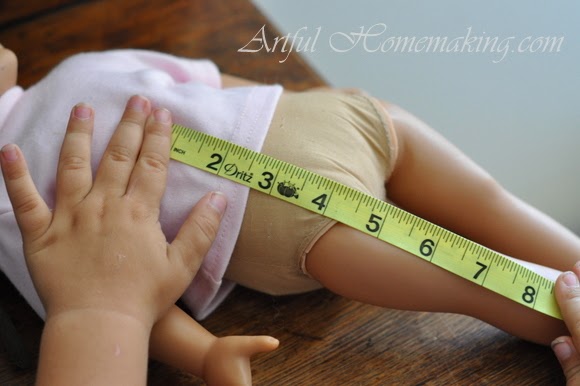
Next, decide how long you want the skirt to be. I decided on roughly 6-7″ (it didn’t really matter to me how long it was for this project). My little helper was helping me:
Fold the fabric lengthwise with selvedges on the side, and cut out.
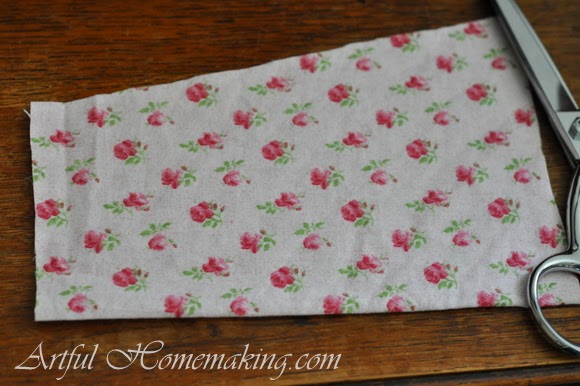
I cut my skirt about 8 1/2″ long, and 6″ wide at the bottom, tapering down to about 4 1/4″ at the top, to give it an a-line shape.
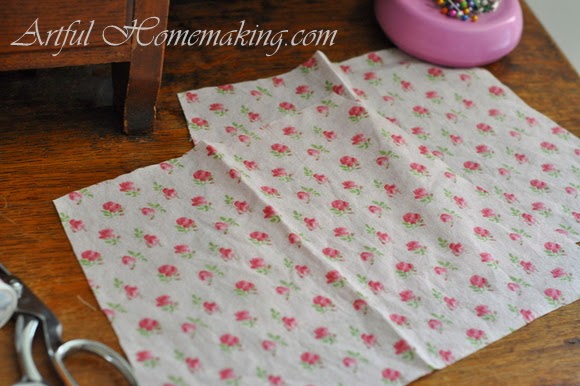
Now it’s time to cut out the second skirt piece. Lay the first piece you cut on top of the folded fabric edge. Cut around the first skirt piece (using it for your pattern).
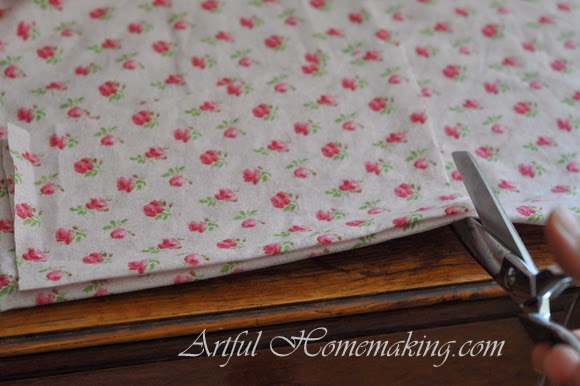
This will give you two identical skirt pieces; a front and a back:
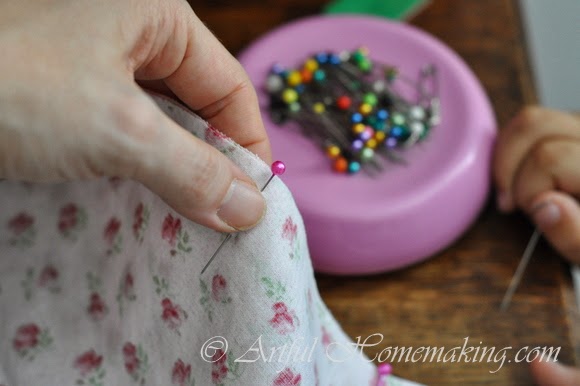
Pin the skirt front and skirt back together at the side seams, right sides together:
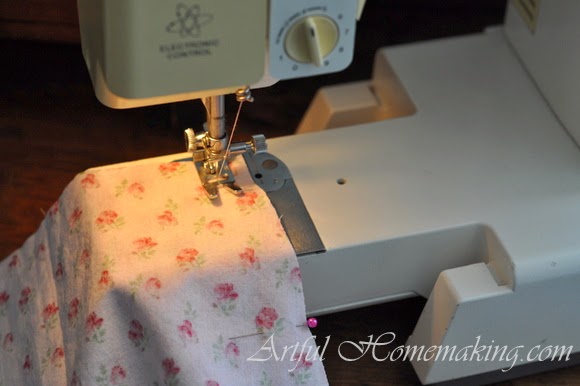
Sew side seams, right sides together, using a 5/8″ seam allowance:
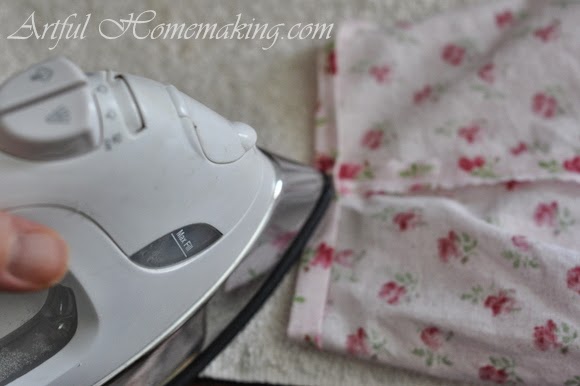
Trim seam allowances to 1/4″ and finish edge. I used my pinking shears, but if you have a serger you could use that, too. Press the seams open (or if you serged, press to the side):
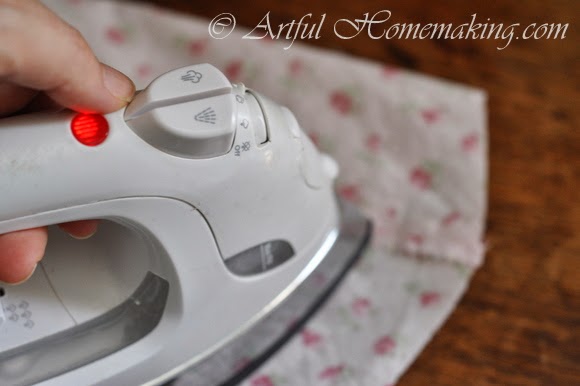
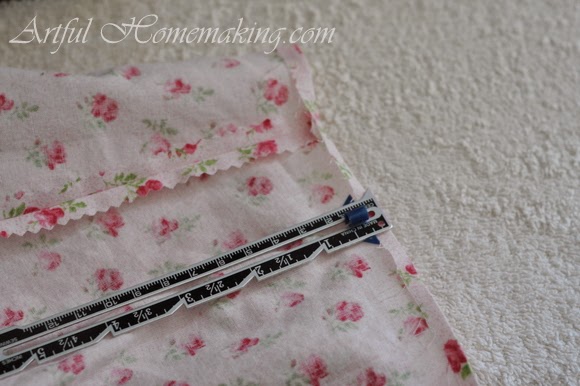
Turn under at the hemline (bottom of skirt–the widest part) 1/4″ and press:
Turn under 1/4″ a second time, and press again:
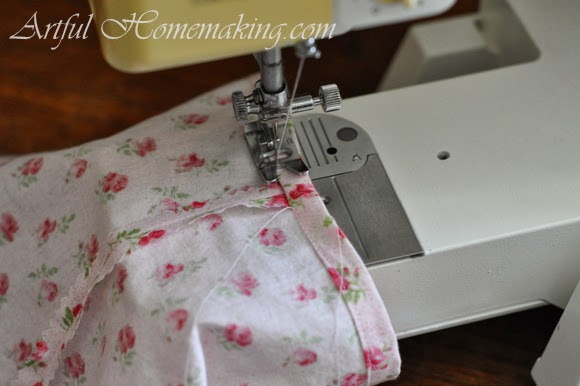
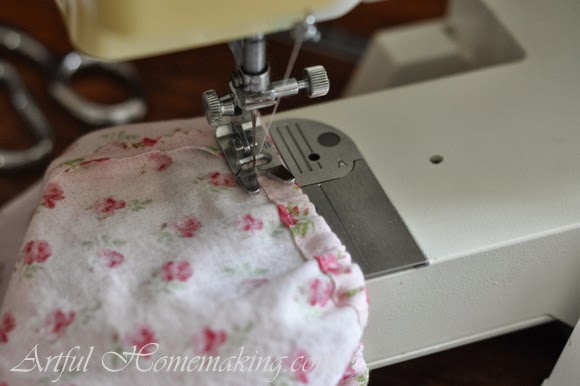
Stitch hem down close to edge:
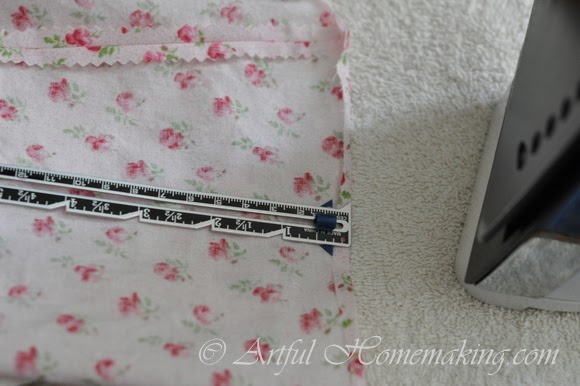
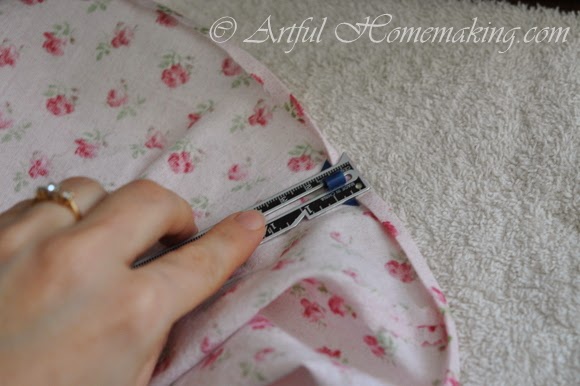
Now we will turn under the top of the skirt for the waistband. This will make a casing for the elastic. Turn under 1/4″ and press:
Turn under a second time 3/8″ and press (If you are using a different size elastic than 1/8″, you will need to adjust these measurements to make the correct casing size for the elastic):
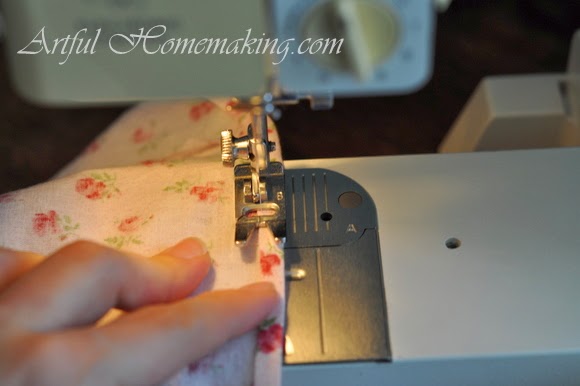
Sew down casing next to the folded edge, leaving about a 1″ opening to insert the elastic:
Measure your doll’s waist and cut a piece of elastic about 1″ smaller than that measurement. Attach a small safety pin to the end of the elastic:
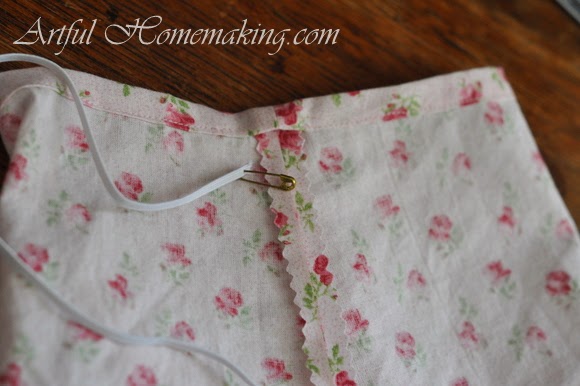
Thread the elastic through the casing:

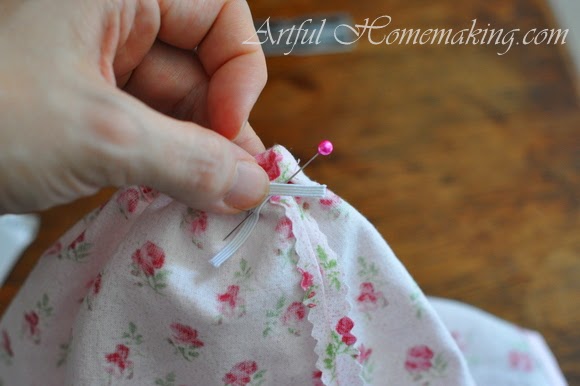
Pin down one end of the elastic to keep the whole thing from going through the casing as you pull it through:
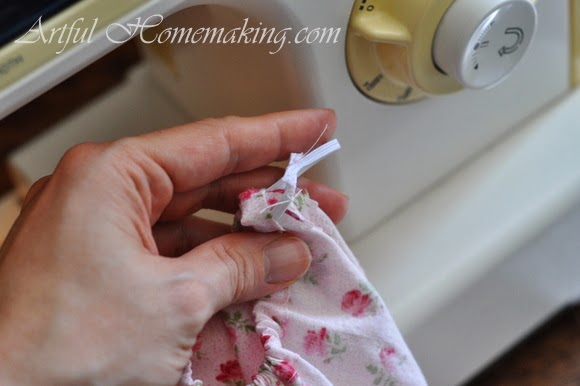
After the elastic is threaded through the casing, pin the two ends of the elastic together, and sew them together. I used the sewing machine for this, but the elastic is so narrow that you may prefer to do it by hand. Either way works fine, you just want to make sure it is securely tacked together.
Now, sew up the 1″ gap you left in the casing for inserting the elastic:
Press the skirt, and try it on the doll:
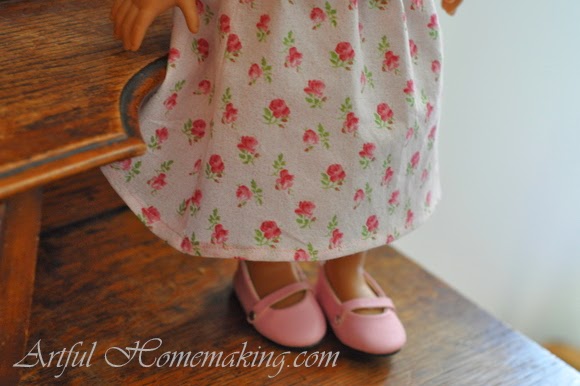
Finished!

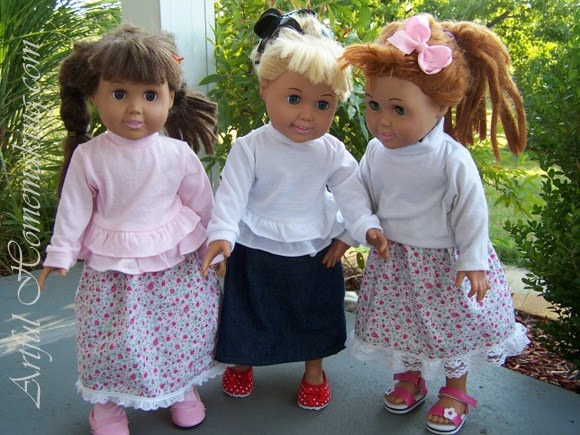
Here are the three doll skirts I whipped up last summer (one denim and two cotton calico):
You can add lace or any kind of creative embellishments to the skirt:

Your dolls will love their new skirts!

So sweet. I like it.
Thank you!
Oh how cute!
With all the sewing I do for the kids I never ever like to sew for dolls. The tiny size seems always so intimidating!
Can you imagine how I would feel sewing for Barbies?!
But you made it look very simple and not intimidating at all.
I will give it a try. To make matching outfits for the doll and the "Momma!"
Thank you Joy!
I know what you mean about the tiny size, Sandy! I made a doll dress for my youngest daughter a couple years ago. It was a prairie dress with a bodice yoke and gathers, sleeves with bands at the wrists, and a placket. It turned out cute, but it wasn't fun to sew! These skirts are not that way–they're totally easy!
I can't even imagine sewing for a Barbie doll. My mother-in-law made a whole set of Barbie clothes for my sister-in-law (including a wedding dress) when she was a young girl. It sounds like a lot of work!
If you try making doll skirt, I hope they turn out well for you!
So cute….wish I could sew.
Thank you! Sewing is so fun. I hope you get a chance to learn sometime!
Great project! I just found your blog and became a new follower (: Can't wait to come back for more posts…Hope you have a lovely week!!
Michele xoxo
The Homesteading Cottage
Welcome, Michele! Thank you so much for visiting and following. I'll have to visit your blog the next chance I get!
So sweet~
I love those projects that go quick and turn out great 😉
Thanks, Jennifer! I agree, quick is good! 🙂
I love the fabric you used in the tutorial! It's so beautiful, I myself would love a skirt made out of it! 🙂 My daughters are hoping for these dolls this Christmas, if I'm able to find a good price for some I will definitely be trying to make them some outfits.
Thank you, Angela! My youngest daughter has a gathered neck regency dress out of that fabric. 🙂 Our daughters have had their dolls for several years now. They're the ones you get at Michael's, and I had a coupon, so they were pretty inexpensive. They've loved playing with them, but the hair doesn't stay nice for very long.
Have fun making doll outfits! 🙂
Great tutorial! My daughter has a couple of Disney toddler dolls and AG patterns are a little too big.
Thank you! That's what's great about making skirts this way…you can adapt the measurements to fit any size doll. And I never do an extremely precise job, yet they turn out great and the girls love them anyway. 🙂
What a great tutorial for making a doll skirt. I actually came to your blog to place an Amazon order through your affiliate link but got side tracked by your lovely pictures of dolls having tea.
Yay! Thank you so much for using my link, I REALLY appreciate it! 🙂 ♥
Oh what a FUN tutorial! My older girls are coming back home today and my middle daughter wants to sew we might have to do this! ;o) Thanks for this! :o)
That sounds like a lot of fun to sew doll skirts together! I'm hoping to do that here too. 🙂
Very cute! I love elastic waist skirts. I make them for myself every year, and for my daughter as well. I haven't thought to make them for a doll…but that is a very good idea! Maybe matching ones for my babe and her doll 🙂
Girls love matching their dolls! The fabrics I used above are ones that match my girls' dresses (left over from making them), and they think it's fun for their doll to match. 🙂