Dye Your Own Playsilks With Kool-Aid {Tutorial}
My children love playing with playsilks. Even though they’re readily available online, it’s so much fun to make your own. Here’s how to dye playsilks with Kool-Aid.
My kids helped me with this easy DIY project, and we had so much fun doing it!

Playsilks are beautiful, natural toys. They are colorful, satisfying to the touch, and there are endless ways to play with them. They inspire creativity.
The only problem is, they’re often expensive. But, you can dye your own for about half the price, and it’s so much fun to do it yourself! (If you’d rather buy them ready-made, you can find them here.)
Supplies Needed:
Here’s what you need to make them:
- undyed silk scarves (I got the 35″x 35″ size)
- Kool-Aid (1-3 packets per color–I used varying amounts for mine–on sale for 5 cents per pkg!)
- white, distilled vinegar
- large pot
- mixing bowls or other container to dye the scarves in

My youngest asked me, “Mommy, can we drink this?” Nope. Sorry kids, this is only for dyeing things with! 🙂

Dye Playsilks with Kool-Aid
Here’s how to dye playsilks with Kool-Aid.
1. Fill a large pot with water about halfway.
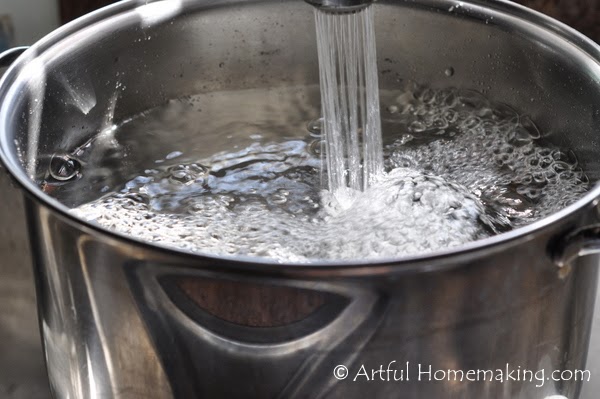
I heated it until it was almost hot enough to boil.
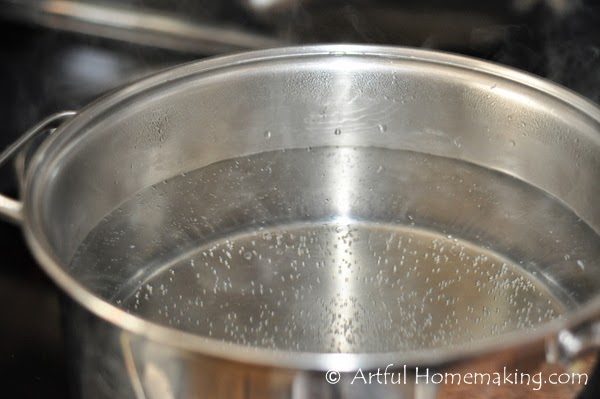
2. Add about 2 cups of vinegar.
3. Put the silks in the pot with the water and vinegar.
Let them soak for about 30 minutes.
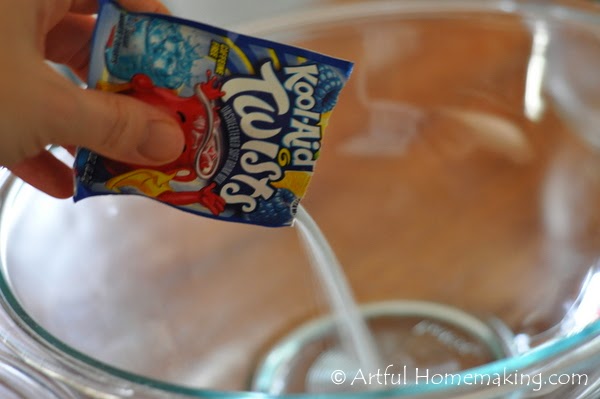
4. Prepare the bowls or other container you’re planning to dye the scarves in.
Pour the Kool-Aid packets into the bowls.
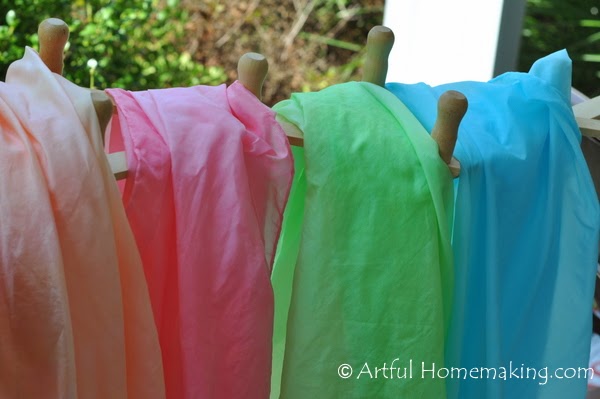
Color Combinations:
- For pink, I used 3 packages of Pink Lemonade.
- For orange, I used 1 package of Orange and 1/2 package Lemonade.
- For green, 1 package Lemon-Lime with 1/2 package Lemonade.
- For blue, 2 packages Ice Blue Raspberry Lemonade.
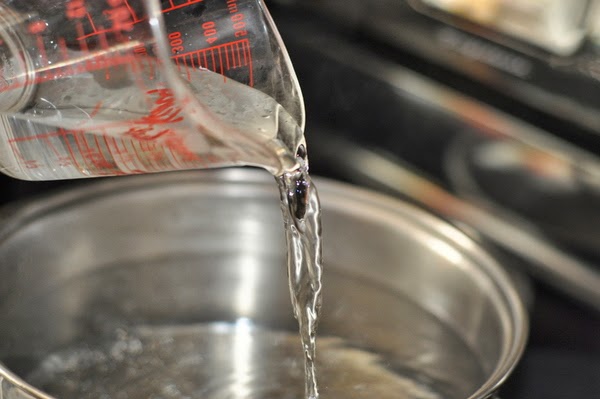
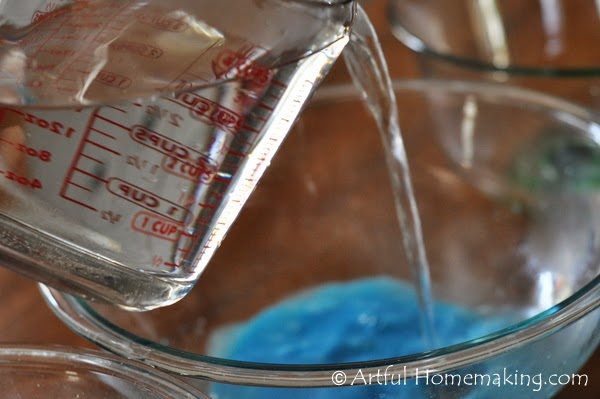
5. Heat water for the dye baths.
I used my large stainless steel tea kettle for this. I have this one.

6. Add the vinegar.
Add about 5-6 cups of hot water (or however much you need to cover the scarves you’re dyeing), and about 1/2 cup vinegar to each bowl, and stir until powder is dissolved completely.

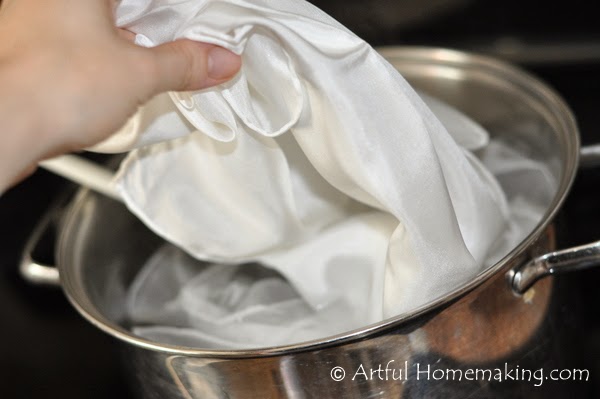
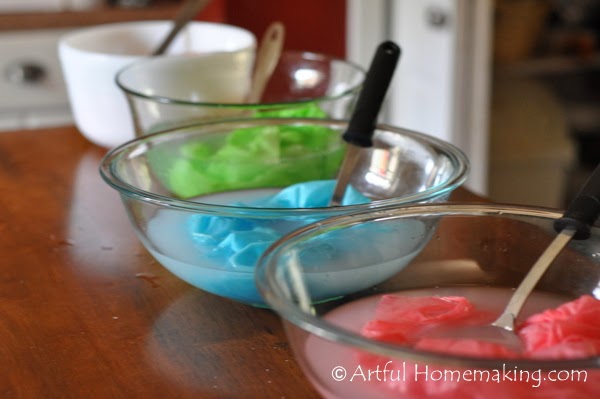
7. Add silks to the dye bath.
Add the silk to the bowl and stir to cover it fully with the Kool-Aid dye. Stirring occasionally will ensure that the whole silk gets covered with the dye.

It only took a couple of minutes for the color to transfer from the liquid to the silk.
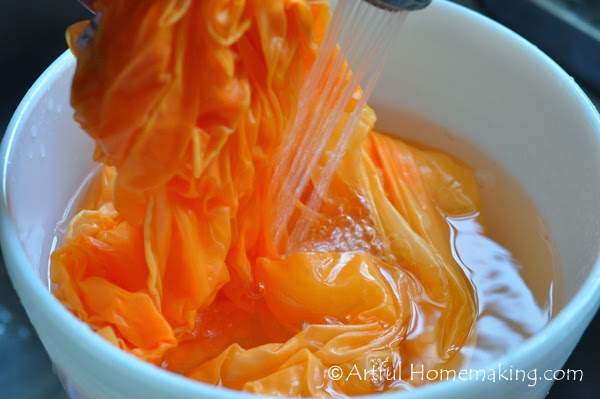
8. Remove from dye bath.
When the silk has reached the color saturation you want (2-3 minutes) it’s time to remove it. The water will be cloudy or almost clear as dye transfers to the silk.

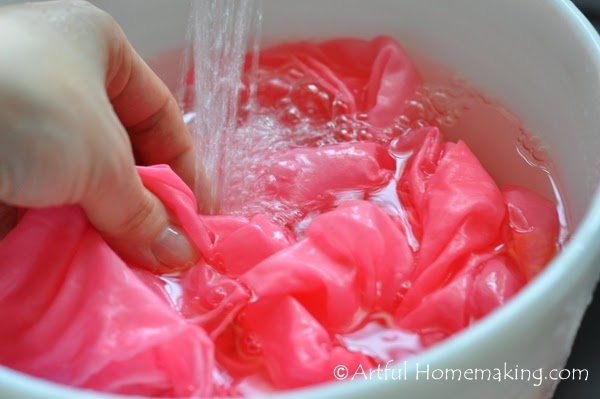
9. Rinse.
Take silk out of the bowl (or just pour the water out of it and keep the silk in the bowl–that’s what I did) and begin rinsing silk with cool water until it runs clear.
It may take several minutes. Some colors (like red) may never rinse completely clear.
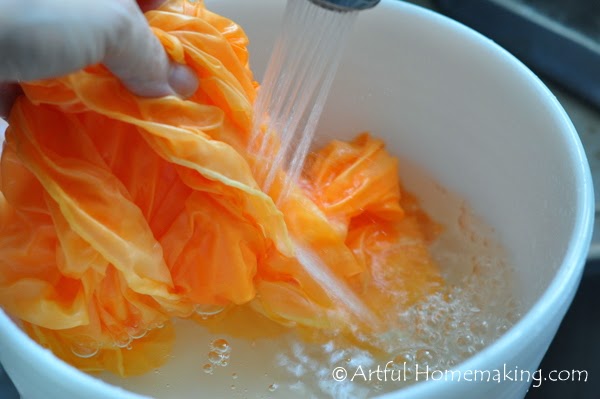
Even after rinsing for a long time, the orange one still never ran completely clear. It didn’t matter to me, so I gave up!

10. Dry.
Find a place to dry the silks. If you put them outside to dry, it doesn’t take long at all.
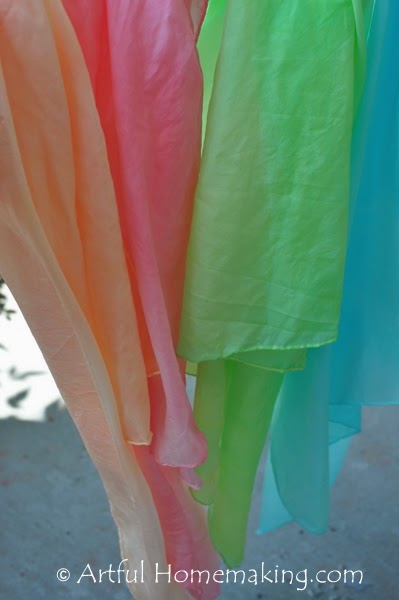
I used a peg rack balanced over two chairs to dry mine.
Once they’re dry, they’re ready for playing with!
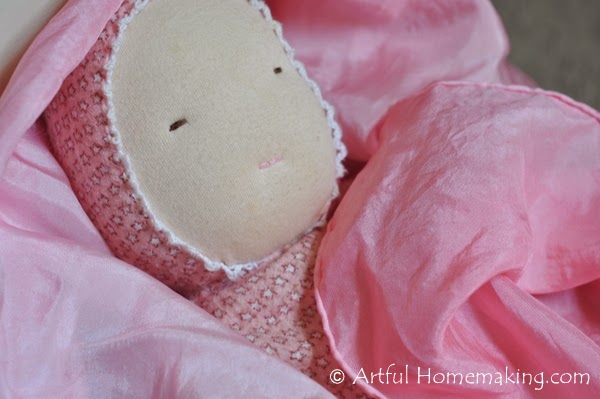
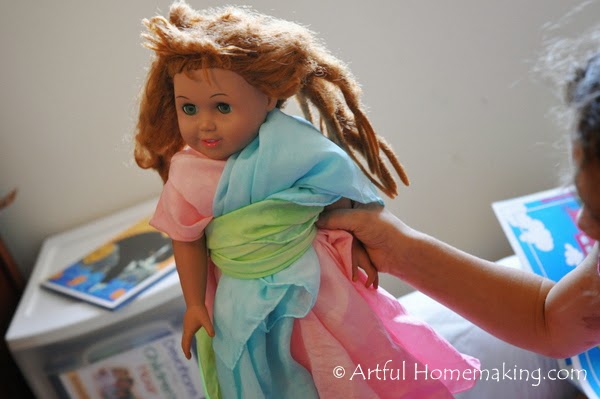
Faith’s Waldorf doll looked very cozy wrapped in a pink silk:

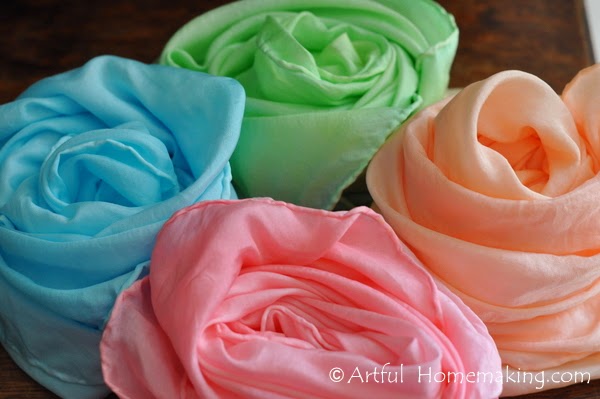
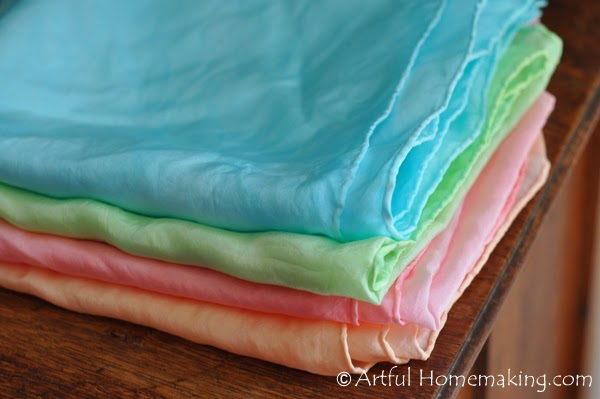
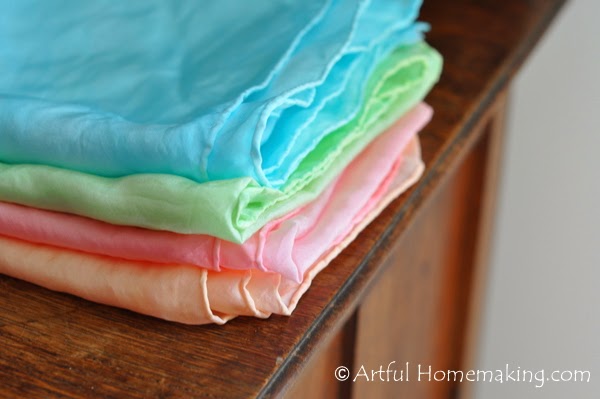
I think they turned out so beautiful! They’re a work of art.
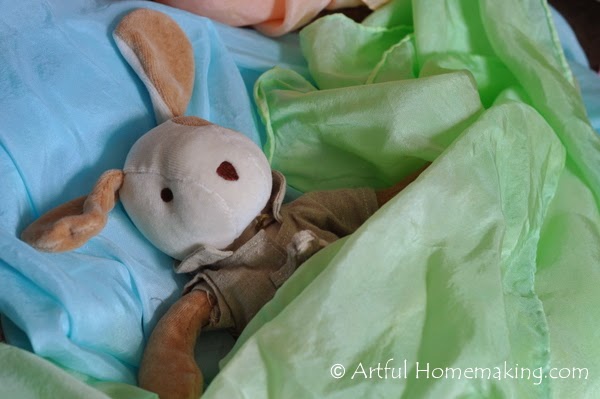
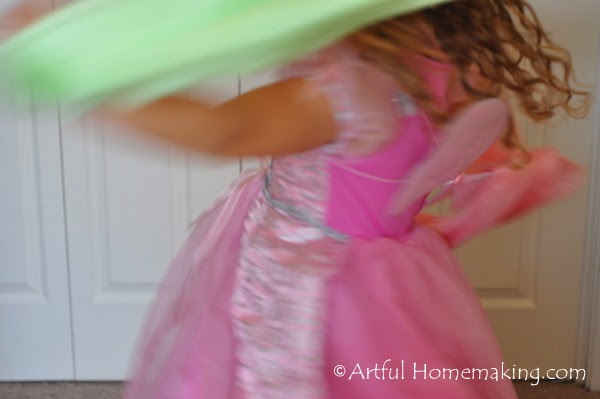
The girls are very creative with the playsilks, making doll dresses…
Skirts for themselves…and also just dancing with them…

If they ever need washing, I would hand wash them in cold water and hang to dry.
Enjoy your beautiful new playsilks!
**This post was originally published in August 2012.
**Update July 2014: Almost two years later, and these are still being played with and still look bright and colorful!**
Hi! I’m hoping to do this today but I have a question! In the first step, do you keep the water and vinegar on the heat while the silks are soaking for the 30 minutes?
Sorry I’m just now seeing this, I’ve been away due to the holidays and illness. I believe I turned off the heat and just left it on the stovetop so that the water was still hot but not boiling. If you made them already, I hope they turned out well!
The colors came out really beautiful! My son
Thanks! I love how vibrant the Kool-Aid makes them!
This is a fun idea!! Will do this with my kiddos!
Enjoy! 🙂
What a beautiful idea. I had never heard of playsilks.
Thank you, Donna! We love them!
Thank you, Donna!
Very pretty! I featured you on Mom's Library as well!
Thank you, Ashley!
Love those bright colors. Thanks for sharing at Mom's Library. I am featuring it on iGameMom http://igamemom.com/2013/08/07/fun-activities-with-colors-moms-library/
Thanks so much for featuring my post!
Just purchased three from Dharma to dye for my 9 month old for Christmas. I don't know of he is to young for them but I'm excited about them. 🙂 I am going to attempt a tie dye, a ombre, and maybe just the pretty green you have here. Thanks for the tutorial. Also, thanks for the link to your supplier. It is crazy how many bloggers leave out that vital tidbit.
Great–I hope you have fun making them! Babies usually love play silks, since they love to play peek-a-boo and they're so colorful and soft. 🙂
My girls have silks and they adore playing with them. They have been blankets, royal clothing and everything in between. ♥
They're so fun, aren't they? I'd love to do some larger ones. 🙂
I have been thinking about doing this! Thanks for the tutorial :o) I think my kids would love the process of creating the color silks! ;o)
I'm sure your kids would love it! 🙂
Great idea~
I love the 'twirly' picture 🙂
Thanks, Jennifer!
What a great idea. They are so pretty that it makes me want to wear them :0)
Thanks! My girls think they're fun to wear!