How to Install a Beadboard Kitchen Backsplash
How to install a beadboard kitchen backsplash yourself and save money! Our DIY beadboard backsplash tutorial.
When we moved into our current home over seven years ago, the kitchen was painted a brick red.
At the time, I was into a rustic, country look, and I was thrilled with our new kitchen.
But this little country kitchen has only one window (the one over the sink), and then a little bit of light comes in from the back door, which also has a window.
The main thing I started to really dislike about our kitchen back then was that it was dark. Very dark.
And if there’s one thing I love, it’s lots of natural light.
You can get a glimpse of what our kitchen looked like before in this post.
Since we couldn’t afford a complete kitchen remodel to add more windows, I decided to paint everything white to try to lighten it up.
Even though I had planned to paint a long time ago, we didn’t get to it until June 2016 (you can see the before and after pictures here).
Tin Backsplash
When we moved in, the previous owners had installed a new tin backsplash. It was very “country,” and I loved it.
But with time and child dishwashers, the tin started to rust, despite the fact that we regularly sprayed it with a protectant spray.
I considered painting the tin white, but the area around the sink had started to wear away entirely, and it was crumbling off the wall. The only thing to do was remove it.
Before we started painting the kitchen, we pulled off part of the tin backsplash because it was covering a part of the wall I wanted to paint.
You can see the photos of the tin backsplash being removed here.
One Year Later
Life was busy and it took us a whole year to finish the job of removing and replacing the tin backsplash. But it was finally gone.
We painted the kitchen in June 2016, and we didn’t get a chance to work on it again (because of time and money constraints) until last summer (August 2017).
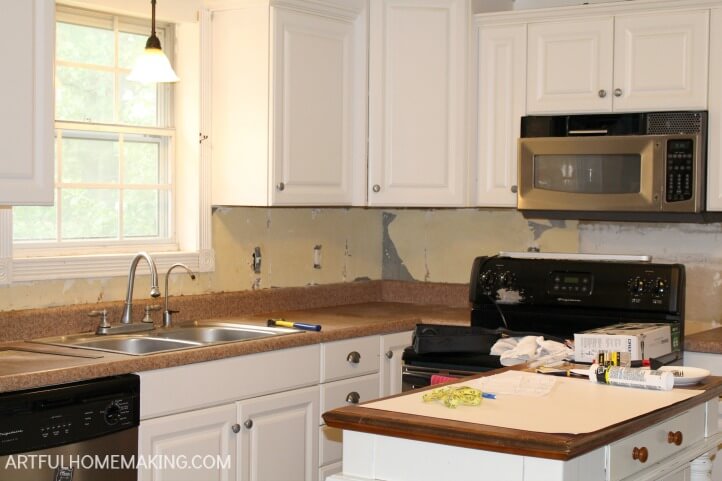
When we finally got it all removed, this is what it looked like:
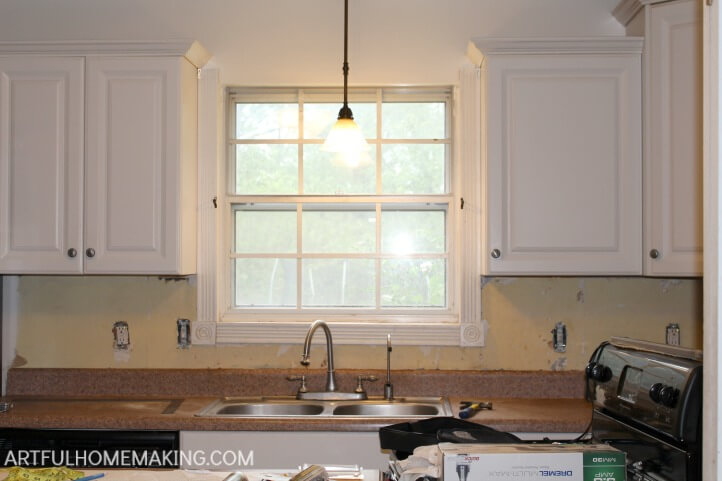
Underneath the tin was a layer of some sort of stick-on vinyl backsplash.
We didn’t have a lot of money to spend on a backsplash, so I thought I might be able to just paint the backsplash wall area to make it look neater.
But I realized that was going to be impossible, because the surface wasn’t at all smooth after we removed the vinyl. Before painting, the whole thing would need to be resurfaced.
What I really wanted to do (future goals) is install white subway tile (because I love the look and it would be so much more durable), but that was out of our budget.
Not only that, in the not-too-distant future our countertops will need to be replaced due to becoming a bit warped because of water exposure (again, child dishwashers! 🙂 ).
So, even if we could have gone with the tile, it wouldn’t have been a wise move right now. We needed something less permanent.
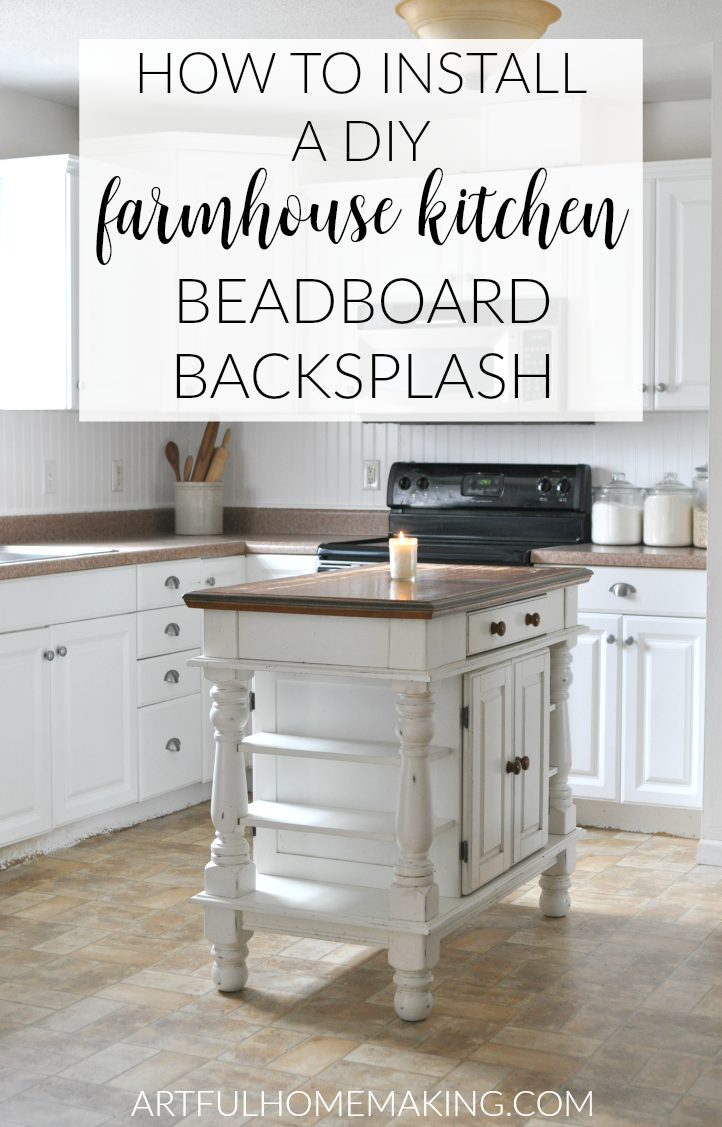
We needed something that would be inexpensive and relatively easy to install. And that’s when we decided on a beadboard backsplash!
We were able to do the whole area with one sheet of beadboard, which only cost us $19.99.
And it was something my husband could do himself, which saved us even more money.
Below, I’ll give a breakdown of the supplies we used and the instructions we followed, in case you’d like to know how to install a beadboard kitchen backsplash for yourself!
Affiliate links included below for your convenience. Read my disclosure here.
How to Install a Beadboard Kitchen Backsplash
Supplies Used:
- One sheet of wood beadboard $19.99
- Dremel tool
- Electric Brad Nailer
- Brad Nails
- Quarter Round Trim
- Caulk
- Screwdriver
- Measuring Tape
- Spackle
- Paint
What We Did:
1. First, we measured the area to figure out how much beadboard we would need.
2. Then, we went to Home Depot to buy the beadboard. We asked them to cut it to size for us, but they refused, saying they didn’t make individual cuts. In the end, the only thing we could get them to do was cut it in half for us so that it would fit in our vehicle (we had a minivan full of 7 people, and we had driven an hour and a half just to get there).
3. Several days later, my husband began cutting the beadboard into the pieces he would need. He used a jigsaw and the dremel for this.
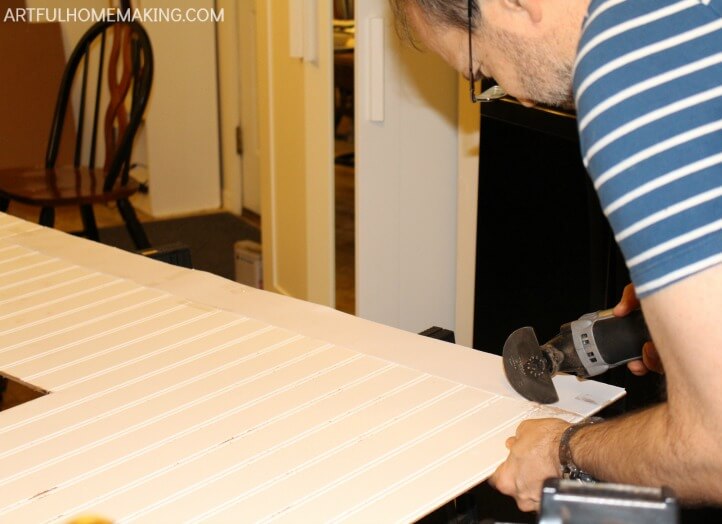
Since he had never done a remodeling project like this, he was a bit concerned about making a mistake (I’m so thankful for his willingness to learn new things!).
In order to eliminate the possibility of making a wrong cut, he used poster board to make a pattern. This way, he knew exactly where to cut out the holes for the light switches and electrical outlets.
4. We had a piece of trim around the window that had fallen off when we removed the tin backsplash. Before getting started with installing the beadboard, he first reattached the window trim with the brad nailer.
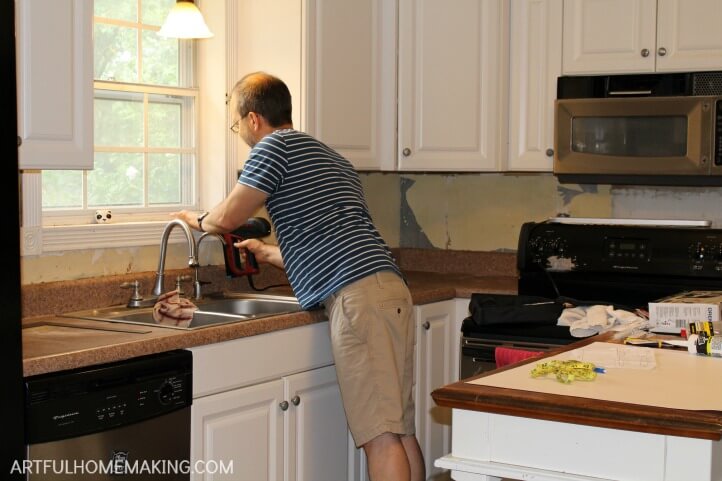
5. The next day, after cutting out each piece of beadboard, he used the brad nailer to attach it to the wall.

6. After getting all the beadboard attached, he then used the quarter round trim to finish it off.
7. The next step was to fill in the little spaces between the trim and the beadboard and the trim and the counter with white caulk.
8. We used spackle to fill in some of the grooves where two pieces of beadboard were joined, then we sanded off the spackle.
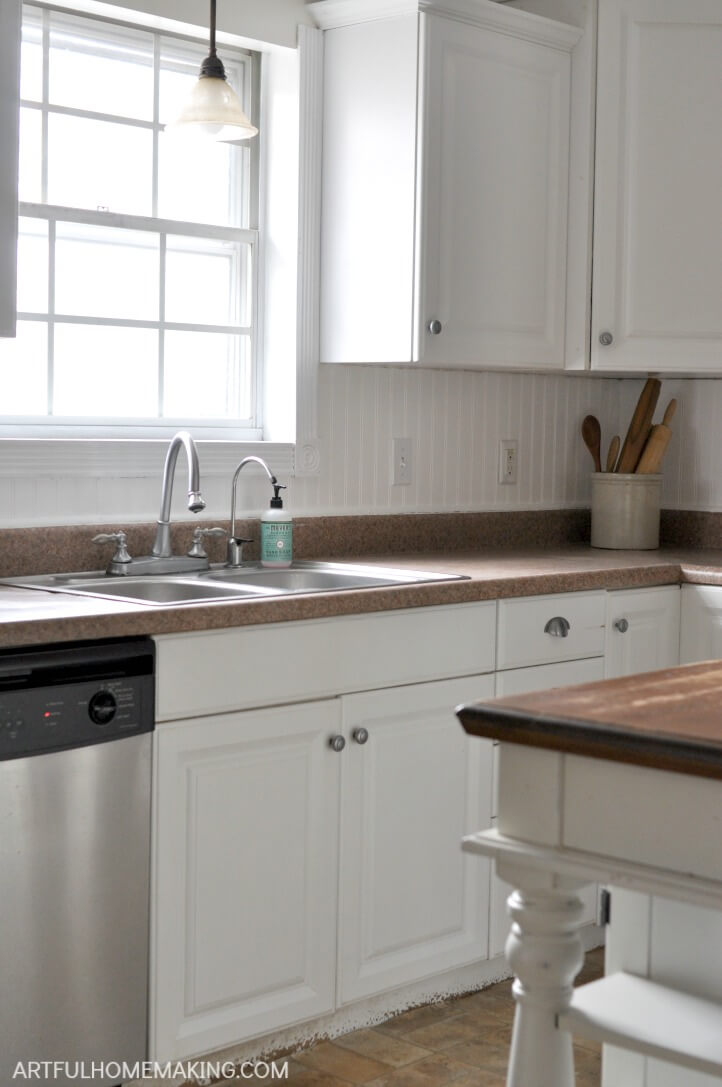
Painting Beadboard
Our beadboard backsplash stayed partially finished until last week, when I decided it was finally time to paint it!
So, from the time we started this simple project, it’s now been about a year and a half! That’s crazy! 🙂
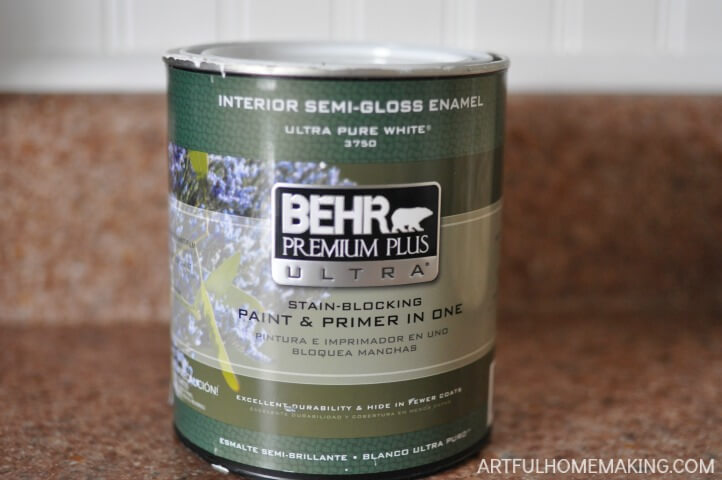
I used this Behr Premium Plus Ultra semi-gloss paint with the hope that it would be very durable and washable.
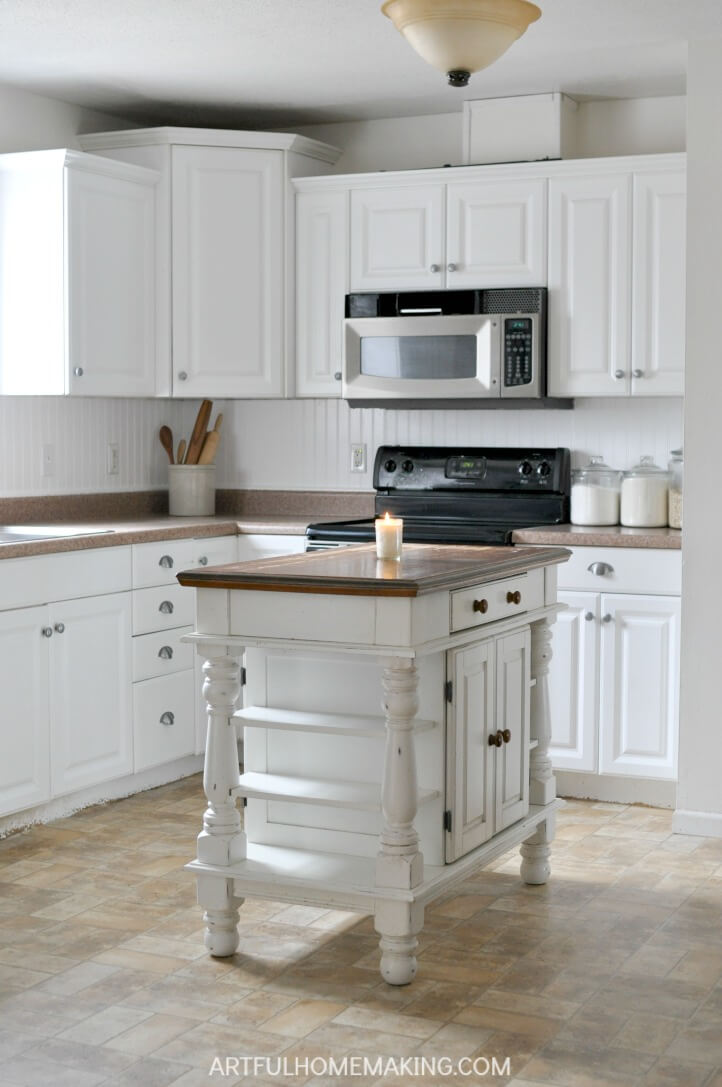
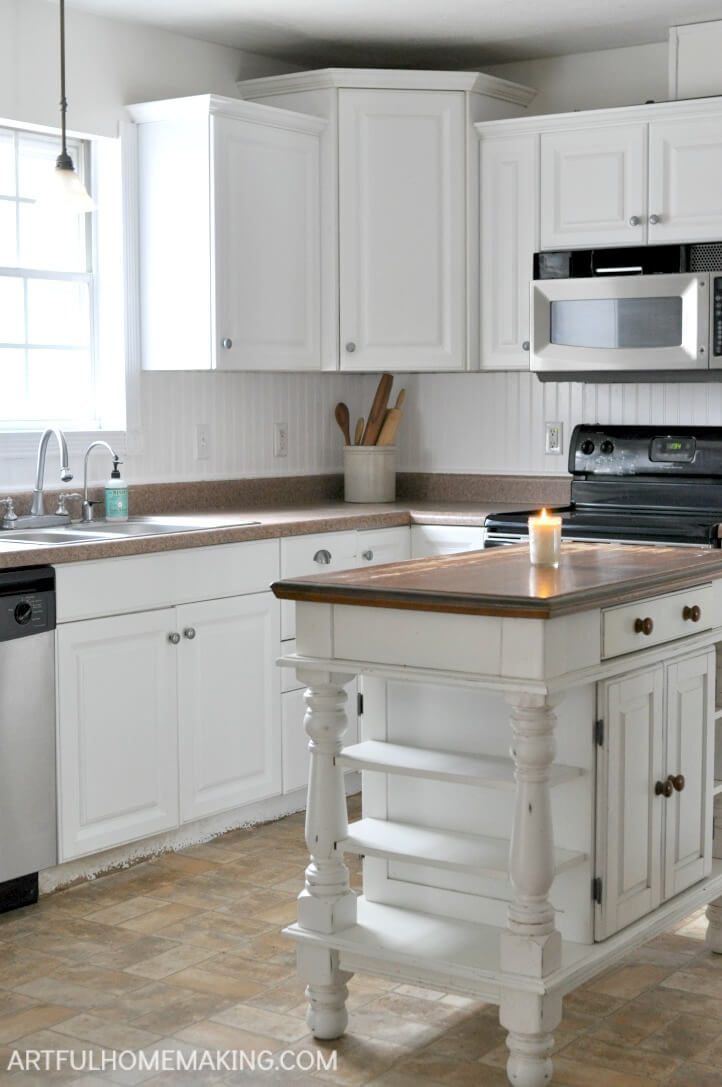
Finally Done!
For most people, this project could be completed in a weekend, but we’ve had so many circumstances preventing us from finishing.
We’re all so relieved that it’s finally done!
We still have a few other simple projects for the kitchen that we’d like to do.
If you look closely at the photo above, you’ll see that we also need to paint the bottom of the cabinets (where they join the floor). Another thing on my to-do list for this spring/summer!
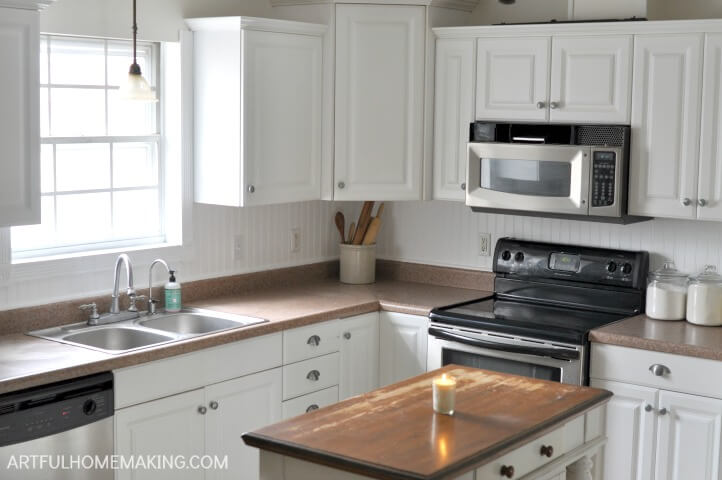
Also, the grill came off the front of the microwave (which was here when we moved in). And the handle came off the door some time ago. I keep hoping we can just get rid of the microwave and put a shelf in its place.
Although now that we’ve finished the beadboard, I’m not going to be too quick to tear anything out anytime soon!
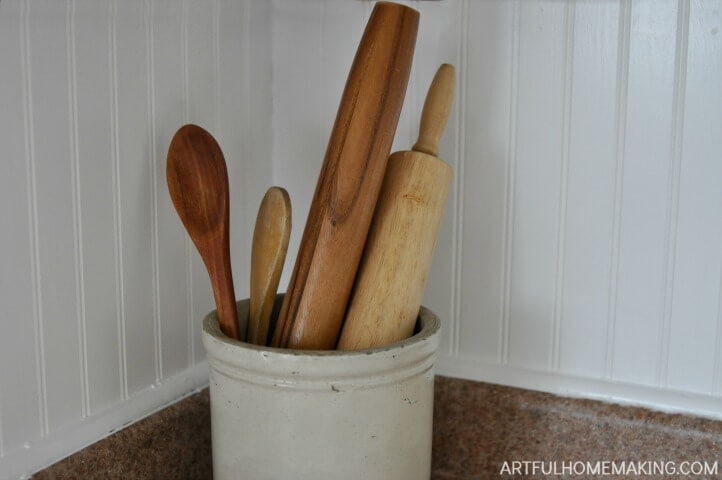
You can see in these photos that I’m still using my homemade soy candles (find the instructions for how to make soy candles in this post).

I have always loved farmhouse style, and I was so thankful that our kitchen already had white cabinets and cute drawer pulls when we moved in.
Seven years ago, when we moved here, I wasn’t sure how well the white cabinets would hold up to five children, but they’ve been surprisingly durable. I kind of love them now.
I found this old antique crock at a flea market about 20 years ago, and it’s still one of my favorite things.
Hopefully these instructions for how to install a beadboard kitchen backsplash will be helpful to someone!
Supplies Used in This Project
- One sheet of wood beadboard $19.99
- Dremel tool
- Electric Brad Nailer
- Brad Nails
- Quarter Round Trim
- Caulk
- Screwdriver
- Measuring Tape
- Spackle
- Paint
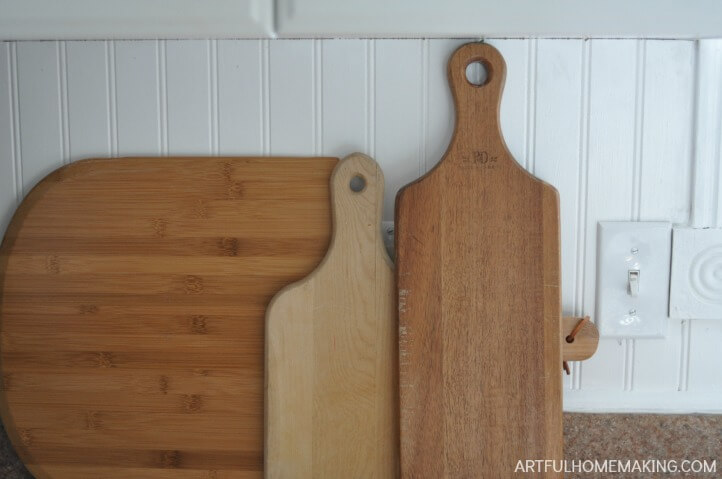
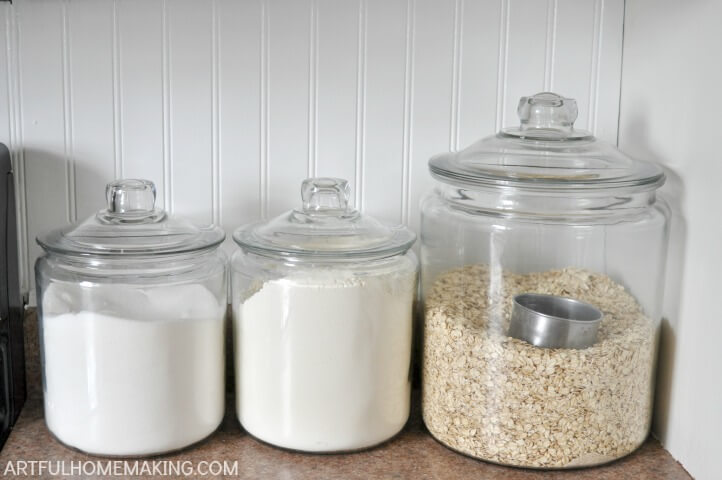
Other Items in Our Kitchen
- White Kitchen Island
- Homemade Soy Candle (learn how to make your own here!)
- Mrs. Meyer’s Hand Soap
- Anchor Hocking Heritage Hill Jars
Related Posts:
Farmhouse Master Bedroom Updates
Farmhouse Style Organization and Storage Solutions
Pin This Post for Later!
This post contains affiliate links. Read my full disclosure here. Sharing here.
What an amazing difference it makes! I love the look and pinned this for later. We had thought about a tile backsplash, but I like this one even more!
Thank you, Ali! It’s been 2 years now since we first put up the beadboard, and we still love it!
That looks really great, what a transformation.
Thanks, Anita!
I love it! Great job …and your patience paid off. You should be proud.
Thank you, Bevy!
I love it! We did the same thing when we moved into our house. What took us forever ( more than a year and a half) was getting light switch plates on, the thick bead board made the outlets sit too far back, it for some reason was a hard thing to fix. 🙂 We first covered our back splash with polyurethane , big mistake! Turned very yellow over time. So we sanded it down repainted it and covered with Polyacrylic this time, a lesson learned. It has stood up fabulously for 7 years and it is not hard to clean at all. And in this house of 8-10 people there is plenty of flying spaghetti sauce and lots of everything else around here.
Thanks, Carla! I’m glad to hear that your beadboard has held up well for all these years! So far we’ve really loved ours, and it hasn’t been hard to clean at all. 🙂
That is such a nice change-up from your tin backsplash. We also have a tin one and it looks positively awful. I think you are definitely giving me ideas about doing this. It looks so crisp and clean.
Thank you, Mary! I’m really enjoying how clean and bright it looks. 🙂
Fantastic post! I will be featuring you tomorrow at Thursday Favorite Things on my blog! I hope you will join us again for this week’s party!
Thank you, Amber! And thanks so much for the feature!!
The beadboard backsplash looks very nice and keeps the kitchen looking clean and bright. Stopping by from the #HomeMattersParty link up.
Thank you, Nicole! And thanks so much for stopping by!
I love the beadboard backsplash! It looks great; thank you for sharing with us on Party in Your PJ’s.
Thanks, Teresa! Thanks so much for hosting!
This looks amazing! I have been considering this for years but have been wary of the amount of work and cost…this is actually manageable. Thank you for sharing!
#DIDI
Thank you, Sara!
Great tutorial and I love the result! Thanks for sharing with Party in Your PJs!
Thank you, Lynda!
Love how this backsplash looks! Would love to use it in our kitchen! Thanks for sharing your post on the Simple Homestead Blog Hop, as one of the co-hosts I will be featuring your post this week!
– Nancy ( Nancy On The Home Front P
Thank you, Nancy! And thanks so much for the feature!
The new backsplash is very cute! We’re definitely not one of those families that can get a project like this done in a weekend, so I definitely appreciate how much work this must have been for your family. Thanks so much for sharing at the #happynowlinkup!
Thank you, Leslie! That’s encouraging to know we’re not the only ones who take longer to complete these kinds of big projects! 🙂
Nice update.
Thanks for sharing at our SImple Homestead Hop 🙂
Thank you, Sandra! And thanks for hosting!
So pretty! I love how light it is.
Thank you, Lisa! Yes, it really brightened it up so much!
Our kitchens look so similar. You did a great job with the backsplacsh. I love the look of the beadboard, but beware it’s a pain in the you know what to clean. I’m currently debating on keeping ours and giving it a fresh coat of paint, or finally going the subway tile route which is just so overused lately. The beadboard still feels farmhouse yet not everyone is doing it. Good luck with yours and beware of spaghetti sauce!
Thanks, Shea! I had to laugh at your spaghetti sauce comment! 🙂 Yes, I know it’s not going to be the easiest to clean. We’ve had it up since August (so, about 6 months now), so I’ve had a chance to see how it’s going to behave. I would have totally gone for the tile if we could’ve afforded it. Maybe someday! For now, I’m just going to plan on painting it periodically to keep it looking fresh.
It looks great Joy!! I know that’s exciting to have it completed.
Thank you, Nancy!! Yes, it feels so good to have that project crossed off our list. 🙂