Our Daily Calendar
Last year we used this calendar for our daily school calendar, and while it was very cute, it had some shortcomings. There was no sense of continuity, like a full calendar gives you. Even though there was a place for discussing “yesterday,” and “tomorrow,” it all seemed very disjointed to me.
Almost every day, as soon as he wakes up, my youngest asks me what day it is. Then he wants me to remind him what yesterday was, and what day tomorrow will be. I can tell that he’s trying to figure out where everything fits in this thing that we call time. Another one of my younger children was also having difficulty remembering the order of the months, days of the week, and understanding the seasons. Therefore, I went in search of the perfect daily calendar.
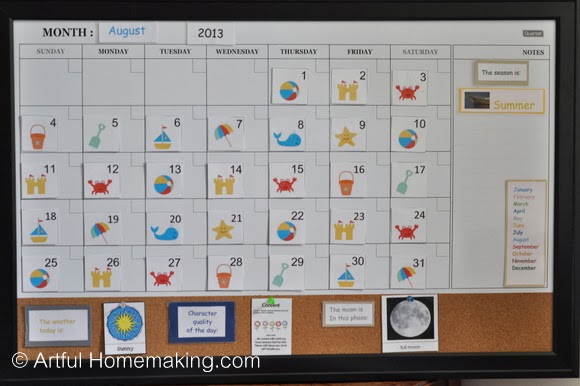
I went to an office supply store (Staples, I think), and found just what I was looking for! It’s similar to this one, except mine is bigger, I believe. But the one we have is the same brand, and it’s magnetic, dry erase-capable, and also has a cork board at the bottom. I fell in love with it as soon as I saw it!

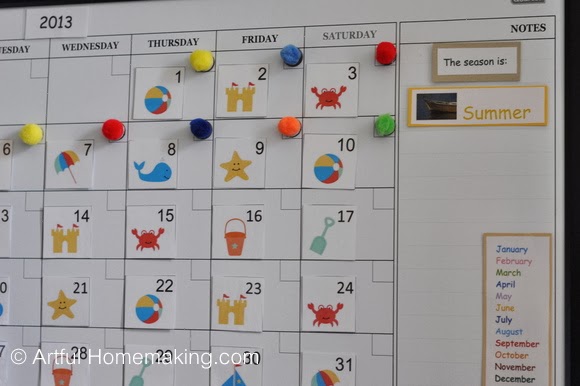
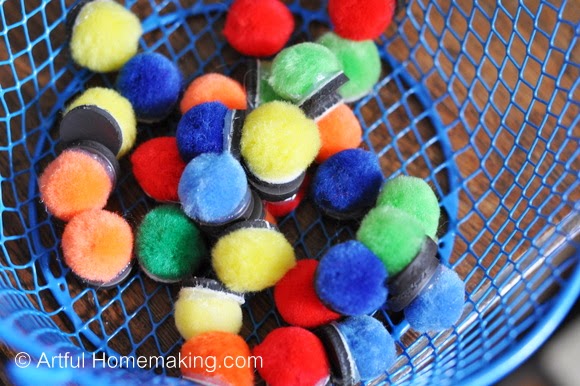
To mark off the days, I made these little pom pom magnets. I already had all the little button magnets (some leftover from this project), and I already had all the pom poms. All I did was hot-glue the pom poms to the magnets, and they were finished. Easy and cheap!
I went ahead and filled up this week with magnets, just to show how fun and colorful they look:

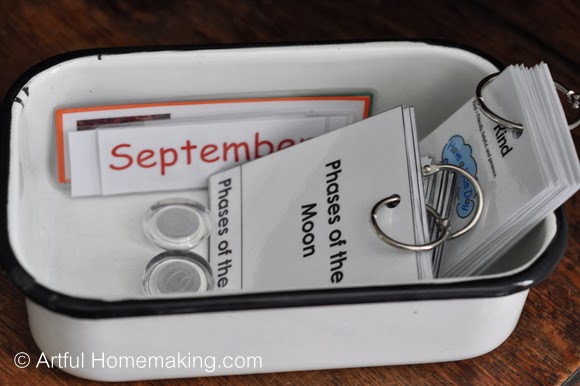
I made all the month cards, the year, the labels for everything (the weather today, character quality of the day, etc.), the season cards, and the little card with the months in order (on the side of the calendar) myself. Then I printed them off and laminated them (of course!).

I found all of my monthly calendar cards at Counting Coconuts (and her beautiful calendar was a huge part of the inspiration for mine!) and Teachers Pay Teachers (search for the free ones–you can find lots of great ones for free!). I went ahead and printed off all the ones for the year and laminated them, too, so they’re ready to go.
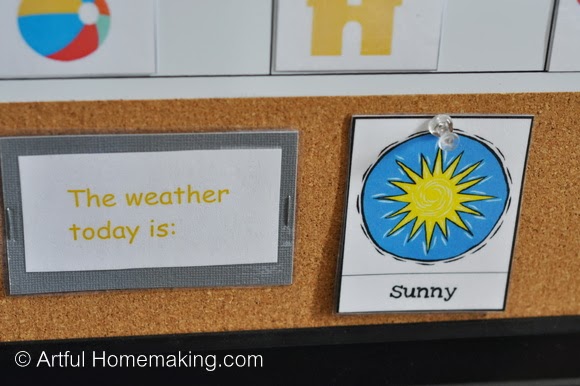
Then I found some adorable weather cards (they also have some cute seasons cards). Here’s a link to some other cute weather cards–it was hard to choose! We also decided to follow the moon phases, as we all think that’s fascinating. I got my cards here. I also printed out these godly character traits cards. I followed Michelle’s idea to print these 9 to a page, which makes little cards, instead of printing out the full sheet for each one (to print them 9 to a page, I just selected this option on my printer dialog).
To keep all of the various calendar components together, after laminating, I punched holes in the top and put them on rings. Here they are all stored in a rectangular enamelware container.
Rather than attach the calendar to the wall, I just have it propped up on the shelf in our school area, which is now in our dining room (I hope to share more about that soon!). The reason I didn’t want to hang it, is because it lives in our kitchen/dining area, and sometimes I don’t want school stuff all around. So, this is easy to move if I want our dining room to look a bit less schoolish. Also (and this is the main reason), it is now at eye level for my younger children, and they’re the main ones I wanted it for!
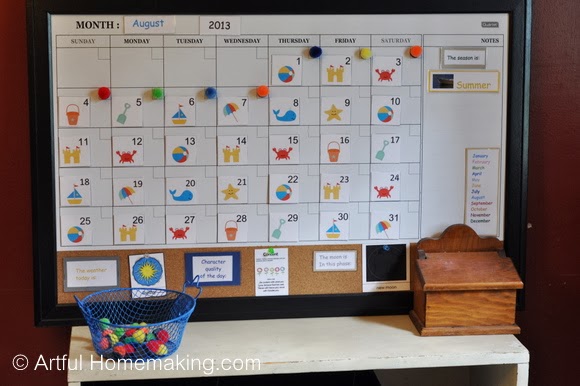
We go over the calendar, days of the week and the months, and character qualities during our Circle Time every morning. The box next to the calendar holds Bible memory cards, which we also go over during that time. We’ve been using this calendar since last month, and it’s already been a great help! I regularly see my children looking at the calendar to see what day it is, instead of asking me. They also really love the colorful calendar cards, and they’re looking forward to seeing what I put up each month.
P.S. For my readers who aren’t homeschoolers, I promise that my schoolish posts are coming to an end soon! Then they will just appear occasionally, as usual. 🙂
Related Posts:
Cool calendar! I think my younger kids would enjoy something like this.
Thanks, Rose!
I think I figured it out. Do you have those laminated with a colored paper behind them and then velcroed to the board?
Hi Laura! First I printed out the words ("The weather today is:") and then mounted that on colored cardstock. Then I laminated it. I attached the ones on the corkboard section by just stapling it to the corkboard. The season one is just taped to the whiteboard section. I just folded up two pieces of tape and stuck them to the back on each end and then stuck it to the board. But velcro would work, too!
I love this! We were really struggling with the calendar in our Saxon math book. This perfect. Can you please explain the plastic sleeves that your "The weather is and the season is and months of the year." How do you have those attached?
Joy,
This is wonderful! I love all the ideas! I'm bookmarking this for later. We're in the process of moving and I don't have the time right now to put one together…but I will. 🙂
Heather
Thank you, Heather! I hope your move goes very smoothly! 🙂
I find the homeschool posts interesting Joy-in the UK very few children are homeschooled
I'm glad you find them interesting, Fiona! Thanks for the positive feedback! 🙂