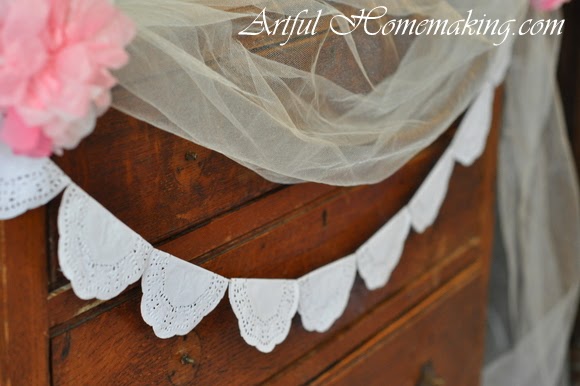
Paper Doily Garland {Tutorial}

We made these very easy garlands for my daughter’s birthday. They’re so easy they don’t even really require a visual tutorial, but I decided to do one anyway, in case someone might like to see how to make them.
Here’s what you need to make them:

Fold the doily in half:

Unfold the doily, and lay the twine in the fold line:
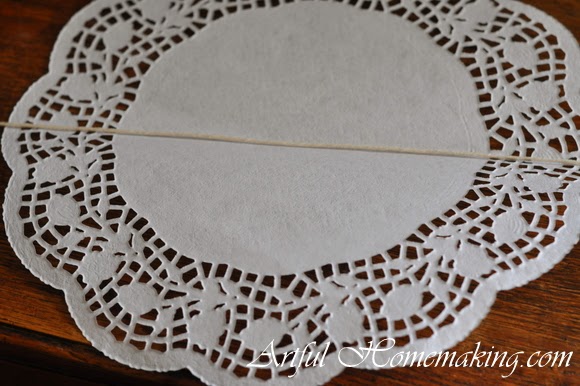
Apply glue all around the doily, concentrating most of it around the edges. I also put some in the crease of the doily to firmly attach it to the twine. Then fold the doily back over along the fold line you made:

Press all the edges together, smoothing out the glue and making sure all edges are glued down:

Just let the glue dry a bit, and that’s it!

Enjoy your very inexpensive decorations! These can also be reused, if you store them carefully, not allowing them to wrinkle. I’m planning to use these for our other two girl birthdays coming up (one this coming Monday, and another one in October).
That is so pretty. To bad I don't have a girl to make it for. Maybe I will in the future…have a granddaughter. [o= Thanks for sharing this sweet idea.
Blessings and ((HUGS))
-Mary
I was thinking this would be cute at a baby shower, too. And, yes, it would be fun for a granddaughter!
I hope your day is blessed, Mary! ♥
thankyou for the inspiration. I have a little girl's 4th birthday coming up. I hope to post on my blog about her butterfly cake…I love this idea…very sweet and feminine.
A butterfly cake sounds so sweet for a 4th birthday!
So sweet and simple, I love it! I'm a first time visitor to your blog (and new follower), I really enjoyed looking around. 🙂
Welcome, Sarah! Thanks for visiting and following! 🙂
Love it! :o) This would be a fun decoration in a room as well. I wonder if you could spray paint them to add extra detail. 🙂
Thanks, Nabila Grace! I imagine you could spray paint or do anything you wanted to them, since they're made of paper. And it would be a cute room decoration, too!
So beautiful! Simple, lovely & economical – LOVE it. 🙂
Thanks, Collette!
This is really nice and I bet she loved it!
Thank you, Mitzi!