How to Make Beeswax Candles
Learn how to make beeswax candles with this easy DIY tutorial!
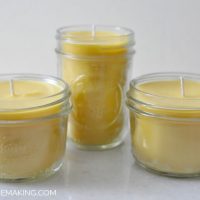
Servings: 3 candles
Ingredients
- 1 pound beeswax
- 1/2 cup coconut oil
- wax melting pitcher and saucepan for double boiler
- candle wicks
- 8 ounce jelly jars or 4 ounce canning jars or any size you have available
- glue gun and glue sticks
- clothespins
Instructions
- Heat up your glue gun and stick the wicks to the bottom of the jars. Try to keep the wicks in the center of the jar.
- Fill your saucepan or pot about half full of water, put it on the stove, and bring water to a boil.
- Pour 1 pound of beeswax pellets into your wax melting pitcher or other container.
- Set the container with the beeswax into the boiling water in the saucepan to create a double boiler effect. Turn the heat down so the water is just gently boiling or simmering.
- Allow the beeswax to melt. Stir occasionally. I use a wooden skewer or a wooden spoon from the thrift store for this.
- After the beeswax has melted, add the 1/2 cup of coconut oil. Stir to combine, and wait for it to melt. Then add any essential oils, if using.
- Quickly pour the melted beeswax into your jars.
- After pouring the wax into your containers, center the wick with a clothespin (see the video if this is unclear), or use a pencil or bamboo skewer to center the wick.
- Allow the candles to sit undisturbed while the wax sets up and hardens. Then trim the wicks about 1/4" to 1/2" long.
- I usually wait a day or two before burning the candles for the first time. This allows them to cure. When burning for the first time, it's a good idea to let the candle burn for a couple of hours. That's it!