This post may contain affiliate links. Please read our disclosure policy.
Learn how to make beeswax candles with this easy DIY tutorial. You can make your own beeswax candles with just a few simple supplies.
I’ve been making my own homemade candles for years now.
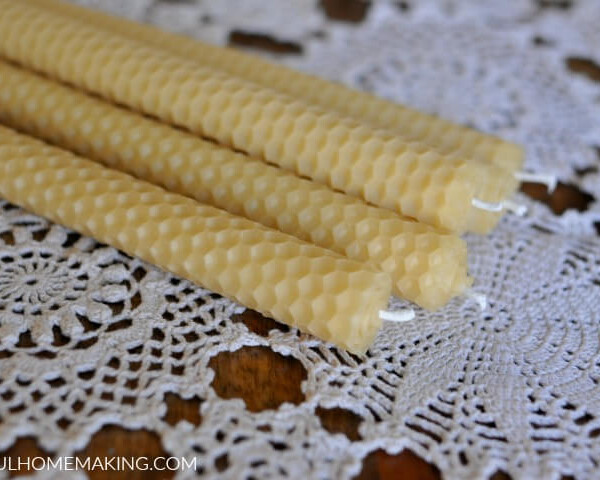
First, I started off making homemade rolled beeswax candles. My kids and I have been making these together for over 10 years. These are seriously so simple that even small children can help make them!
Next, I learned how to make homemade soy candles. I’ve been making my own soy wax candles for years, too.
Today I’m going to share with you my favorite natural candles of all. Beeswax candles are the healthiest candles I’ve come across yet. And they’re so easy to make!
In this tutorial, you’ll learn how to make your own homemade beeswax candles with just a few ingredients and simple supplies.
Watch the Video
Why Make DIY Beeswax Candles?
Beeswax candles are beautiful and natural, and they make great gifts!
But more importantly, beeswax candles are non-toxic, and they have actually been reported to improve the indoor air quality in your home.
Natural beeswax candles are cleaner burning than paraffin candles, so you can feel good about using them.
Learning how to make your own candles is a useful old-fashioned homemaking skill that’s also easy to learn.
How Do You Make Beeswax Candles at Home?
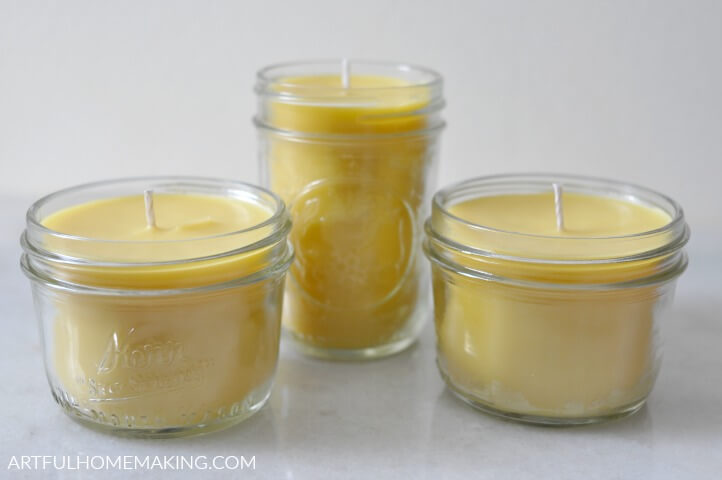
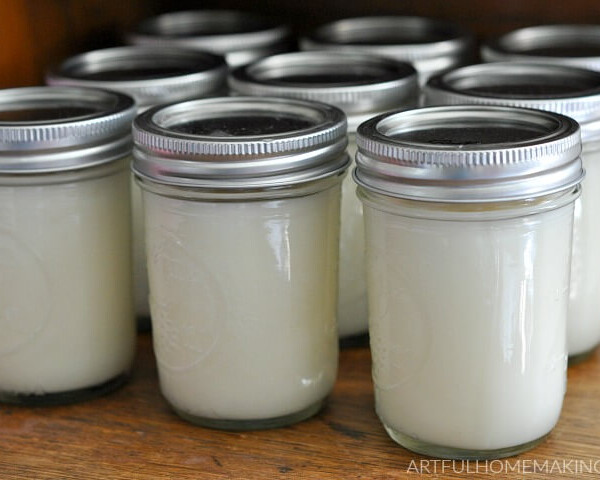
In this post we’re learning how to make homemade beeswax candles in Mason jars. You can also make pillar candles, dipped taper candles, or rolled beeswax candles with beeswax sheets. But for this tutorial, we’re just going to focus on making a poured candle that’s poured into mason jars.
If you don’t want to use a Mason jar, you can also get creative and pour your candles into candle tins, old teacups, thrifted crocks, or so many other containers! Just keep in mind that the size of the container may necessitate a different wick size.
The steps for making beeswax candles at home are simple (full ingredients and instructions are in the recipe card below).
1. Gather your supplies (listed below).
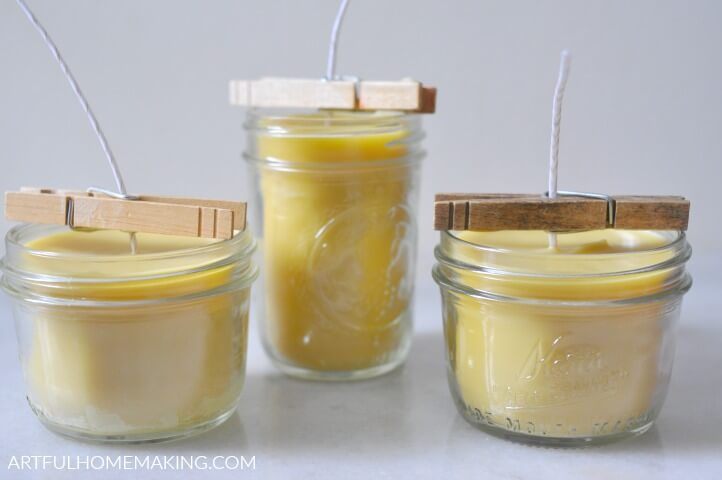
2. Prepare your jars and wicks by attaching wicks to the bottom of the jar with wick stickers or a glue gun.
3. Melt the beeswax in a double boiler.
4. Add the coconut oil and let it melt with the beeswax.
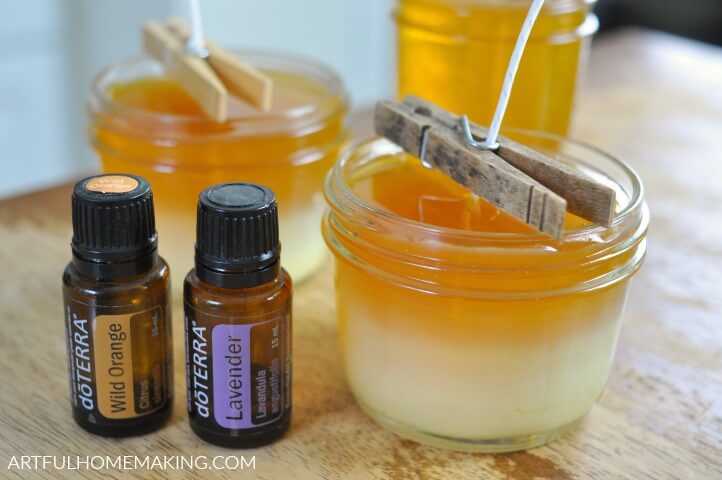
5. Add essential oils, if using.
6. Pour the melted beeswax and coconut oil into your jars. Work quickly because beeswax starts to set up very fast.
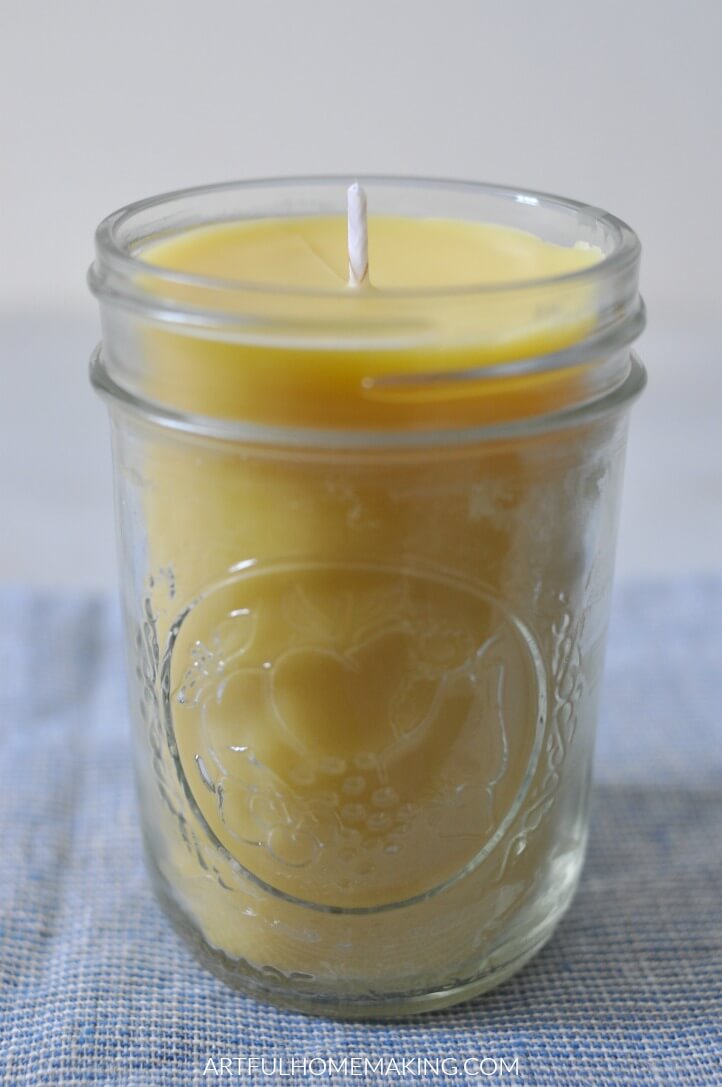
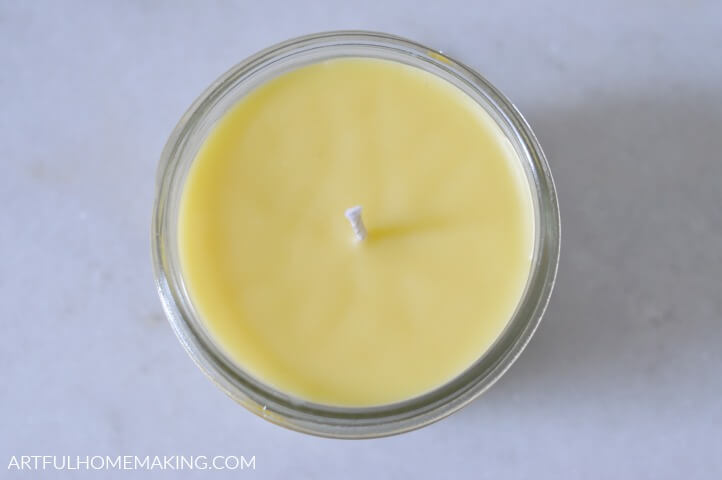
7. Center the wicks and allow the candles to sit undisturbed while the wax sets up and hardens. Then trim the wicks.
8. Allow the candles to cure for a day or two, and then they’re ready to use!
This post contains affiliate links below. Read my full disclosure here.
What Do You Need to Make Beeswax Candles?
As I mentioned above, you only need a few basic supplies to make these easy beeswax candles.
- 1 pound beeswax
- 1/2 cup coconut oil
- wax melting pitcher and saucepan for double boiler
- measuring cup
- candle wicks*
- 8 ounce jelly jars or 4 ounce canning jars (or any size you have available)
- glue gun and glue sticks
- clothespins
- essential oils, optional
A note about scenting beeswax candles with essential oils: it takes a lot of essential oils to scent candles. For this reason, I usually don’t add them to my homemade beeswax candles.
Usually, I just leave the candles as they are, with their delicate, natural honey scent.
But if you want to add essential oils, you could try about 40-55 drops of essential oils (or even up to as much as a tablespoon or two). You may need to experiment to see how many drops you’ll need.
Because it takes so many drops of the essential oils to scent the candles, you could use cheaper essential oils for this.
*A note about choosing the correct candle wicks: finding the correct wick for your candles can be complicated! And beeswax candles are especially difficult.
There are many different factors to take into consideration, including the purity of each particular brand of beeswax and the size of container you’re using.
Choosing the right size candle wick for the diameter of the container is an important consideration.
I’ve linked above to candle wicks similar to the ones I used for this project. However, you may need to do some experimentation to find just the right wick for your particular combination of wax and container.
How to Make Beeswax Candles
Learning how to make beeswax candles is easy and fun. Here are the simple steps for making your own.
1. Heat up your glue gun and stick the wicks (these are the wicks I recommend trying) to the bottom of the jars. Try to keep the wicks in the center of the jar.
2. Fill your saucepan or pot about half full of water, put it on the stove, and bring water to a boil.
3. Pour 1 pound of beeswax pellets into your wax melting pitcher or other container (I bought this candle making pitcher almost 7 years ago, and it’s still working well for me).
4. Set the container with the beeswax into the boiling water in the saucepan to create a double boiler effect. Turn the heat down so the water is just gently boiling or simmering.
5. Allow the beeswax to melt. Stir occasionally. I use a wooden skewer or a wooden spoon from the thrift store for this.
6. After the beeswax has melted, add the 1/2 cup of coconut oil. Stir to combine, and wait for it to melt. Then add any essential oils, if using.
7. Quickly pour the melted beeswax and coconut oil into your jars. Work quickly because beeswax starts to set up very fast.
8. After pouring the wax into your containers, center the wick with a clothespin (see the video if this is unclear), or use a pencil or bamboo skewer to center the wick.
9. Allow the candle jars to sit undisturbed while the wax sets up and hardens. Then trim the wicks to about 1/4″ to 1/2″ long.
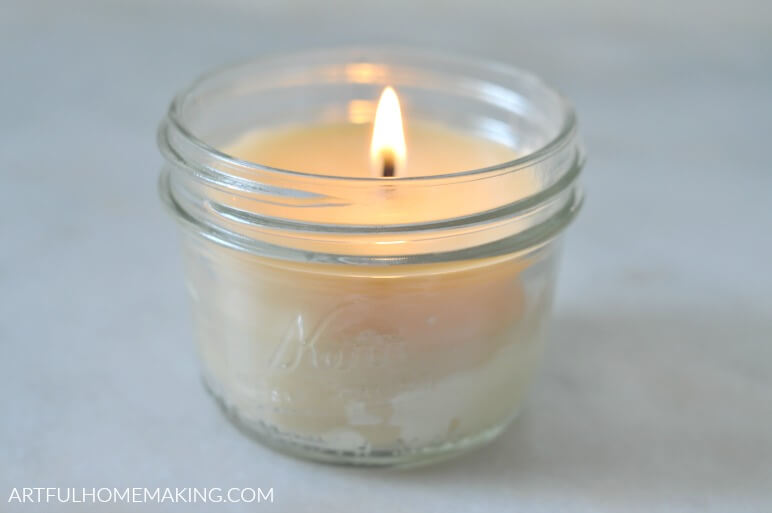
10. I usually wait a day or two before lighting the candles for the first time. This allows them to cure. When lighting for the first time, it’s a good idea to let the candle burn for a few hours (about 3-4 hours).
This will help your candle burn better, and it also can prevent tunneling (assuming the correct size wick was used).
Plan for about 3-4 hours burn time each time you light your candle, and it should burn better.
That’s all there is to it!
More Beeswax and Candle Tutorials
- Homemade Beeswax Lip Balm Recipe
- Homemade Wood Butter Recipe
- How to Make Your Own Soy Candles
- How to Make Rolled Beeswax Candles
Troubleshooting Beeswax Candles
Beeswax is a bit trickier to work with than other types of wax. The kind of beeswax and the source can even make a difference.
Finding the correct wick size can also be tricky, and sometimes requires some trial and error. The wicks I’ve used in this tutorial have worked well for me, but they may not work well with your wax or your containers.
With beeswax, it’s recommended that you test different sizes of wicks to see how each one will perform with your particular container and wax.
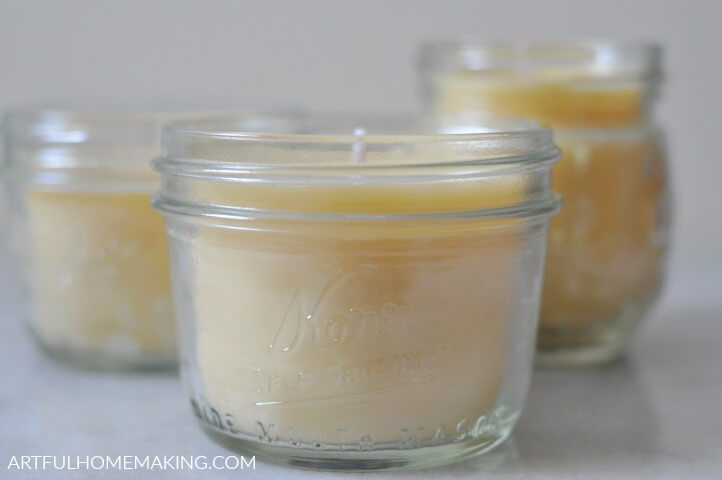
Note: Different shades of beeswax will give you different shades of candles. I used white beeswax for some of the candles in this post, and the darker ones were made with yellow beeswax.
Frequently Asked Questions
Here are some of the most common questions I’ve received about making homemade beeswax candles:
What is the ratio of beeswax to coconut oil for candles?
In this recipe, I use 1 pound of beeswax to 1/2 cup of coconut oil.
How do you avoid cracks in beeswax candles?
I haven’t experienced cracks with my candles, but I’ve received a couple of questions about how to avoid this.
I’ve read that in order to avoid cracks, try to let the candle cool more slowly in a warm location. Also, you might try pouring the wax at a slightly cooler temperature (155-160 degrees has been the suggestion I’ve seen). You can also try heating the containers before pouring the beeswax into them (heat in a warm oven).
If you want to fill in cracks after they occur, you can melt some beeswax and pour it in the cracks to fill them in (I haven’t tried this myself, I just saw the suggestion on a candle website).
How to Avoid Tunneling in Beeswax Candles
Sometimes tunneling occurs because the wrong wick (for the size of the jar) was used. And it can take a bit of trial and error to find the best wick for the container used.
My beeswax candles made in jelly jars have a nice burn pool, spreading all the way to the edges. But the ones made in the wide mouth jars don’t burn as fully to the edges because I think they could really use a different/bigger wick.
The other (very common) reason for tunneling is that the candle wasn’t allowed to burn long enough. I usually plan to burn my candles for about 3 hours each time they are lit.
This is especially important for the first time the candle is lit, as it helps it to burn more successfully after that.
Beeswax candles can take a bit of experimentation to get them right!

How to Make Beeswax Candles
Ingredients
- 1 pound beeswax
- 1/2 cup coconut oil
- wax melting pitcher and saucepan for double boiler
- candle wicks
- 8 ounce jelly jars or 4 ounce canning jars, or any size you have available
- glue gun and glue sticks
- clothespins
Instructions
- Heat up your glue gun and stick the wicks to the bottom of the jars. Try to keep the wicks in the center of the jar.
- Fill your saucepan or pot about half full of water, put it on the stove, and bring water to a boil.
- Pour 1 pound of beeswax pellets into your wax melting pitcher or other container.
- Set the container with the beeswax into the boiling water in the saucepan to create a double boiler effect. Turn the heat down so the water is just gently boiling or simmering.
- Allow the beeswax to melt. Stir occasionally. I use a wooden skewer or a wooden spoon from the thrift store for this.
- After the beeswax has melted, add the 1/2 cup of coconut oil. Stir to combine, and wait for it to melt. Then add any essential oils, if using.
- Quickly pour the melted beeswax into your jars.
- After pouring the wax into your containers, center the wick with a clothespin (see the video if this is unclear), or use a pencil or bamboo skewer to center the wick.
- Allow the candles to sit undisturbed while the wax sets up and hardens. Then trim the wicks about 1/4″ to 1/2″ long.
- I usually wait a day or two before burning the candles for the first time. This allows them to cure. When burning for the first time, it's a good idea to let the candle burn for a few hours. Enjoy!
Notes
Pin This Post for Later


I’ve been making beeswax candles for years using this method! They’re such a great handmade gift idea, and we also love using them at the dinner table since they’re unscented.
So if it did tunnel, just melt more beeswax and pour it on top?
I haven’t experienced tunneling in my candles, so I haven’t personally tried these methods to fix it. But from what I’ve read, if the tunnel is fairly shallow, you can use a heat gun or a hair dryer (on low speed/high heat setting) to heat the surface of the candle so that the wax will melt and fill in the small tunnel. If the tunnel is deeper, you can also try melting some more wax and pouring it into the tunnel.
How many candles does this make in either size?
It should make about three 8 oz. candles (the taller jelly jars) or six 4 oz. candles.
Great information! I have some tallow to use and would like to do a beeswax/tallow blend. Have you ever done this and do you know what proportions I might try?
Thank you! I’ve never tried using tallow, so I’m not sure.
How easy is it to clean your boiler? I just used Pyrex glass measuring cups last time in a pot of water on the stove and I never did end up getting all the wax off of it. 🙁
I should have put this in the post (I did mention it in the video, but forgot to add it to the blog post). For cleanup, what I do is just put the melting pot back in the pot of water and heat it up again to make the wax liquid (this is after pouring the candles, so there is just a bit of wax left in the pot). After heating up the leftover wax, I take a paper towel and wipe out the melting pot. It’s a lot easier to clean off when it’s liquid. So, for a glass measuring cup, you could reheat it to liquify the wax and then wipe out the cup. Then you can wash and dry it after getting the wax out. Hope that helps!
Great tutorial. Candle-making is my next craft to learn. I love this. Gonna give your recipe a try. But I do want to add fragrance to mine with lots of throw. Thank you for sharing at #omhgww. See you next week. Pinned and tweeted.
I enjoyed this post so much, Joy, and I wanted you to know that this post will be featured in the next Tuesday Turn About Link Party! Thanks for sharing your project and I hope to see you at next week’s party!
Thank you, Cindy!
Can you scent the candles with fragrance oil ?
I haven’t tried that with beeswax candles, but I have used fragrance oil in my soy candles (tutorial here).
I love how easy this is!! Do you need to add coconut oil to the beeswax or is it optional?
Hi Michele! You could try leaving it out, but I’ve never tried making them without the coconut oil, so I’m not sure how they would turn out. The coconut oil is supposed to help extend the burn time and avoid tunneling. Hope that helps!