This post may contain affiliate links. Please read our disclosure policy.
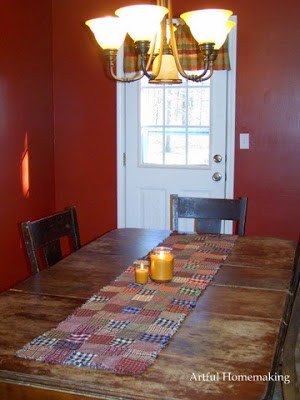
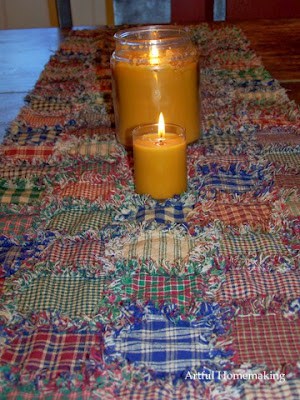
I just finished stitching up this homespun table runner yesterday. It was so cute and fun to make that I decided to take a few pictures of the process so I could share with you how easy it is!

Homespun fabric is wonderful for a ragged-edge quilt (or table runner or table cloth or other project) because it frays so well. And it’s also pretty inexpensive.
You can also get homespun in any color scheme–you aren’t limited to the well-known “primitive” looking fabrics I’ve used here. You can always get homespun by the yard and cut the squares yourself, or you can do as I did, and buy them already cut here. (The lady who runs Jubilee Homespun is very sweet and wonderful to do business with!)
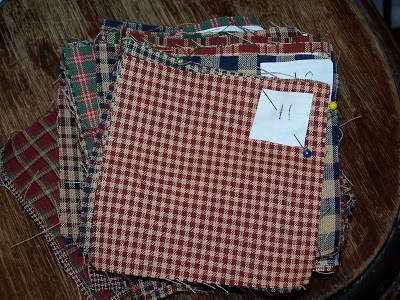
Step #1: Cut out squares (or use pre-cut squares). And be sure not to pre-wash your fabric–this is key to getting it to fray well after you’re all done. The number of squares you will need depends on how long you want your table runner. I used 125 four-inch squares (5 across and 25 down).
Step #2: Lay out all the squares in a pattern that looks nice to you. Even though my table runner probably looks pretty random, I did lay out all the squares and I tried to evenly distribute the different prints and colors somewhat.
Step #3: Row by row, pick up the fabric squares in the order you want them sewn, and use a little piece of paper to label them. Pin all the squares together that go in each row. For instance, I picked up each square in row 1 and then pinned them all together with the numbered paper also pinned to them. That way I could keep the design the way I had it all laid out originally. Continue with all rows.
Step #4: Sew each of the squares in row 1 together wrong sides together, using a 5/8″ seam allowance. Actually, homespun doesn’t have a wrong side, but if you were using a fabric with a wrong and right side, you would be sewing the wrong sides together, keeping the right sides on the outside. Does that make sense?! The key is to keep remembering that you want the seam allowances on the outside.

Step #5: After you have sewn the across rows together, you want to join them with the other rows. As I was making this table runner, I decided to just sew a row and then attach it to the rest of them right then. For instance, I sewed row 1 and then set it aside. Then I sewed row 2, and pinned it to row 1, and sewed them together, etc. It probably makes more sense to sew all the rows across and then join them into one long table runner (which is what I usually do), but this time I deviated from my norm, and it worked just fine. 🙂
 |
|
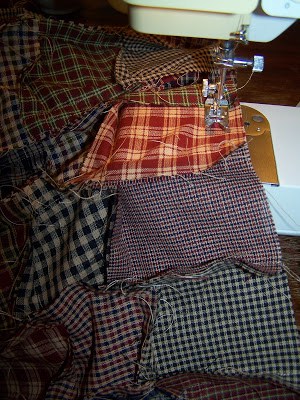
Joining the rows together.
|
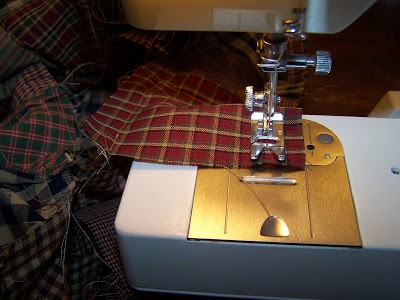
 |
|
Sewing a row together.
|
Step #6: After all the rows are sewn together, stitch around the edge of the entire table runner, 5/8″ from the edge. Pivot at the corners.
 |
|
Pivoting at the corner.
|
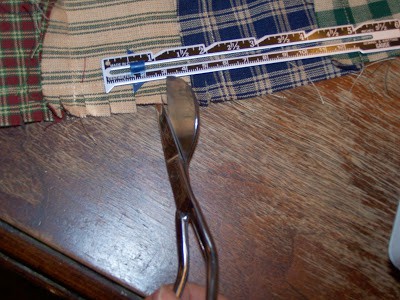
Step #7: Now comes the easy but time-consuming part: clip all the seam allowances about 1/2″ deep and about 1/4″ to 1/2″ apart (it doesn’t really matter how far apart they are). Also clip the outside edge. Be very careful not to cut into the stitching.
Step #8: Throw the table runner in the washing machine (I use a little bit of soap, too) on a cold, gentle cycle. Before drying it, take the table runner outside and shake it out to loosen some of the strings. After running it through the dryer, shake it again to get any other loose strings to fall off. (And you’ll need to clean out your lint trap after this, probably!)
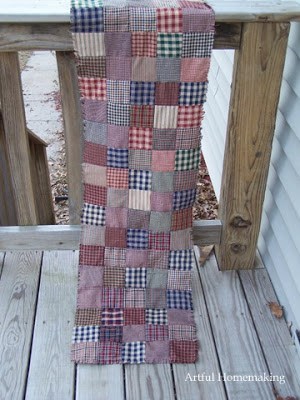
And that’s it! You can either use the ragged side or the other side which looks like a patchwork quilt. I think these are fun to make (they don’t have to look perfect!), and they would make a great gift. You can also take this same idea and make a whole table cloth or place mats.
If anyone makes one of these, I’d love to see it! (Also, let me know if something isn’t clear in my instructions or you have any questions!)


Aren’t you supposed to have batting between layers?
I guess I am a bit confused. How does it become a quilt without batting?
I am a newby!
Hi Donna! No batting is required for this table runner. It does have a patchwork look due to sewing the fabric squares together, but this particular project doesn’t use batting, as it’s not quilted. Hope that helps!