This post may contain affiliate links. Please read our disclosure policy.
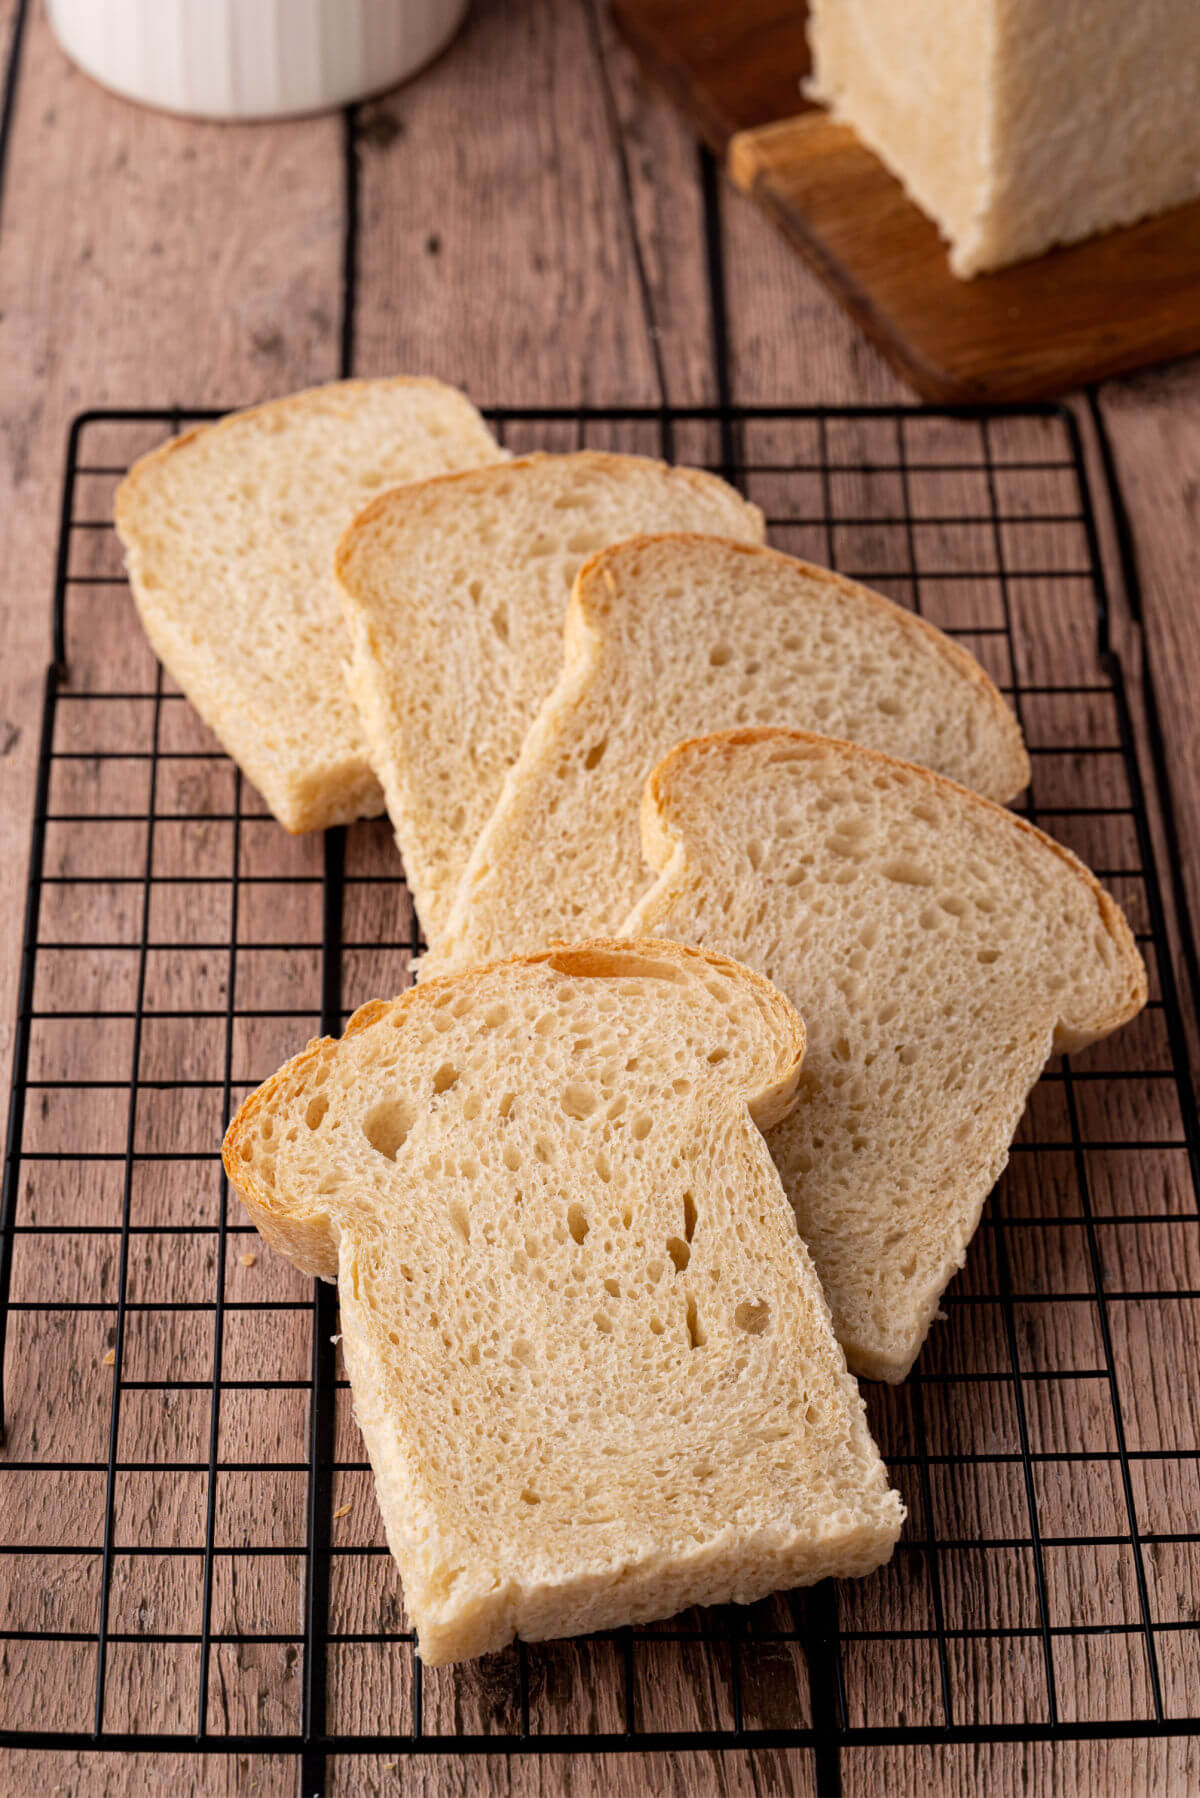
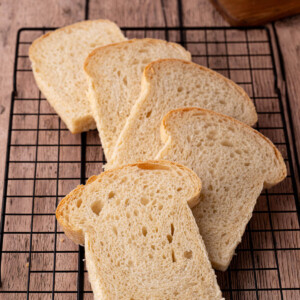
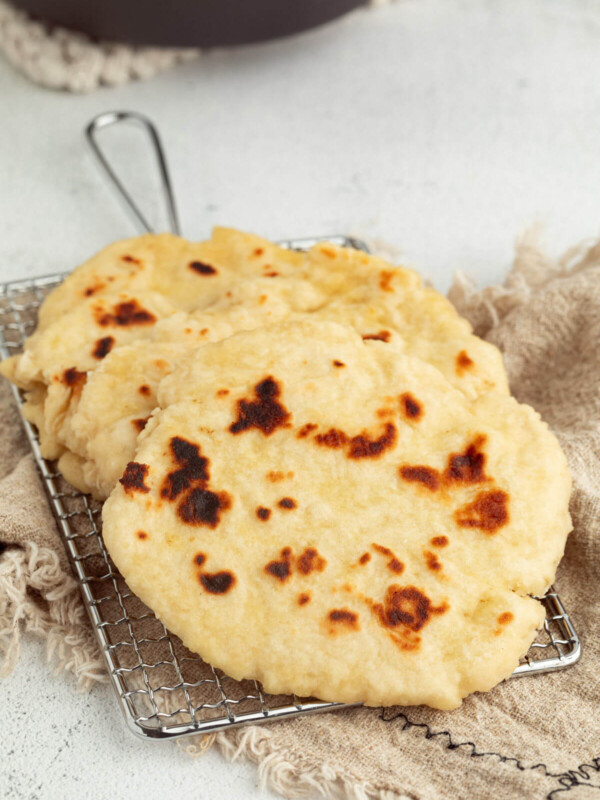
Soft, fluffy, and wonderfully sliceable, this easy sourdough sandwich bread is the everyday loaf you’ll bake on repeat. Made with basic pantry ingredients and an active sourdough starter, this recipe is designed to be as fuss-free as it is satisfying.

Even though I love my easy sourdough bread recipe that’s an artisan-style bread, sometimes you just want a fluffy sourdough sandwich bread for everyday use. This one is great for toasting, for sandwiches, or any time you need a sourdough bread baked in a loaf pan.
Why You’ll Love Easy Sourdough Sandwich Bread
- Easy to Make: This easy recipe doesn’t require as many steps as some sourdough recipes. It makes one loaf, which is perfect for beginners.
- Homemade Bread Without Commercial Yeast: This soft sourdough sandwich bread recipe uses the wild yeast in a sourdough starter to make the bread rise. I love making homemade bread, and sourdough bread is my favorite.
- Made With Basic Pantry Ingredients: This easy sourdough sandwich bread recipe uses basic pantry staple ingredients and doesn’t require a Dutch oven.
Ingredients
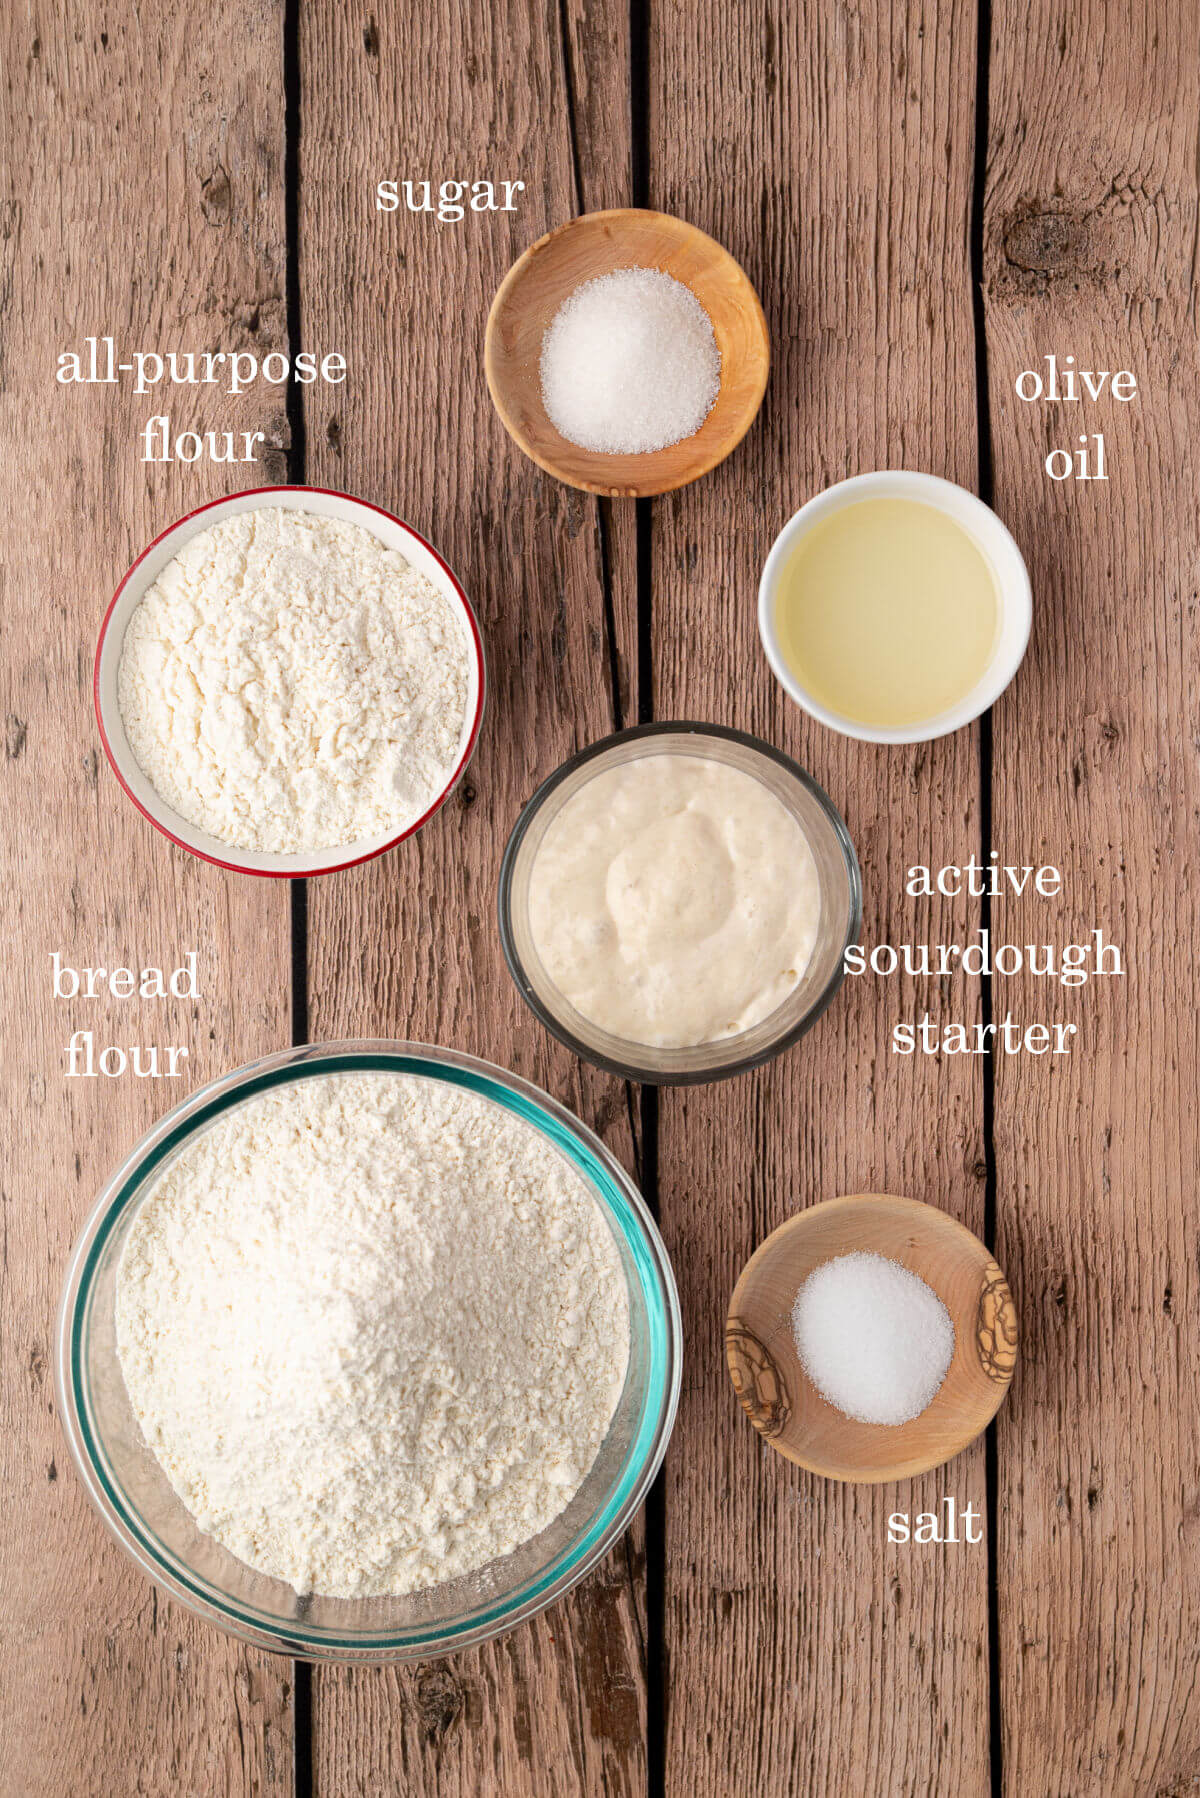
Find the full list of ingredients, amounts, and instructions in the recipe card at the bottom of this post.
- Sourdough Starter: You’ll need active starter for this sourdough sandwich bread recipe. You can make your own sourdough starter or purchase one.
- Bread Flour + All-Purpose Flour: This recipe uses a bit of both bread and all-purpose flour. You can also just use all-purpose flour successfully.
- Olive Oil: You could substitute coconut oil or another neutral-flavored oil in place of the olive oil.
Equipment:
How to Make Easy Sourdough Sandwich Bread
Here are the step-by-step instructions for how to make this sourdough sandwich bread. Instructions are given for using a stand mixer, but you can also do this by hand.
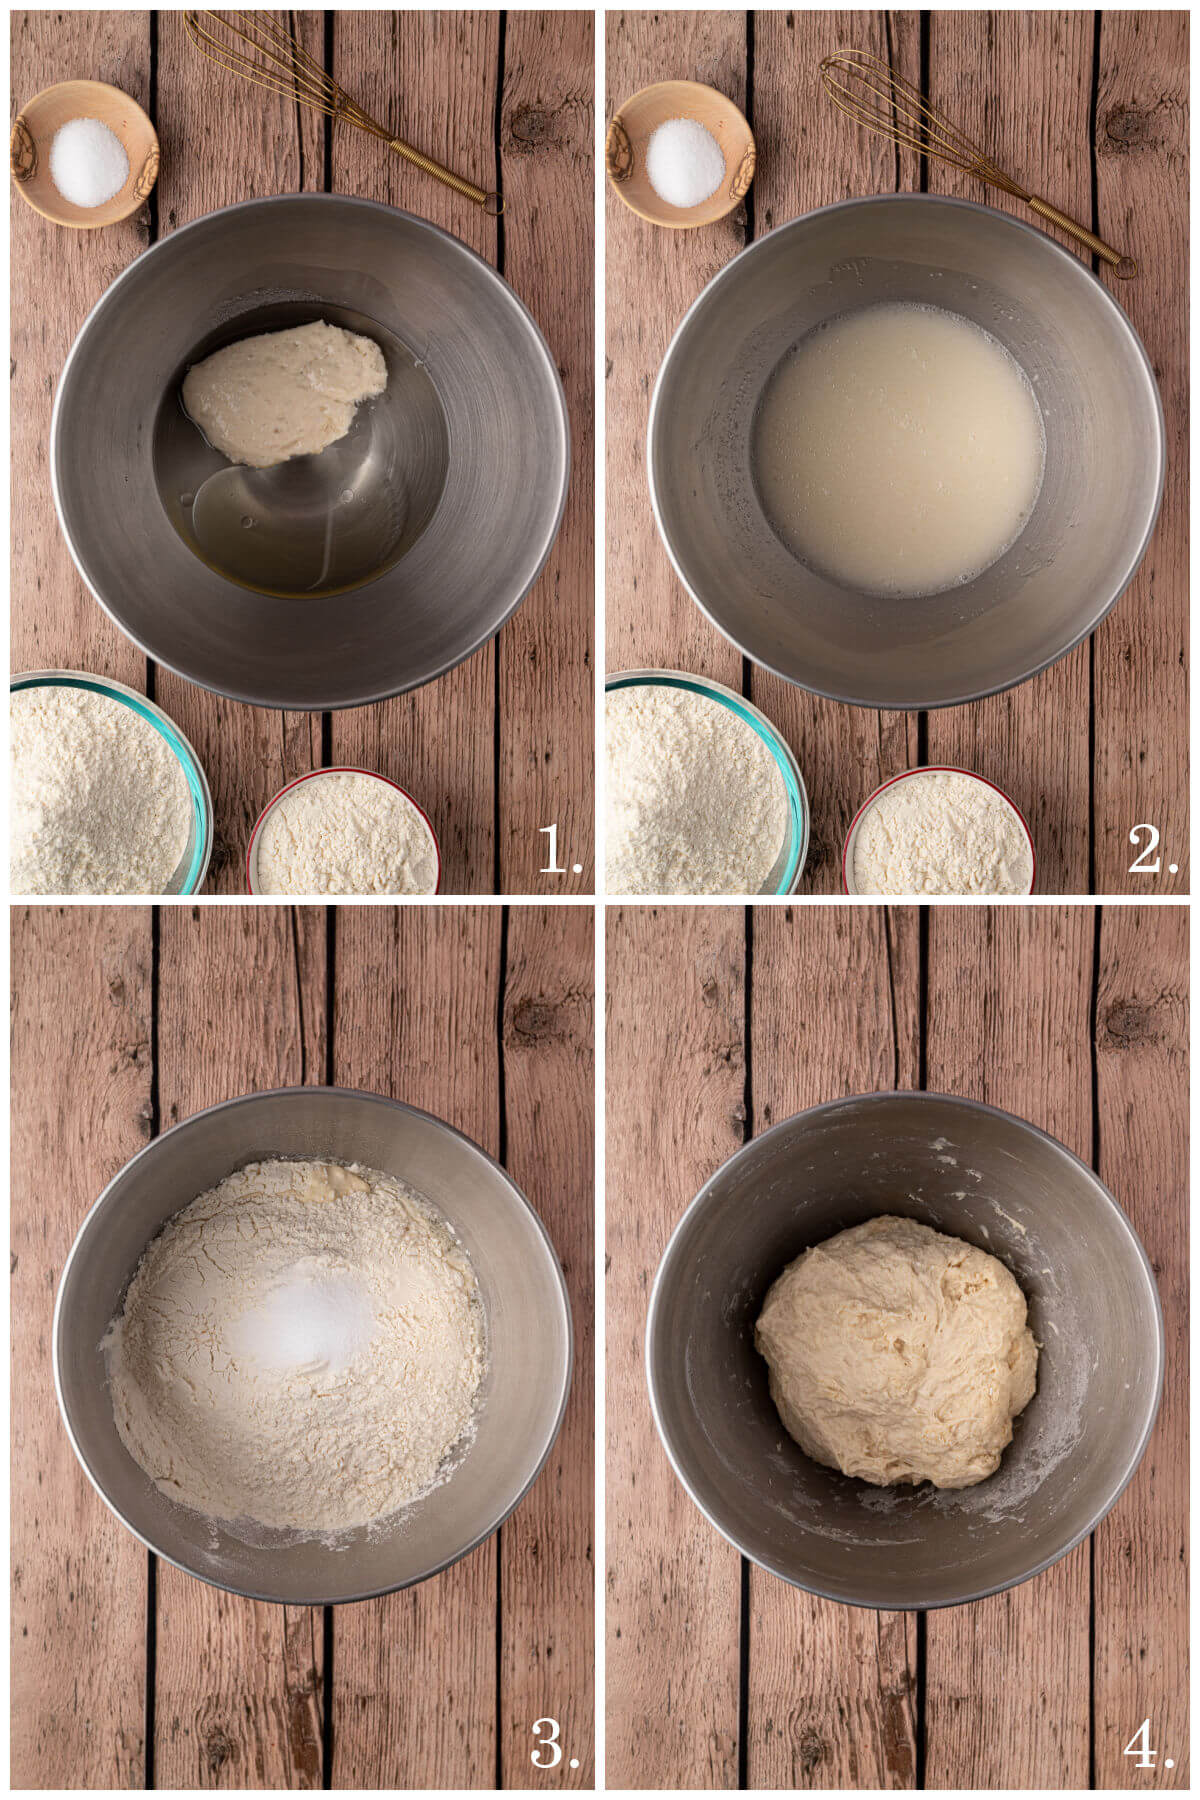
Step 1: In the bowl of a stand mixer, whisk together the starter, warm water, sugar, and olive oil (Photo 1) until the starter is mostly dissolved (Photo 2). Add the bread flour, all-purpose flour, and salt (Photo 3).
Step 2: Mix on low speed with the dough hook attachment until the dough forms a sticky, shaggy mass (about 2–3 minutes). If mixing by hand, stir until combined, then knead until the dough feels sticky and slightly elastic (Photo 4).
Cover with a plate, damp towel, or plastic wrap, and let the dough rest for 30 minutes.
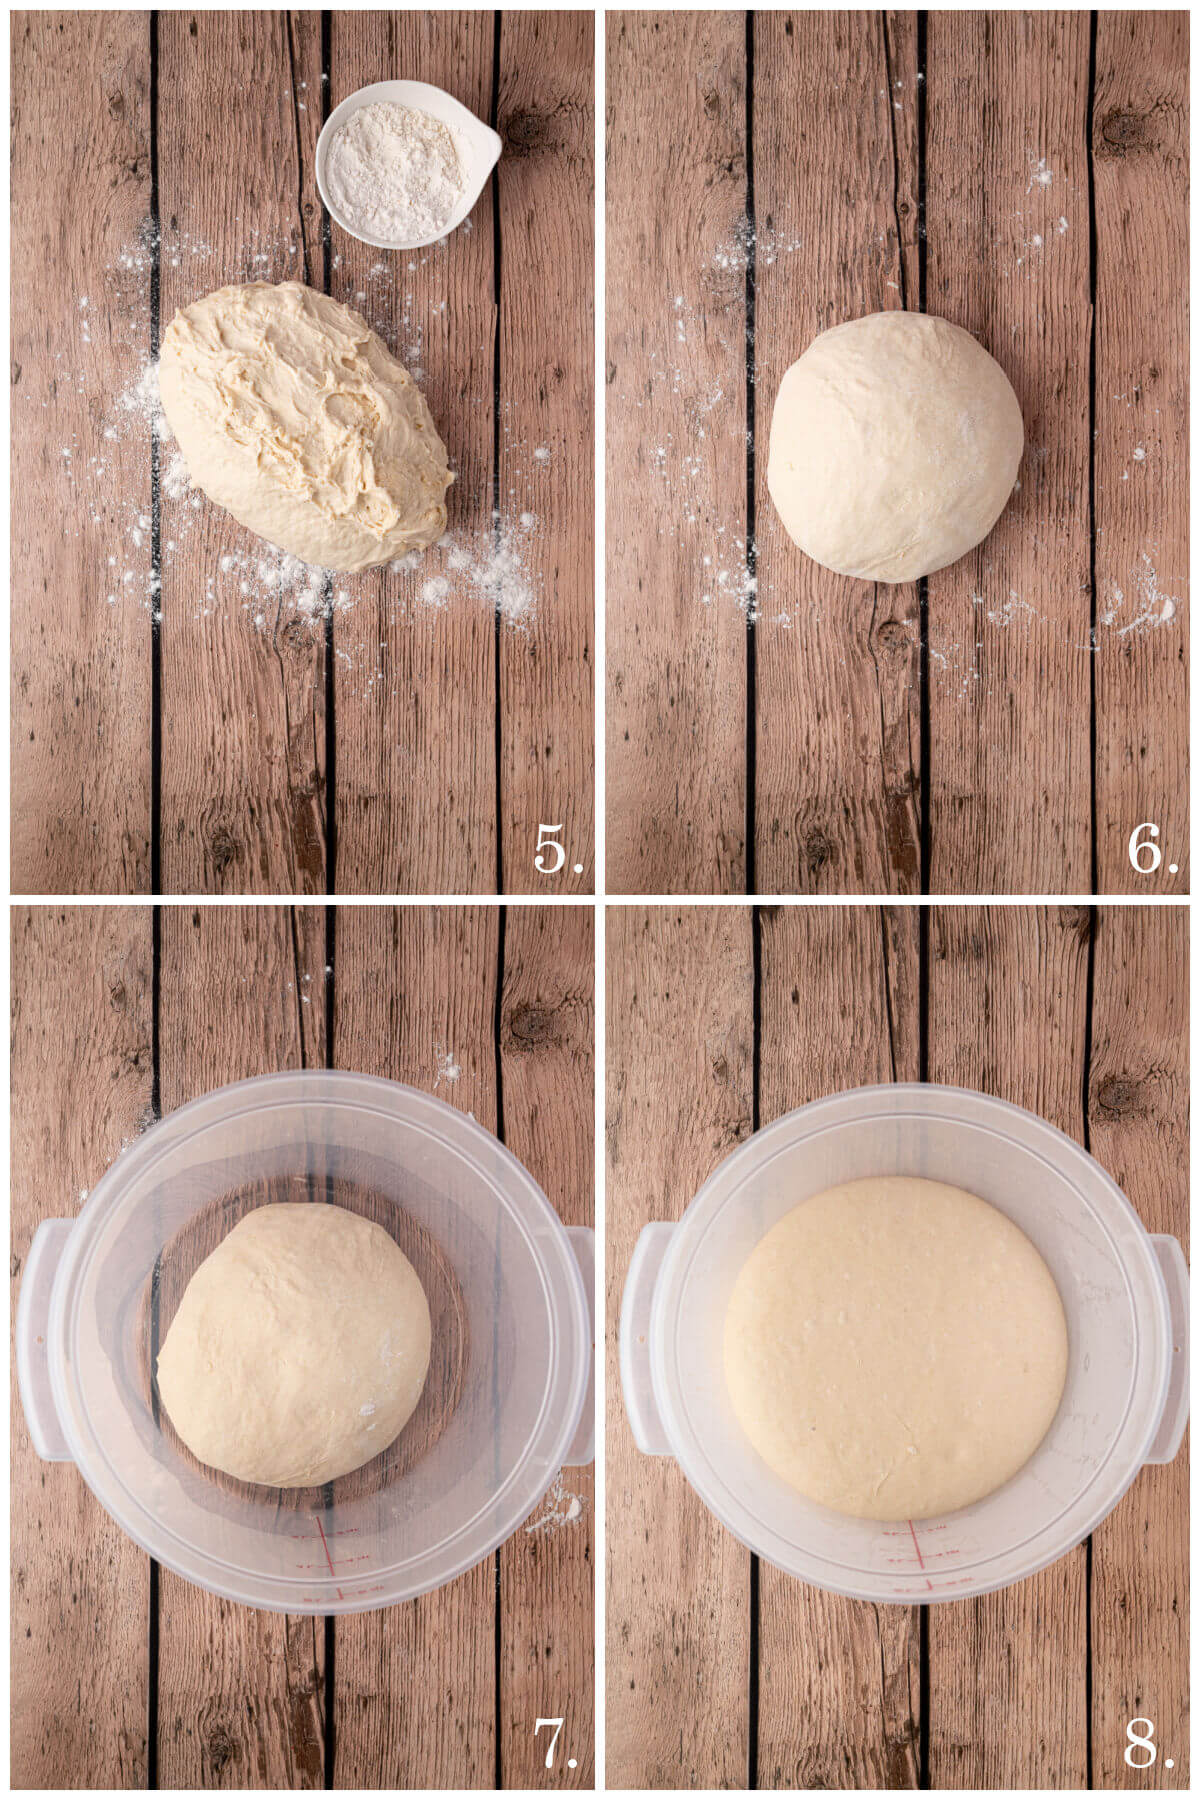
Step 3: After the rest, turn the dough out onto a lightly floured surface (Photo 5). Knead briefly (less than a minute) until the dough is soft and slightly smooth (Photo 6). Place it into a greased bowl or bulk fermentation container (Photo 7). Cover and let dough rise at room temperature until doubled in size (Photo 8), about 6–8 hours depending on the temperature of your kitchen. The dough is ready when it passes the poke test.
How to Do the Poke Test: Press your finger gently into the dough. If the dough springs back very slowly, it is correctly proofed. If it springs back quickly, it’s a sign that it’s underproofed. If it doesn’t spring back at all, that means the dough is overproofed.
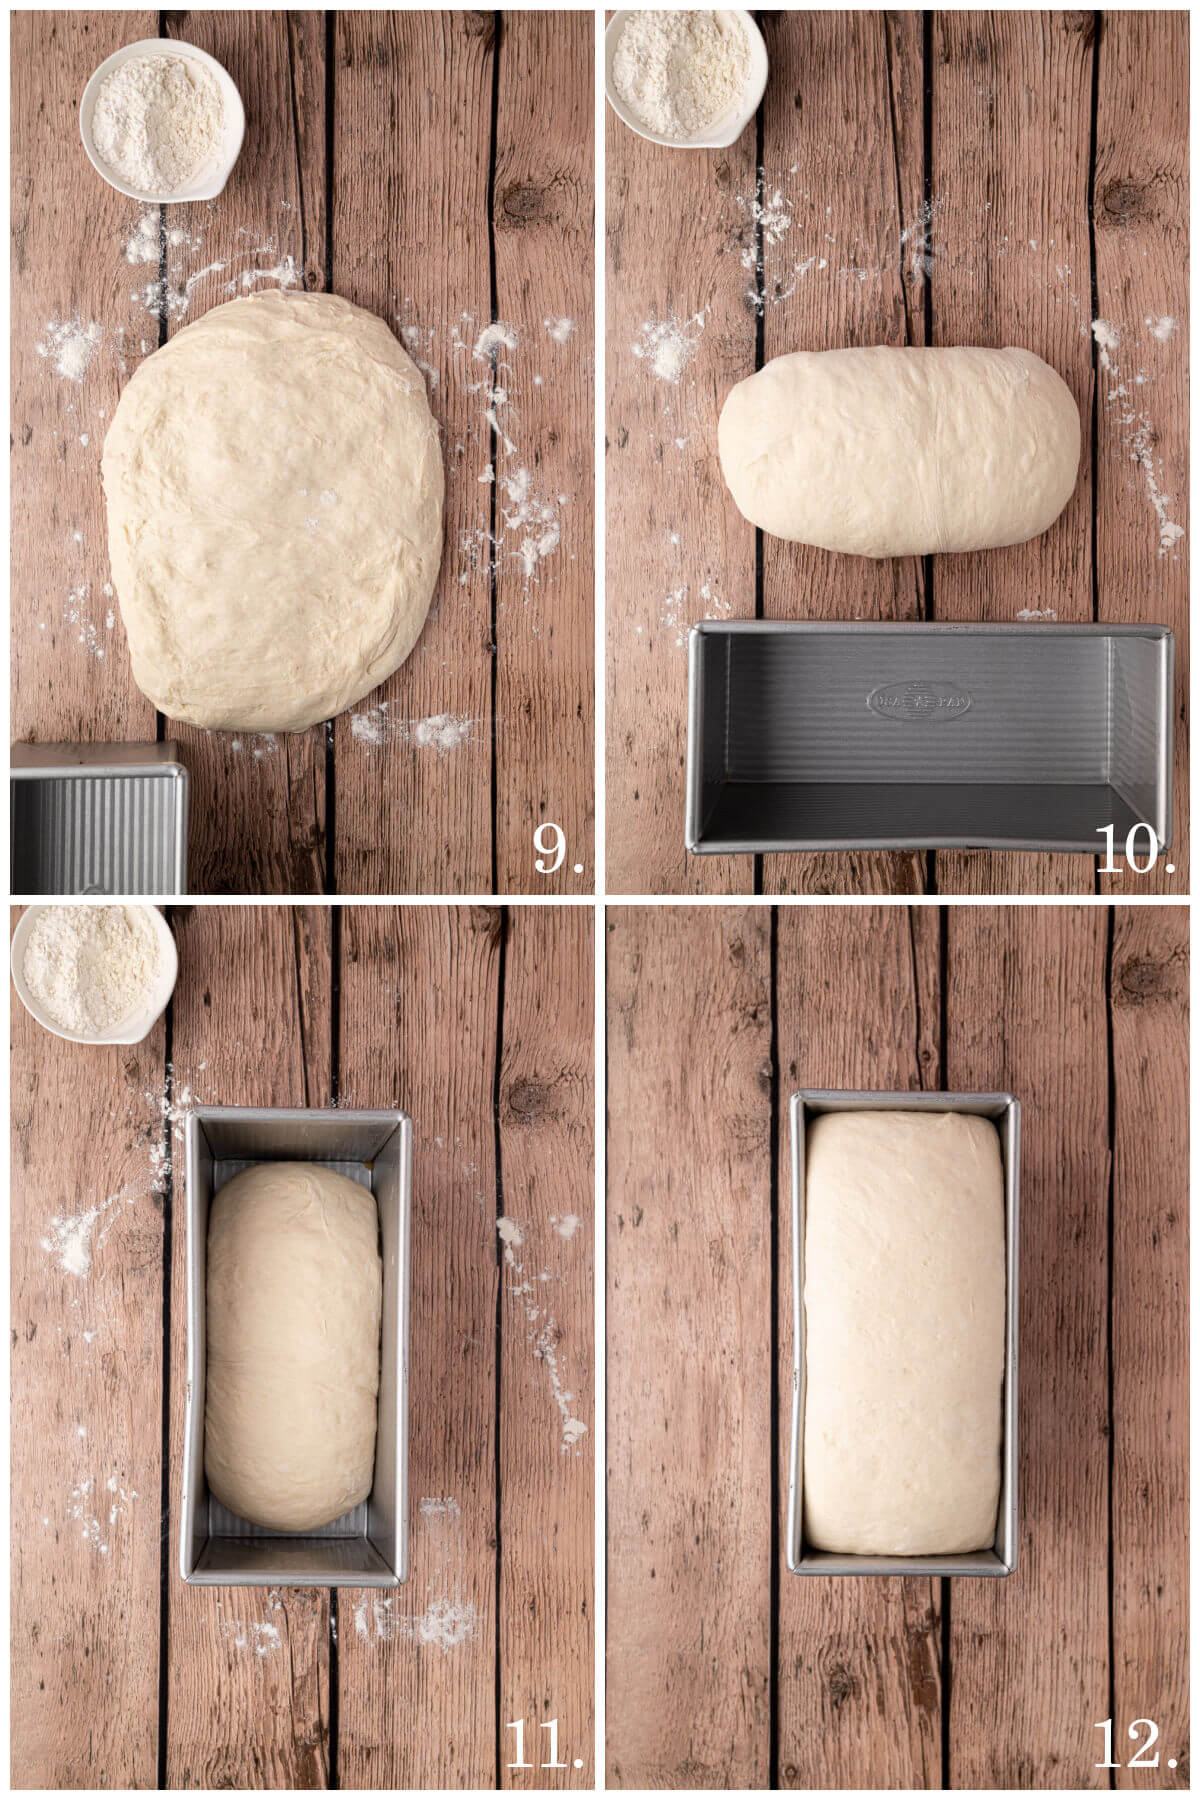
Step 4: Lightly oil your loaf pan. Gently turn the dough out onto a lightly floured surface. Shape it into a rectangle, pressing out any large air bubbles (Photo 9). Roll it into a tight log, tucking the ends underneath (Photo 10). Gently pull the loaf toward you to create surface tension, then place it seam-side down in the bread pan (Photo 11).
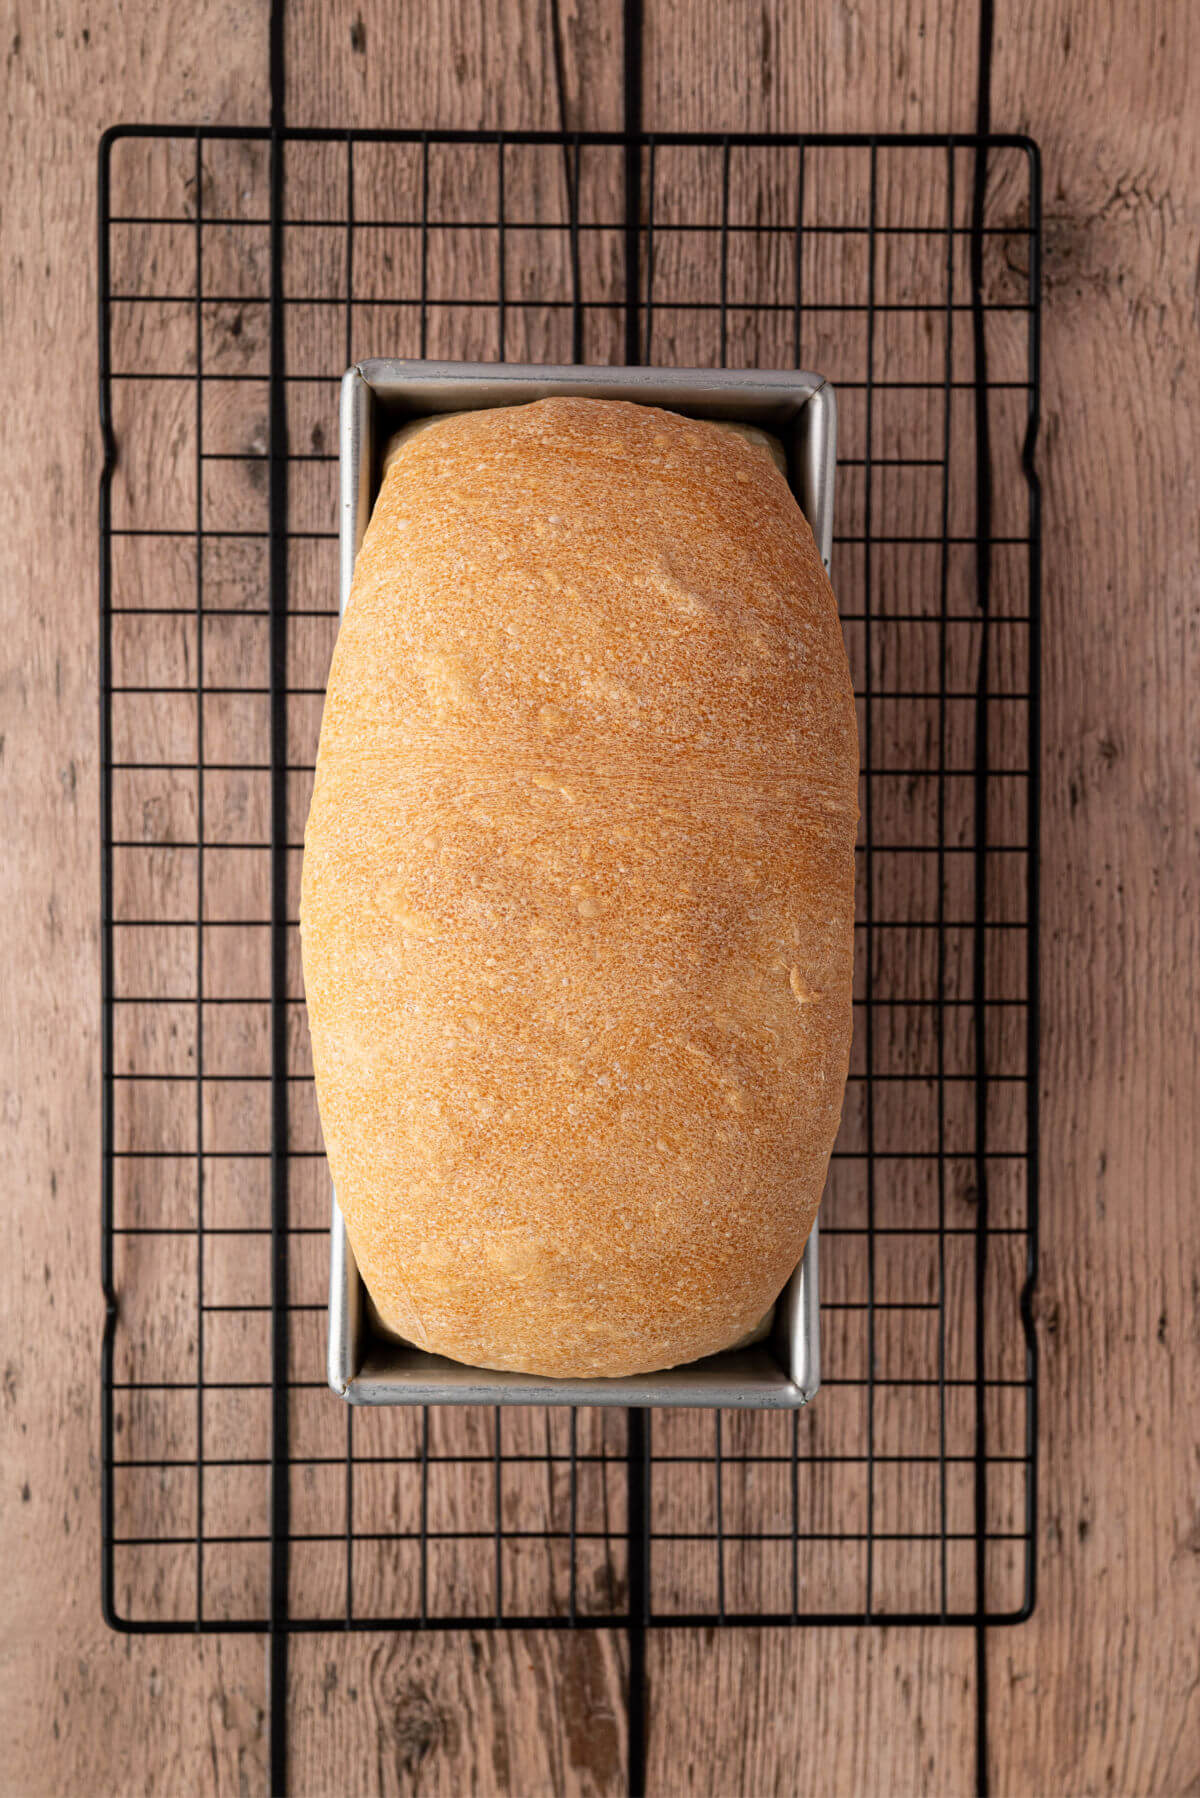
Step 5: Cover with plastic film or a damp towel and let rise 1–2 hours, or until the dough is just peeking over the top edge of the pan (Photo 12).
Step 6: Preheat your oven to 375°F (190°C).
Step 7: Bake the loaf in the center of the oven for 40–45 minutes, or until golden brown on top and the internal temperature reaches 200°F (93°C).
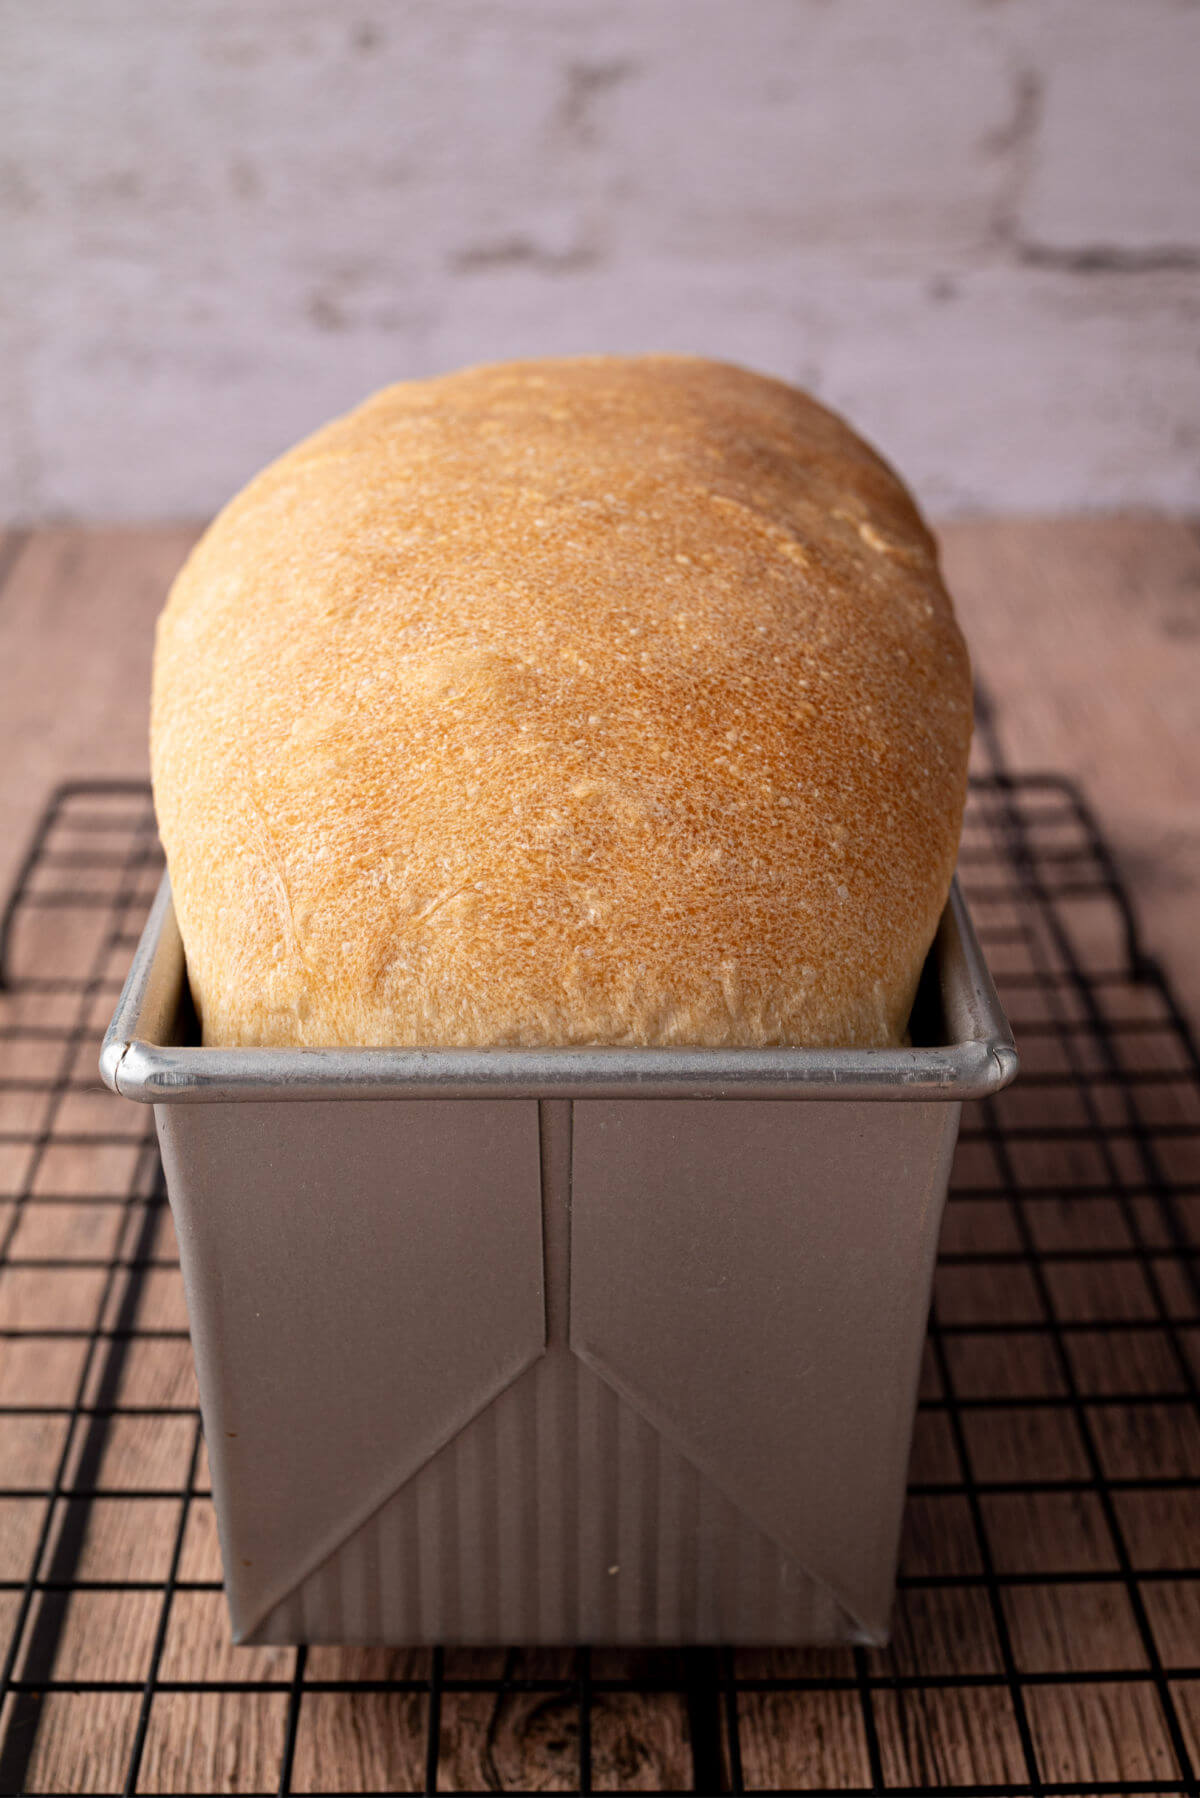
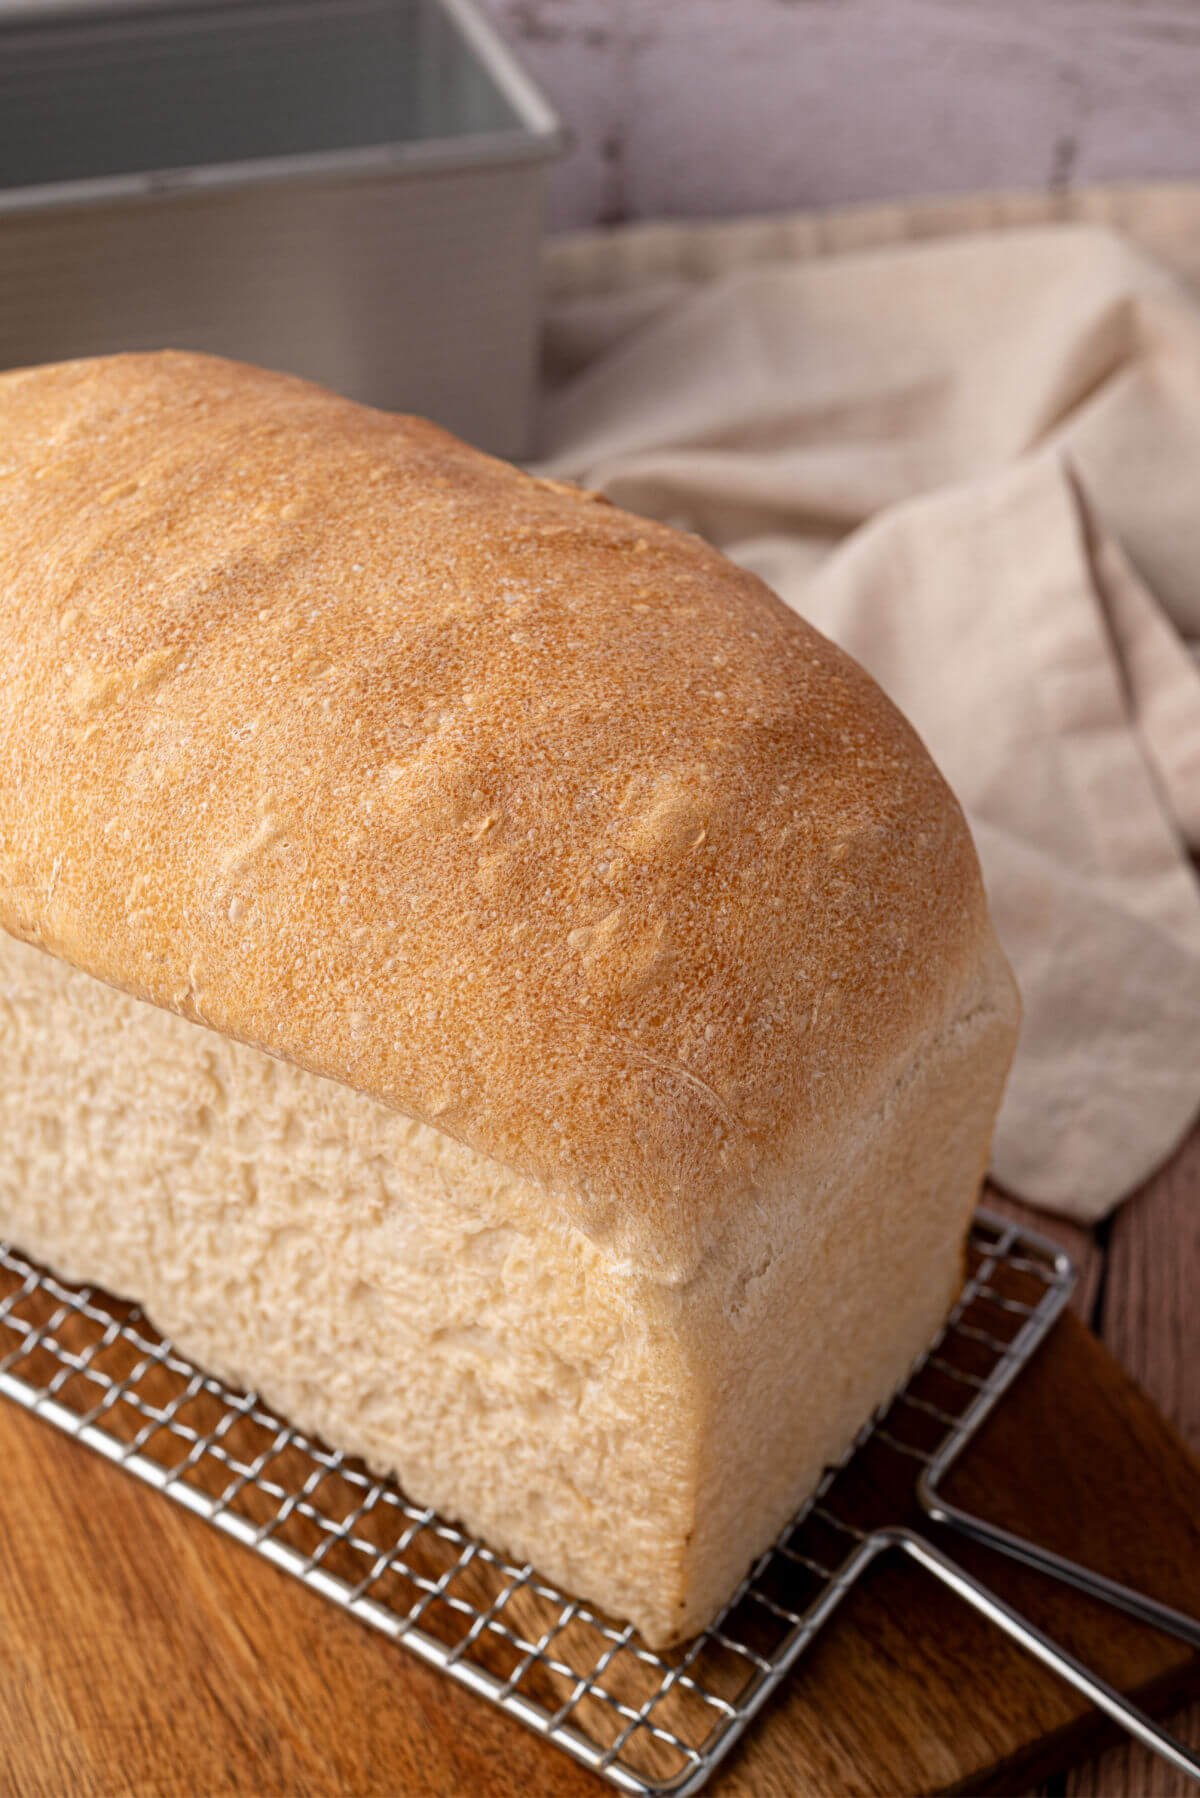
Let cool in the pan for 10 minutes, then transfer to a wire rack to cool completely.
How to Store
Store cooled bread in a bread box, a bread bag, or tightly wrapped at room temperature for up to 3 days or freeze in slices in a freezer-safe plastic bag for up to 6 months.
Expert Tips
- This soft sandwich loaf recipe uses a combination of all-purpose flour and bread flour, but you can also just use all-purpose flour in place of the bread flour. The higher protein content of the bread flour helps create a chewier crumb and taller loaf. I have had perfect success with using all-purpose flour, but have found using bread flour and all-purpose together is perfection.
- For a slightly softer crust, brush the top with melted butter while the bread is still warm.
- You can bake this in a Pullman pan for perfectly square sandwich slices. Just leave the lid off if you want a more rounded loaf like the photos in this post, or leave the lid on if you’re aiming for a closed-top loaf.
- Using a stand mixer makes this recipe so quick and easy, but you can also make this by hand.
Recipe FAQs
Yes! Sourdough bread is great for sandwiches. This easy sourdough sandwich bread recipe is especially great for sandwiches, since it makes a loaf of bread that’s similar to traditional store-bought bread and the soft crust slices nicely.
Sourdough sandwich bread is different than traditional sourdough bread because it has a softer crumb and crust, and instead of being made in a round boule shape, this bread is made in a loaf pan.
Yes! After bulk fermentation, shape the loaf and place it in the pan. Cover and refrigerate overnight. Let it come to room temperature and finish its final rise before baking. (This could take several hours.)
Use the poke test: gently press a clean floured finger into the dough. If it springs back slowly and leaves a slight dent, it’s ready.
This could be due to underproofing or cold room temps. Make sure your dough doubles during bulk fermentation, and give it time to rise in the pan.
More Sourdough Recipes
- Easy Sourdough Bread Recipe
- Overnight Sourdough Biscuits
- Sourdough Irish Soda Bread
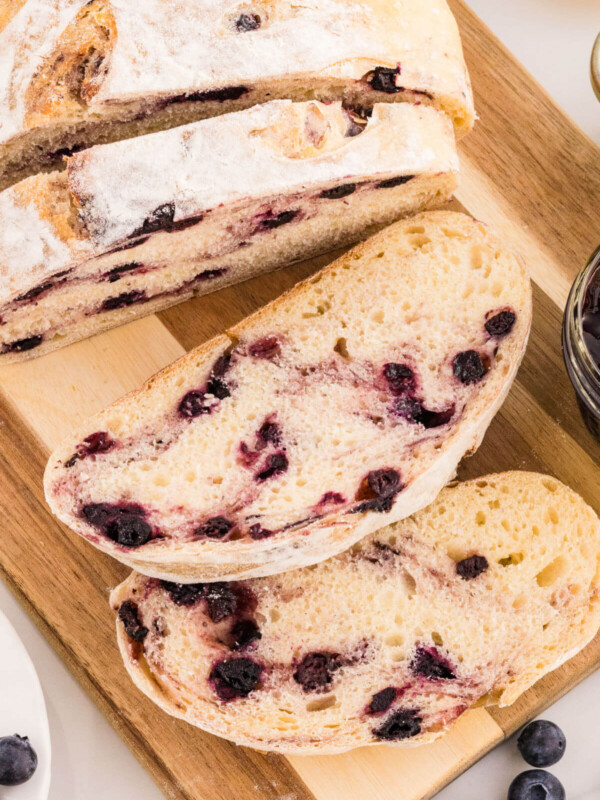
- Blueberry Cream Cheese Sourdough Bread
- Sourdough English Muffin Bread
If you make this recipe and enjoy it, please leave a comment with a 5-star recipe rating and let me know! Thank you!
Easy Sourdough Sandwich Bread
Equipment
- Stand Mixer optional
Ingredients
- 65 grams active sourdough starter, about 1/4 cup
- 300 grams warm water, about 1 1/4 cup, (warmed to 72 degrees)
- 12 grams sugar, about 1 tablespoon
- 15 grams olive oil, about 1 tablespoon, plus some for the pan
- 400 grams bread flour, about 3 cups
- 100 grams all-purpose flour, about 3/4 cup
- 10 grams sea salt, about 1 3/4 teaspoons
Instructions
- In the bowl of a stand mixer, whisk together the starter, warm water, sugar, and olive oil until the starter is mostly dissolved.
- Add the bread flour, all-purpose flour, and salt.
- Mix on low speed with the dough hook until the dough forms a sticky, shaggy mass (about 2–3 minutes). If mixing by hand, stir until combined, then knead until the dough feels sticky and slightly elastic.
- Cover with a plate or damp towel and let the dough rest for 30 minutes.
- After the rest, turn the dough out onto a lightly floured surface. Knead briefly (less than a minute) until the dough is soft and slightly smooth. Place it into a greased bowl or bulk fermentation container. Cover and let rise at room temperature until doubled in size, about 6–8 hours depending on the warmth of your kitchen. The dough is ready when it passes the poke test.
- Lightly oil your loaf pan. Gently turn the dough out onto a lightly floured surface. Shape it into a rectangle, pressing out any large air bubbles. Roll it into a tight log, tucking the ends underneath. Gently pull the loaf toward you to create surface tension, then place it seam-side down in the pan.
- Cover with plastic film or a damp towel and let rise 1–2 hours, or until the dough is just peeking over the top edge of the pan.
- Preheat your oven to 375°F (190°C).
- Bake the loaf in the center of the oven for 40–45 minutes, or until golden brown on top and the internal temperature reaches 200°F (93°C). Let cool in the pan for 10 minutes, then transfer to a wire rack to cool completely.
Notes
Nutrition
Nutrition information is automatically calculated, so should only be used as an approximation.


Could you please convert from metric to standard measurements please? I’m getting different results from different charts as I try to adapt your recipe.
Hi Synde! I have added cup measurements to the recipe card. Weighing flour gives the most accurate results for bread recipes, so I recommend using the spoon and level method when using cup measurements (use a spoon to scoop the flour into the measuring cup and then level it off with the back of a knife, without packing the flour down at all).
Thank you so much! You are a peach and I appreciate you! S.
You’re very welcome, and thank you for your kind words!
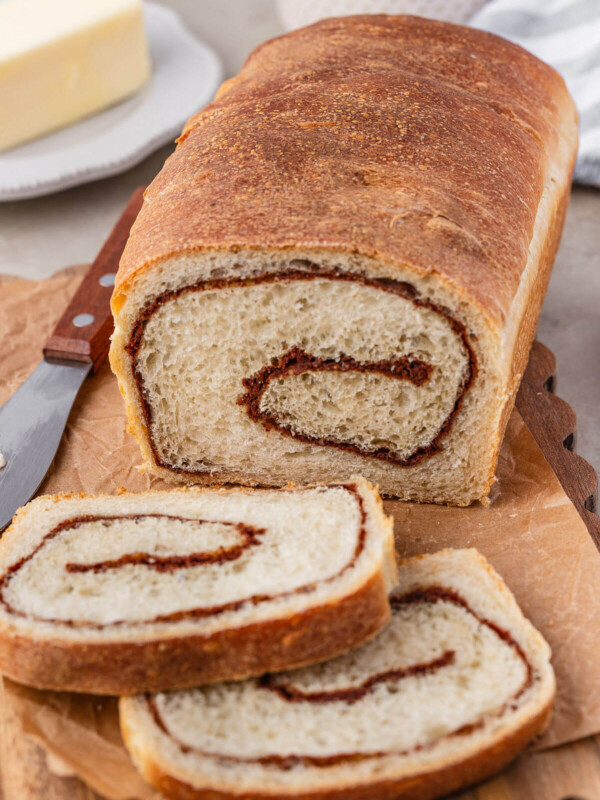
So I did it! I made this bread into a cinnamon raisin bread and it turned iut amazing! I used the measurements you suggested and I added a little flour about a tbsp. To the brown sugar cinnamon mixture so it would create a good swirl effect. Worked perfectly! Thank you. It is a little denser, not a light and fluffy but I expected that. Still taste amazing and we’ve been toasting it and having a slice in the morning with our coffee. Would love to send you pics! Please email me so I can send you some.
Oh yay! I’m so happy to hear it worked! Thank you so much for letting me know that it was a success! 🙂
This recipe is amazing!!! My family loves it. Stays soft for so long. I was thinking of trying this recipe and adding raisins and cinnamon and suagr to it. How would you recommend i do that?
Thank you! I’m so happy it’s been a success, and that your family loves it! I haven’t tested this loaf as a cinnamon raisin loaf, so I can’t say for sure how it would turn out. But I would try maybe 1-1.5 tablespoons cinnamon, maybe 1/3 cup brown sugar, and maybe 1/2 cup of raisins at the point where you roll or press the dough into a rectangle, being careful to seal the ends of the loaf so the cinnamon/sugar mixture doesn’t run out. If you decide to try it, I’d love to hear how it goes! I’m currently working on getting a sourdough cinnamon swirl loaf on the blog, so that should be hopefully coming soon!
This sourdough sandwich bread is amazing and delicious! Its definitely a sit and wait kinda recipe, but it was delicious. Worth the wait. Husband approved. I will be making it again!
Thank you so much for the positive review! I’m so glad you enjoyed the recipe!
Hello. I’m wondering b if you can advise how I would adjust this recipe to bake it in the Large sized Pullman USA Pan that measures – 13×4. It is the only loaf pan I have until I get the smaller 9×4 pan you used.
I’m excited to try making your sandwich bread. My family has been begging me to make it.
We love your beginner artisan or boule sourdough loaf. I’ve made it a couple of times now. I’m new to the sourdough journey and truly find your recipes easy to follow. Very well explained.
Thank you for sharing all you do.
I look forward to your help and guidance if you don’t mind helping me.
Hi Carol-Ann! Thank you so much for your kind words. I’m so glad you love my beginner sourdough bread recipe!
Regarding adjusting this recipe for a different pan, here a couple of (untested) options. First, you could go ahead and bake it in the 13×4 pan, but the dough will not fill the pan, and will yield a shorter loaf. Or, you can try this suggested adjustment from ChatGPT (which I have not tested, so I can’t guarantee how well it will work!). Here are the suggested adjustments:
A 13×4 pan holds about 40–45% more dough than a 9×4. Scale the recipe to 1.4× Here’s what that looks like (rounded for practicality):
90 g active sourdough starter
420 g water
17 g sugar
21 g olive oil
560 g bread flour
140 g all-purpose flour
14 g sea salt
This amount will:
Fill the pan properly
Rise to the lid for a true square Pullman loaf
Give you classic sandwich-height slices
Please just note that I have not tested these changes, I can’t guarantee the results, and it may require some experimentation. If you do decide to try the untested adjusted recipe, I’d love to hear how it goes!
So easy and better than other recipes I have tried. My family loves this recipe.
Thank you, Susan! I’m so happy to hear that!
This is an easy everyday sourdough sandwich bread recipe that’s great for toasting, for sandwiches, or just eating for a snack!