This post may contain affiliate links. Please read our disclosure policy.
Make your own homemade soy candles with this simple DIY tutorial. Learn how to make Mason jar soy candles the easy way with these detailed instructions and step-by-step video!
Make Homemade Soy Candles
My friend Liz is always inspiring me with her creativity. She’s the one who taught me how to make soap, and when I saw her soy candles, I so much wanted to make those, too!
After trying for months to plan a get-together so she could teach me how to make homemade soy candles, and each time having it fall through (due to busyness, sickness, etc.), I finally decided to teach myself!
This tutorial is the result of all my research on how to make homemade soy candles.
Watch the How to Make Soy Candles Video
What You Need to Make Homemade Soy Candles
Affiliate links included below. Read my full disclosure here.
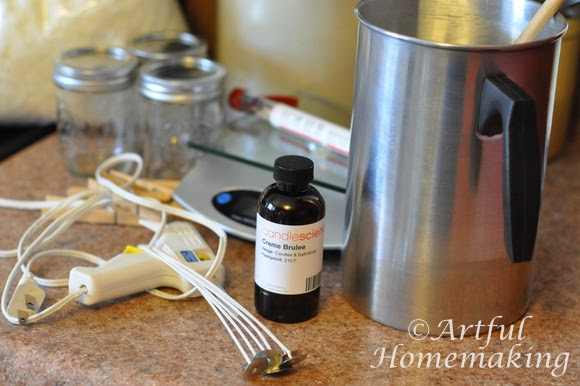
Here are the basic supplies you’ll need:
- Half-Pint 8 oz. jelly jars
- Melting Pot/pitcher or an old saucepan to melt the wax in (the link goes to the melting pot I have)
- Larger pot to use as a double boiler
- Soy Wax (the link goes to the exact wax I used)
- Wicks
- Scale (any digital scale should work)
- Thermometer
- Glue gun, superglue, or wick stickers
- Mixing spoon (I use an old wooden spoon I found at a flea market)
- Clothespins or something to hold the wicks straight (try these wick bars)
- Fragrance oil. For each pound of wax I used about 1-2 oz. fragrance oil.
- Newspapers to protect counters
- Paper towels
- Candle warning labels (optional)
How to Make Soy Candles
First, lay out some newspapers to protect your table/counter.
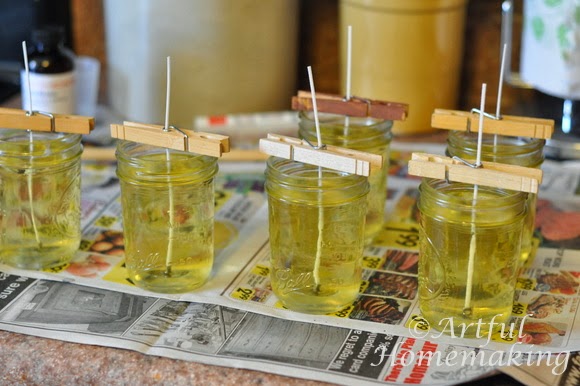
Then stick the wicks on the bottom of the clean jars using a glue gun or superglue.
This just keeps the wicks in one place so they’ll be straighter and not slide all over the place.

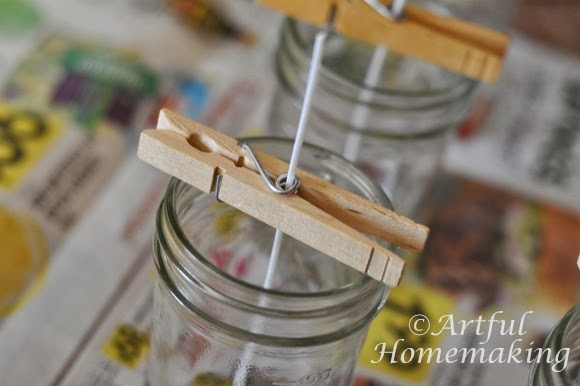
Put clothespins over the jars. I’ve decided that sticking the wick through the metal coil part of the spring holds the wicks better than actually clipping it.
Add a few inches of water to the larger pot and set it on the stove. Let the water heat while you weigh the wax.
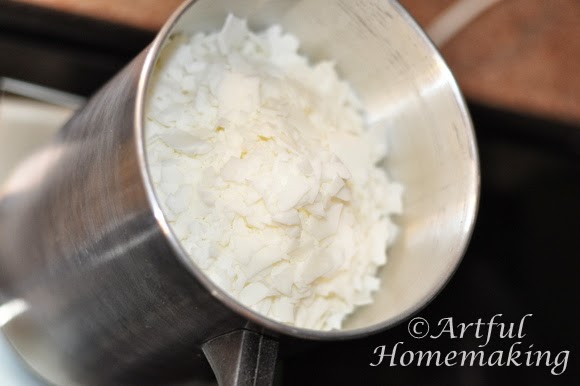
Weigh the Soy Candle Ingredients
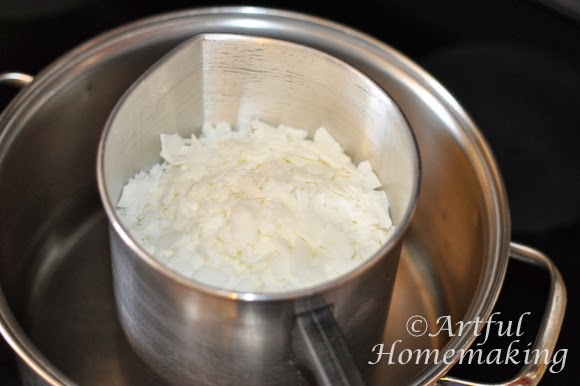
Using your scale, weigh the wax into your melting pot.
The first time I made candles, I only made three. 1 lb. of wax filled three 8 oz. jars.
The second time I made candles, I made six, and I used about 2.03 lbs. of wax, and that filled the six (8 oz.) jars perfectly.
Remember to use the tare function on the scale, so you aren’t including the weight of your melting pot in the wax weight.
I also weigh out my fragrance oil (in a different container) at this time, if necessary.
Melt the Wax
Add the melting pot filled with wax to your pot of simmering water.
The wax will slowly begin to melt. Make sure you watch it carefully (don’t walk off and leave it), as wax can catch fire (burst into flames) if it gets too hot.
Continue heating, stirring with your spoon, until the wax is completely melted.
Use the thermometer to measure the temperature of the wax (I keep it in there the whole time it’s melting–just attach it to the side of your pot if you can–with less wax this may not be possible).
There are different opinions on what temperature you should heat the wax to (and it also depends on the type of wax you’re using), but I let mine get to about 170-180 degrees.
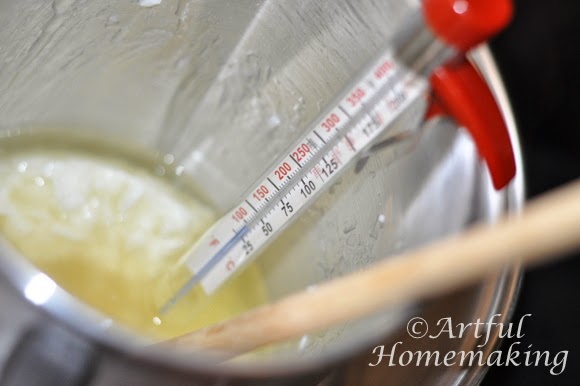
Once you have the wax at the right temperature (170-180 degrees), remove it from the heat.
Add Fragrance Oil
After removing wax from the heat, add your fragrance oil.
Stir to completely blend in the scent with the wax. (I used 2 oz. of fragrance oil to 1 lb. wax).
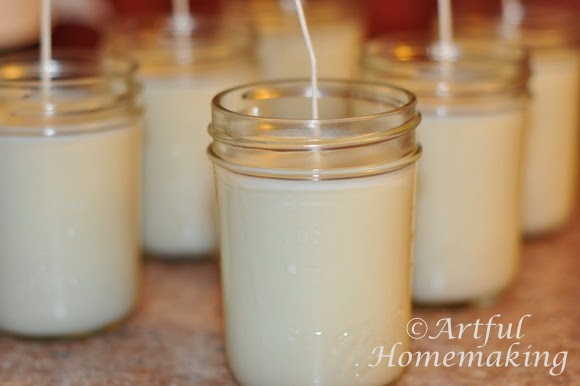
Pour Wax Into Jars
You can pour the wax into the jars at any time after adding the fragrance oil (or, if you’ve decided to omit the fragrance, you can pour when the wax is the temperature you’d like). Around 135 degrees is recommended.
There are a lot of things to consider when pouring your wax, and one of them is that if you pour at too high of a temperature you might get “sinkholes,” which are little holes that form in the top of your candle as it cools.
The first time I made soy candles, I poured at 140 degrees, and the tops of my candles were smooth and perfect.
The second time, I decided to go with the instructions for my particular wax and container, and I poured at 155 degrees–and got sinkholes. So, the next time I will be pouring at a lower temperature.
The trick is that you don’t want the wax to cool either too quickly or too slowly. A friend recommends pouring at around 100 degrees. I will definitely be using a lower temperature next time. At least 130 to 140 degrees, and definitely not at 155 like I did last time!
So, after you’ve added the fragrance oil, pour the wax slowly and carefully into the jars.
You don’t want any splashing to occur, as this can make air pockets in your candle. So just pour as slowly and evenly as you can.
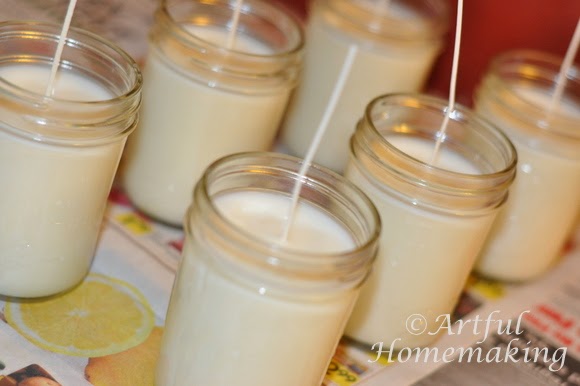
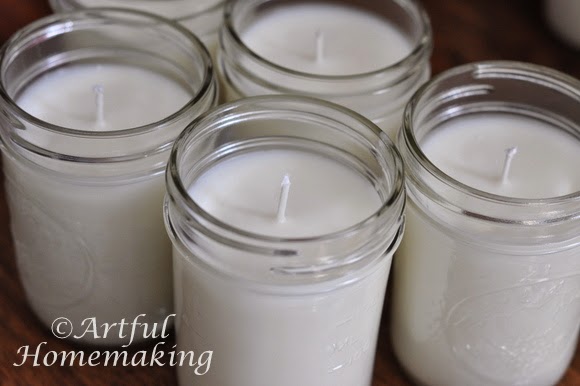
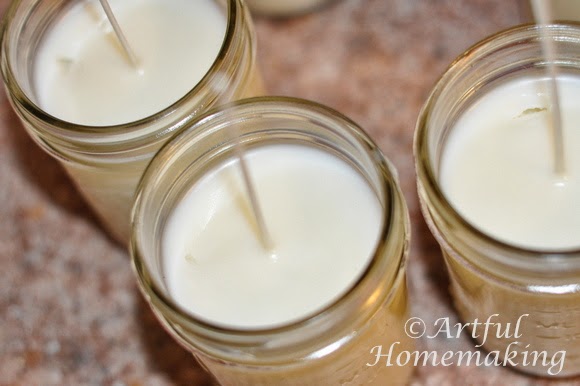
Let the Candles Cool
Readjust your wicks to make sure they are centered and straight. Then let the candles cool, undisturbed.
As they cool, you will notice that they will start to have a cloudy sort of appearance.

Clean Your Supplies
Right after pouring candles, I clean my supplies by simply wiping them with a dry paper towel.
Wipe the thermometer, the stirring spoon, and the melting pot thoroughly.
This prevents the wax from drying and hardening on these items, and they’re very easy to clean if you do it right away.
Allow to Cool for 24 Hours
Eventually, the candles will be completely cooled and solid. You can then remove the clothespins from the wicks.
Enjoy the delicious fragrance permeating your kitchen (if you made scented candles)!
When my husband and children came into the kitchen, they all wanted to know what the delicious smell was!
Let your candles cool completely at room temperature for at least 24 hours before burning.
I’ve read that it’s best to wait a couple of days before burning them, but if you just can’t wait, at least wait 24 hours.
Trim the Wicks
After the candles have completely cooled, you can trim the wicks.
You’ll want to have them at about 1/4″ before burning them (and I don’t have them trimmed that short in these photos).
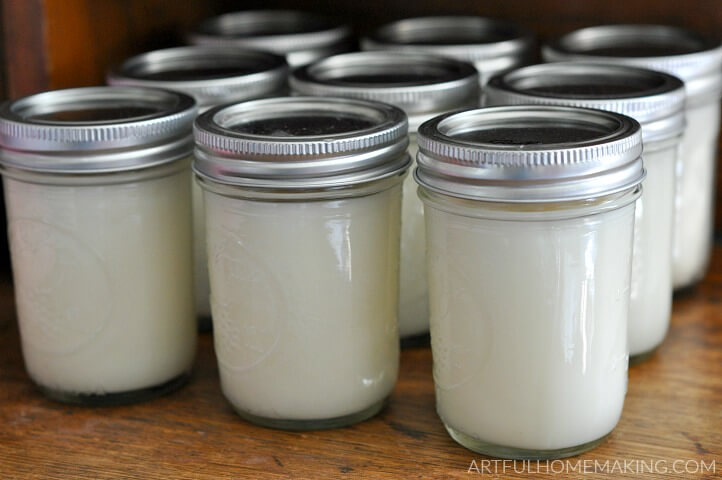
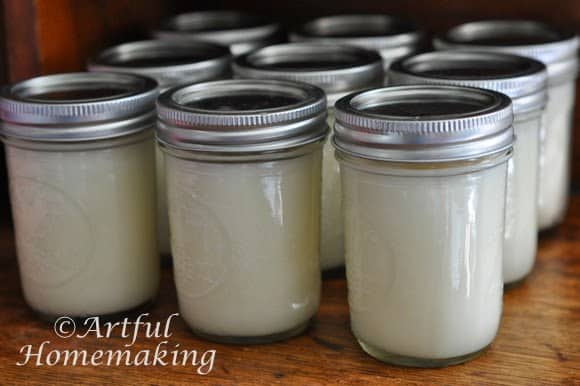
Decorate Jars for Gift-Giving or Leave Plain
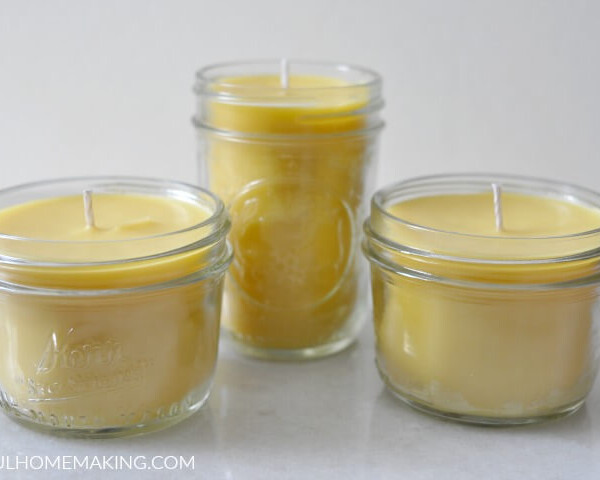
You can use the lids that came with your Mason jars (which looks simple and lovely):
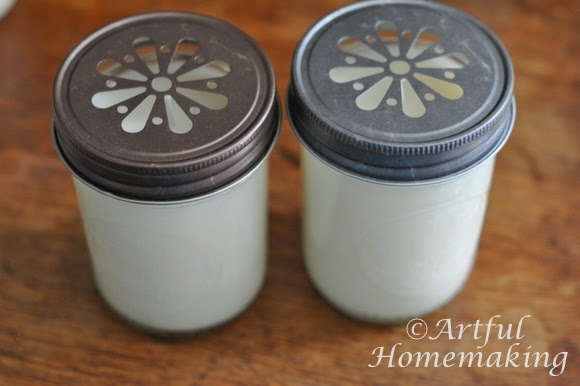
Or, you can embellish them a little bit with decorative lids and maybe a bit of fabric or jute:
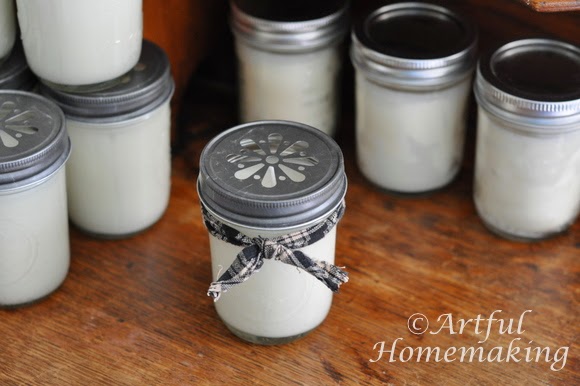
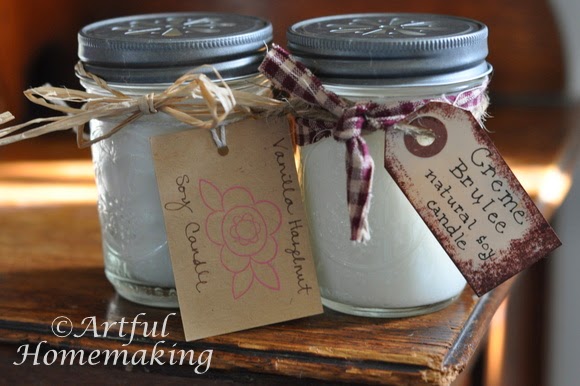
Add tags and a label to the bottom with instructions. I added a label that just said to keep wicks trimmed to 1/4″, etc.
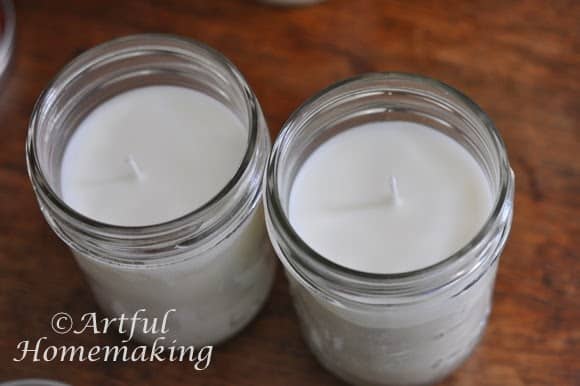
I packaged up these two for a friend’s birthday gift:

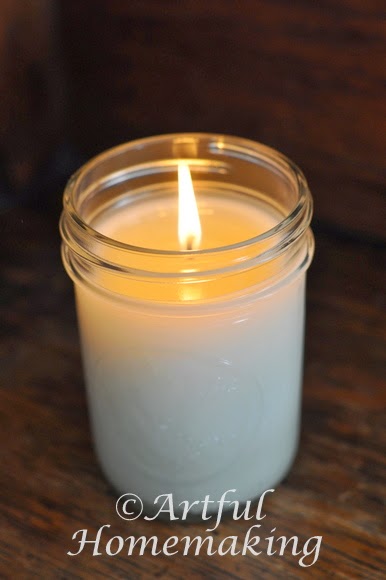
We love having candles lit, especially in the fall and winter. But we burn them all year long and enjoy their warm, cozy glow.
Troubleshooting Soy Candles
There are so many variables to deal with when you’re learning how to make homemade soy candles.
And I’ve only made them twice, so I don’t have all the answers! But I thought I’d address a couple of things that can affect how your candles turn out.
1. Frosting
This happened to me with my first batch of candles. It was cold in the house, and I made the candles late in the evening.
My husband turned the thermostat down before bed (as we always do), and it got very cold in the kitchen where my candles were cooling.
As a result, they developed what is called “frosting,” and it basically just has a whitish look around the sides of the candle.
You may be able to see it in the photo below:
The two candles below also have “frosting,” which is the white look on the sides.
Thankfully, since they are white candles, it’s not really very noticeable, and it doesn’t affect how the candle burns.
But to prevent this, try to make candles when it’s warmer outside or when you can keep the heat turned up so that the room temperature is about 70 degrees. This is considered the ideal room temperature for cooling candles.
2. Sinkholes
Sinkholes are what happens when you pour the soy wax at too high of a temperature.
The “ideal” temperature apparently varies (different people have different opinions), but lower is better!
The first time I poured at 140-ish degrees, and the tops on my first batch were perfect and smooth.
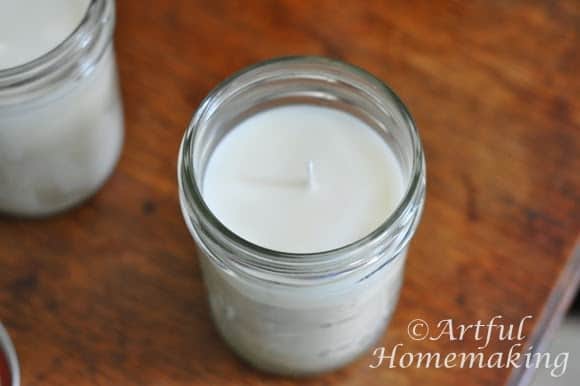
The second time I poured at around 150-155 degrees, and most of the candles got some little “sinkholes” in the tops of them.
You might be able to see in the photo below, that the wax isn’t perfectly smooth on the top:
So, simply pour your wax at a lower temperature and you can probably prevent or solve the sinkhole problem!
The good thing about sinkholes is that they don’t affect the way your candle burns. But when you’re wanting to give them as gifts, they are less-than-perfect.
3. Off-Centered Wicks
To avoid off-centered wicks, make sure to center your wicks after you pour the wax into the jar!
I moved my candles (it’s best to leave them undisturbed while they’re cooling), and the wicks slid ever-so-slightly to the side.
When they were completely cooled, I noticed that they weren’t perfectly centered, and I was disappointed that I had forgotten to re-center them.
So, learn from my mistakes, and hopefully your first try learning to make homemade soy candles will turn out perfectly!
Regardless, I have had so much fun making candles, and I plan to continue making them. I love having them around the house, plus they make wonderful gifts!
I hope you’ve enjoyed learning how to make homemade soy candles!
January 2014 Edit:
I just wanted to add a little note here and say that all of the candles I made back in April and May (2013) have burned beautifully (including the ones with a bit of “frosting,” and the ones with a few small sinkholes).
I saved the best ones for gifts, and gave some at Mother’s Day, birthdays, and Christmas. Everyone loves to receive a handmade candle for a gift!
I enjoy using my candles, too. It’s almost time to make some more!
October 2014 Edit:
I cannot give advice about selling candles, as I have no experience with this.
Most of the candles I’ve made have been for our own use, other than the few I’ve given away to family and friends.
I did label the ones I gave away with some basic candle safety and burning tips, and I recommend you do the same.
In this tutorial, I’m simply sharing my own experience with soy candle making, and I can’t make any guarantees about success or candle safety.
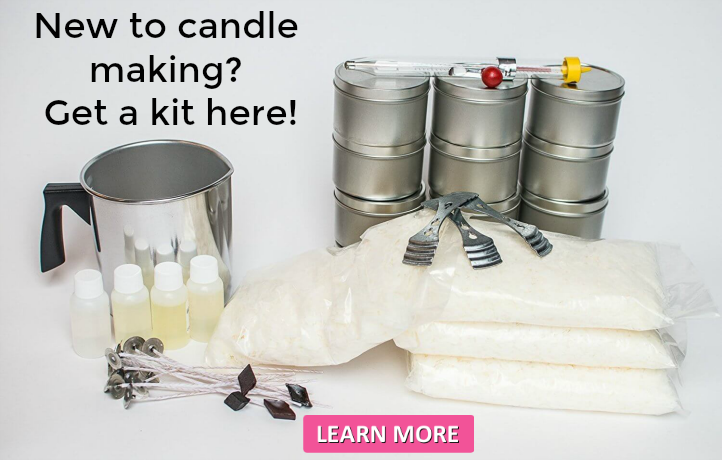
Would you prefer a kit that’s already put together for you?
Try one of these candle making kits.
List of Candle Making Supplies
Affiliate links included below. Read my full disclosure here.
Here are the basic supplies you’ll need to make homemade soy candles:
- Half-Pint 8 oz. jelly jars
- Melting Pot/pitcher or an old saucepan to melt the wax in (link goes to melting pot I have)
- Larger pot to use as a double boiler
- Soy Wax (the link goes to the exact wax I used)
- Wicks
- Scale (any digital scale should work)
- Thermometer
- Glue gun, superglue, or wick stickers
- Mixing spoon (I use an old wooden spoon I found at a flea market)
- Clothespins or something to hold the wicks straight (try these wick bars)
- Fragrance oil. For each pound of wax I used about 1-2 oz. fragrance oil.
- Newspapers to protect counters
- Paper towels
- Candle warning labels
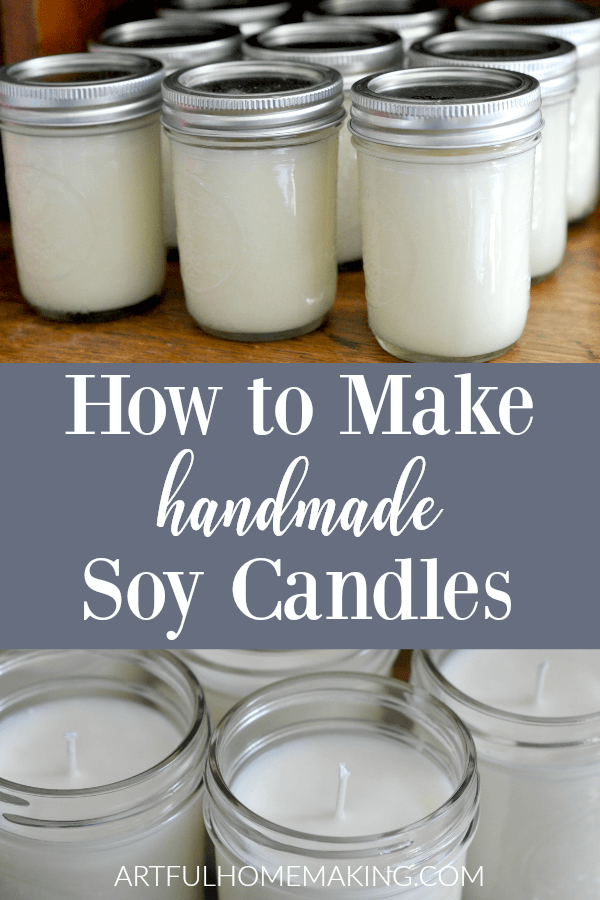
Pin this Post for Later:
Disclaimer: The information presented here is accurate to the best of my knowledge, and is intended for entertainment purposes only. No guarantee is given about the suitability, completeness, or accuracy of the instructions contained here. I accept no liability for the use or misuse of any of the information presented here. Use these instructions at your own risk, and please take safety precautions when working with heat, wax, and candle-making supplies.


Have you made colored candles? I noticed the candles shown above are white, do you buy colored wax or have to add some sort of dye to color the wax?
You have managed to make candle making seem possible. Thanks for your in-depth instructions. Of course I need to actually try the process to confirm this, but maybe now I will be inspired to do so. Thanks!
ok thank you
Hi I am making homemade candles out of old candles that I have left over and I am having a problem with the homemade wick. while I am burning my candle the wick falls over too the one side and I was just wondering is there anything that I can do to stop this
I'm sorry, I don't have any experience with that.
I want to make these for a fundraiser to sell what would be a decent price for them yuh think?
I really don't know. I've never sold any of mine, only given them as gifts. Maybe look for similar candles on Etsy.com and see what they're going for?
Love this! You made this look so easy~i am going to try this for sure! Thank you so much for sharing. I am addicted to candles and tarts….
If you try making them, I hope they work out well for you!
I have been making the candles and what fun it is 🙂
Also, I played around with the amount of oil to add to the wax…I used 2oz per pound of wax..unless the scent is strong. I love strong smelling candles and finding the customers do too!
So glad they're working out for you, Regina, and thanks for sharing your experience with the amount of oil and wax!
Hello,
I was reading your tutorial and if you don't mind I would like to add a few comments as I make candles for a side job as a living.
2 oz of fragrance oil per 1 pound of wax is extremely way too much. Back the oil down to 1 oz per pound. This is pretty much the general rule of most chandlers when making candles. A good temperature to add the fragrance is generally about 185 degrees and you need to stir stir very well to mix the oil and wax. I would stir for about 1 1/2 to 2 minutes. And when you are ready to pour, stir again and pour very slowly into your jar so as to avoid air pockets/bubbles. Wax can only hold so much oil per pound and it can also clog the wick thus making a pooly scented candle and not make a properly burning candle. Using this much oil could cause the candle to seep oil on top and even cause combustion/fire….And this undoubtedly is why there is not much scent. Also did you cure your candles? Meaning, they need to sit a week or 2 for the oil and wax to bind together.
Making candles and selling right away is very serious business. It takes a very very long time, even years to perfect and to sell to the public or a fund raiser by just making a few candles is not something I would recommend for any novice. Different fragrances used take different size wicks and they need to be tested each candle and burned for testing purposes right down to the very end of your burn cycle. If you use an lx 16 wick for example on 1 fragrance in the particular jar you use, if might not work in a lighter weight fragrance. This would need a smaller wick. Candle making is all about testing, testing and testing. It is not an instant over night process but months and months or years. Also deep melt pools with high flames can be a fire hazard. There is so very much to learn about candle making. Joining a candle forum is a recommendation to learn about the process I highly recommend. To try and sell to the public after making a few candles I would definitely not recommend and especially a a fund raiser makes me shudder for someone just learning and thinking they are good enough to sell as believe me, they are not. You need insurance, caution labels, proper labels on jars with company name to keep your butt covered.
Candle making is fun and I love it. Enjoy it. I didn't put this post up to offend anyone. I just tried to make suggestions to help and explain the proper ways to go about. Thankyou and everyone enjoy!
Thanks for offering your suggestions–there's always room for learning and improvement in any venture!
This easy guide to making soy wax candles is fabulous. I have made quite a few in the past 6 months and have also managed to sell some of them ! As you say they make the perfect gift and they are wonderful to have in the home. You can make them for every room and when they burn the smell is just divine. Thank you
Thank you so much for the positive feedback! I'm so glad you've had such great success, and I'm so glad I could help!
Joy, Thank you so much for your helpful and clear instructions! My son and I are trying our hand at candle-making to fund a service trip for ourselves. It's been really fun for both of us! I also used supplies from candlescience, specifically the Golden Brands 464 wax, and have really liked them. I'm getting ready to order more now to keep experimenting.
I am getting pock marks and craters on my candles, so continue to experiment with temperatures and cooling. It gets confusing, because it seems everyone has a different opinion. Fortunately, I have a heat gun from another project and am going to try and smooth the tops with that today.
Your tip about using the clothes pins was creative and brilliant! That's worked really well for me, and I've even been clipping the "loose" end of the wick into the clip itself to hold it taut and straight while the candles cool.
Thanks again for taking the time to post your detailed, helpful directions! You've made the beginning steps much easier for me!
Naomi
Thank you so much, Naomi! I'm so glad the instructions were helpful to you!
I know what you mean about how confusing it can be to get the glitches worked out–it does seem like everyone has a different opinion and even different instructions when it comes to candle-making. There are so many variables to consider.
That's sweet that you and your son are enjoying the experience together!
I love this instructions! The candles burned so amazing when I followed these instructions. Question: I followed candlescience (same oils I used) instructions from their website, the third time I made candles, and they tell you to add the fragrance in at 185. I do not feel that the fragrance was as strong as the ones I made following your directions. Any input as to why?
Thank you, Blanca! I'm so glad they worked out well for you! I really don't know why the fragrance wouldn't be as strong when you followed the other instructions. Sorry I can't be of more help–I just found this method works for me, so I keep doing it this way! 🙂