This post may contain affiliate links. Please read our disclosure policy.
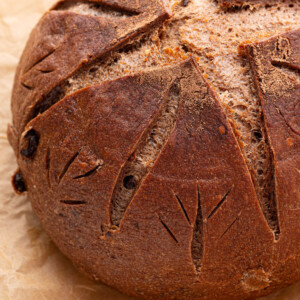
This sourdough chocolate chili bread is a bold, artisan-style loaf that brings together rich chocolate and a subtle chili heat in every chewy bite. The flavor combo is unexpected yet perfectly balanced. It’s sure to impress dinner guests or spice up your weekly sourdough rotation.

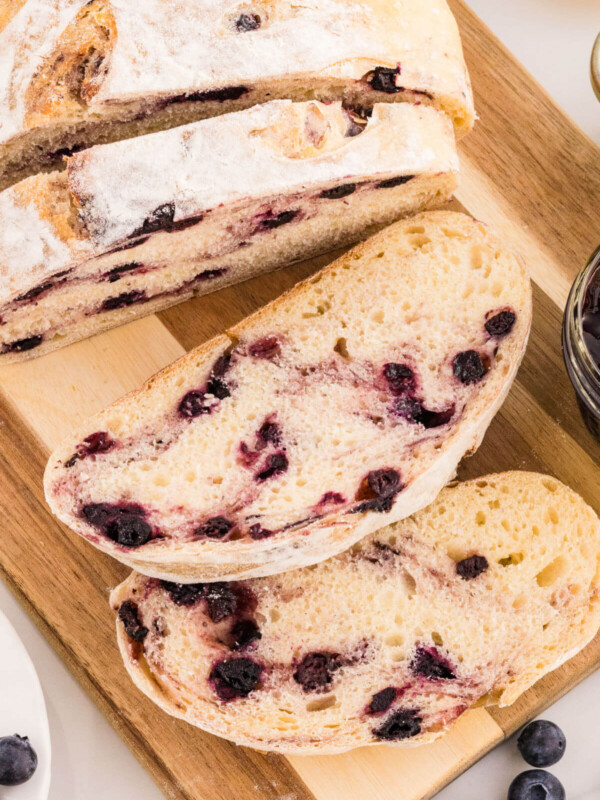
Once I mastered my go-to everyday sourdough bread, I was completely hooked on the beautiful, slow process of long-fermented dough. For more long-fermented sourdough, try everything bagel sourdough bread, sourdough English muffin bread, blueberry cream cheese sourdough bread, and soft sourdough sandwich bread.
If you love bold, flavorful bakes, this chocolate chili loaf brings it all—chewy crust, tangy depth, and a little spicy-sweet twist that makes every slice feel like something special.
Why You’ll Love Sourdough Chocolate Chili Bread
- Gut-friendly long ferment: Thanks to the natural fermentation process, this loaf is easier to digest and full of sourdough’s signature tang and nutrition. Need to make a starter from scratch? Check out my simple process for making your own sourdough starter.
- Unique and fun variation: This recipe takes artisan sourdough to the next level with dark chocolate, chili flakes, and just a touch of sweetness for a bold, bakery-worthy twist.
- Flexible schedule: Life gets busy! This dough can be cold-proofed in the fridge for up to 3–4 days, so you can bake it fresh when the timing works best for you.
Ingredients
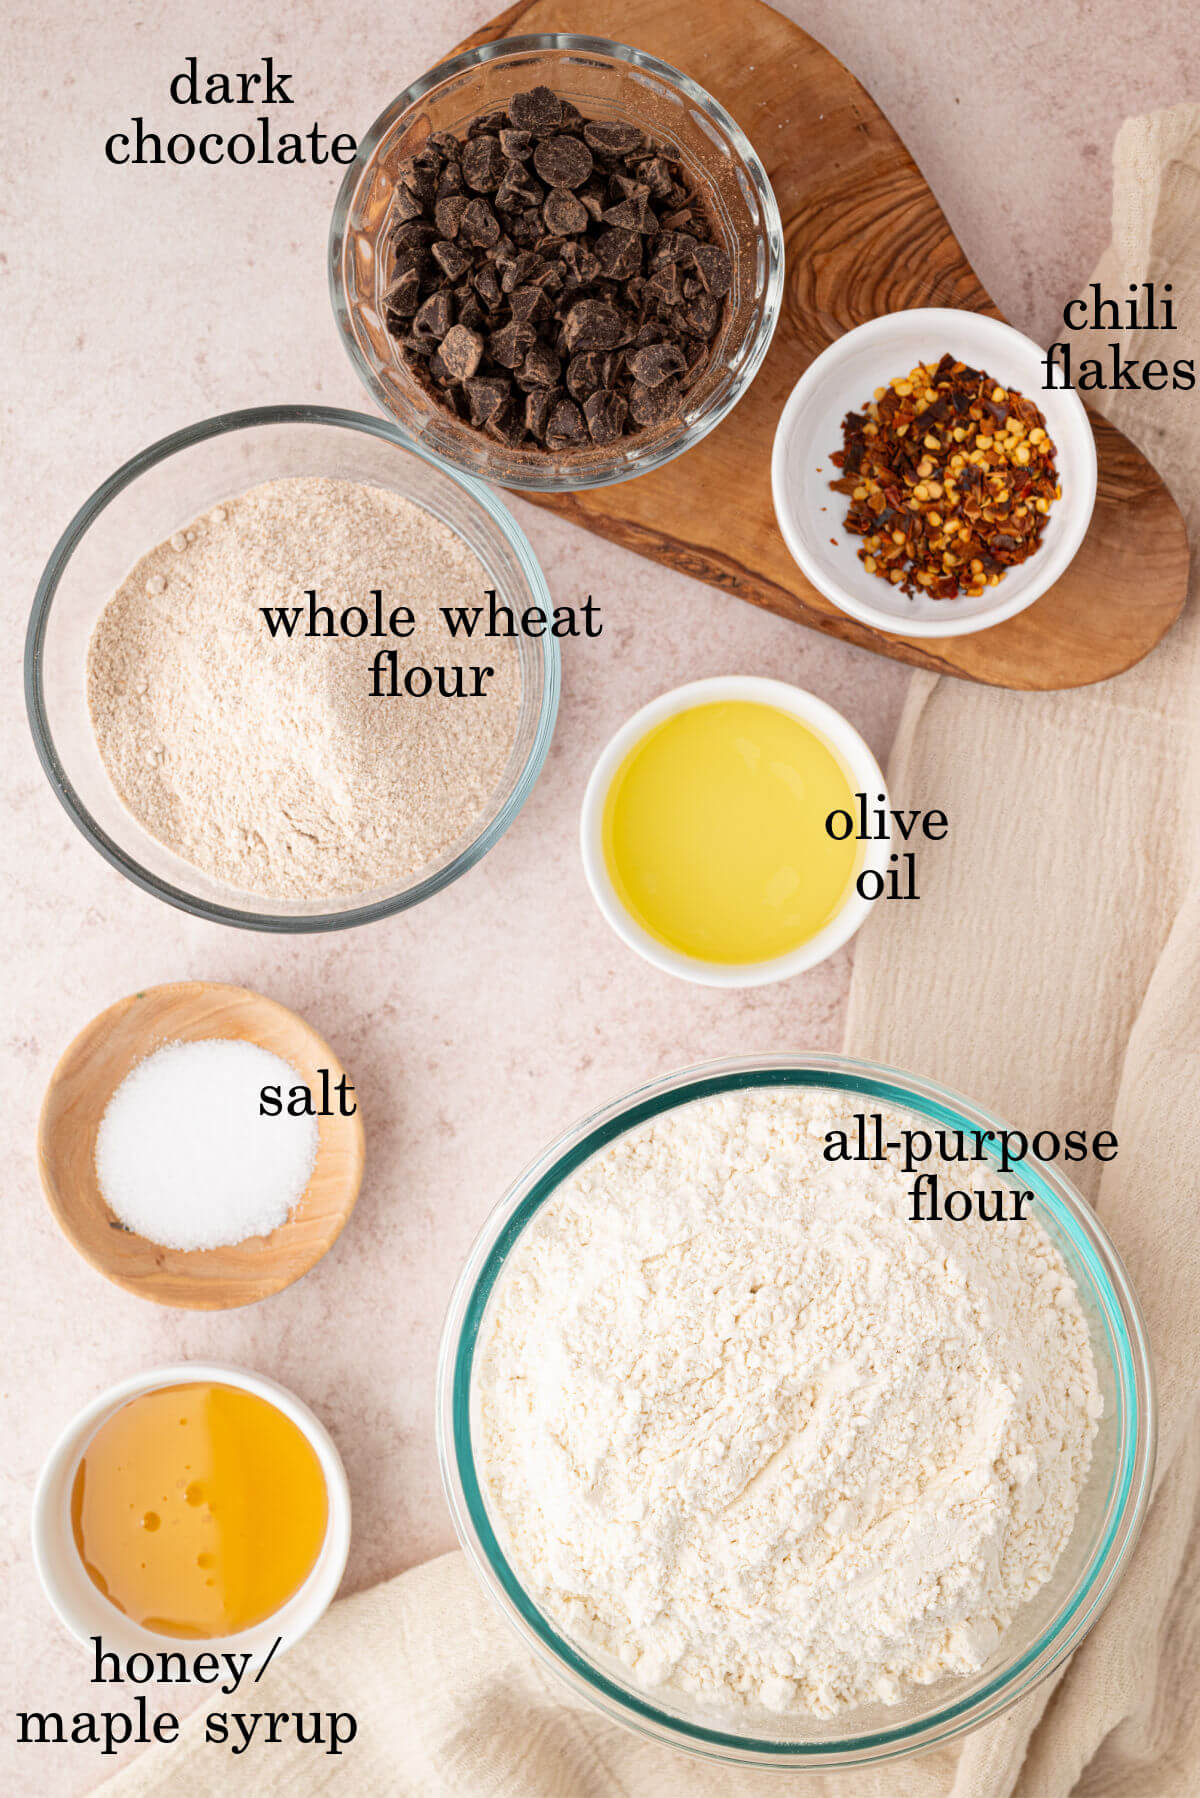
Find the full list of ingredients, amounts, and instructions in the recipe card at the bottom of this post.
- Levain: This is just a mini preferment made by mixing your active sourdough starter, water, and flour the night before. It gives the dough a head start on fermentation and helps it rise beautifully.
- Mix of all-purpose and whole wheat flour: The all-purpose keeps the crumb tender, while the whole wheat flour adds flavor depth and hearty texture.
- Dark chocolate: Use high-quality dark chocolate, chopped or grated. You can experiment with bittersweet or even a touch of cocoa powder for a more intense flavor.
- Chili flakes: Adds subtle heat that pairs perfectly with the chocolate. Use mild chili flakes for warmth, or swap in cayenne or chipotle for a bolder kick.
- Honey or maple syrup: Just a touch adds sweetness to balance the bitterness of the chocolate and spice from the chili—but feel free to leave it out for a more savory loaf.
- Olive oil: Optional, but it helps create a softer texture.
Equipment
- Stand Mixer (optional)
- Bench Scraper
- Kitchen Scale
- Dutch Oven
- Proofing Basket
- Parchment Paper
- Bread Lame
How to Make Sourdough Chocolate Chili Bread
Here are the step-by-step instructions for making Sourdough Chocolate Chili Bread.
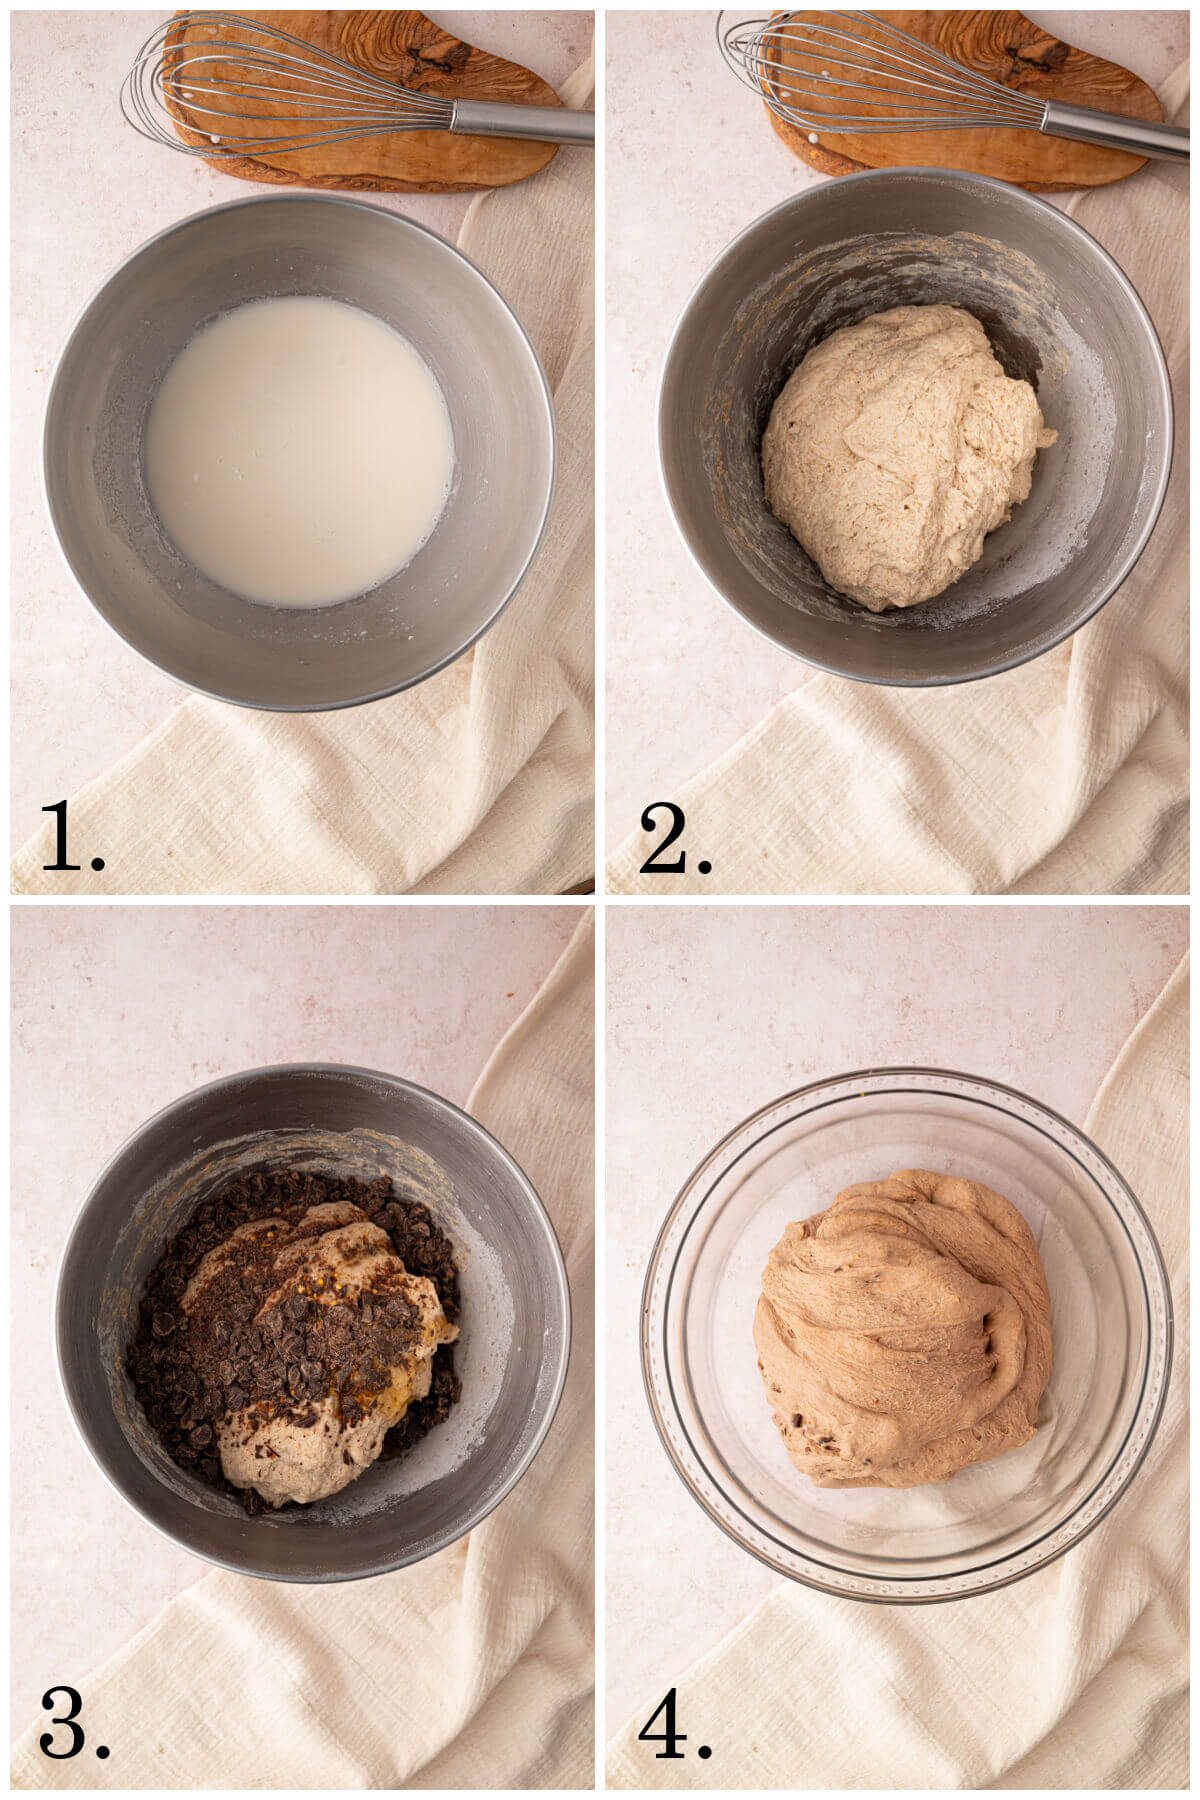
Step 1: Prepare the levain
The night before baking, mix 17 g starter (active), 67 g water, and 67 g flour in a small bowl (Photo 1). Stir until smooth, cover, and let it sit at room temperature for 8–12 hours (or overnight) until bubbly and expanded.
Step 2: Mix the dough
In a large bowl or stand mixer, combine the 400 g water and prepared levain. Stir well to dissolve. Add 500 g all-purpose flour, 100 g whole wheat flour, and 10 g salt. Mix until a shaggy dough forms, about 2–3 minutes (Photo 2).
Step 3: Add chocolate and chili
Add the chopped dark chocolate, chili flakes, and optional honey or maple syrup (Photo 3). Mix again until everything is evenly distributed (Photo 4).
Step 4: Autolyse rest
Cover and let the dough rest for 30 minutes. This helps the flour hydrate and improves texture.
Step 5: Knead the dough
Knead by hand or mixer for 5–10 minutes, until the dough is smooth and elastic. Add olive oil during kneading if using—it will soften the crumb.
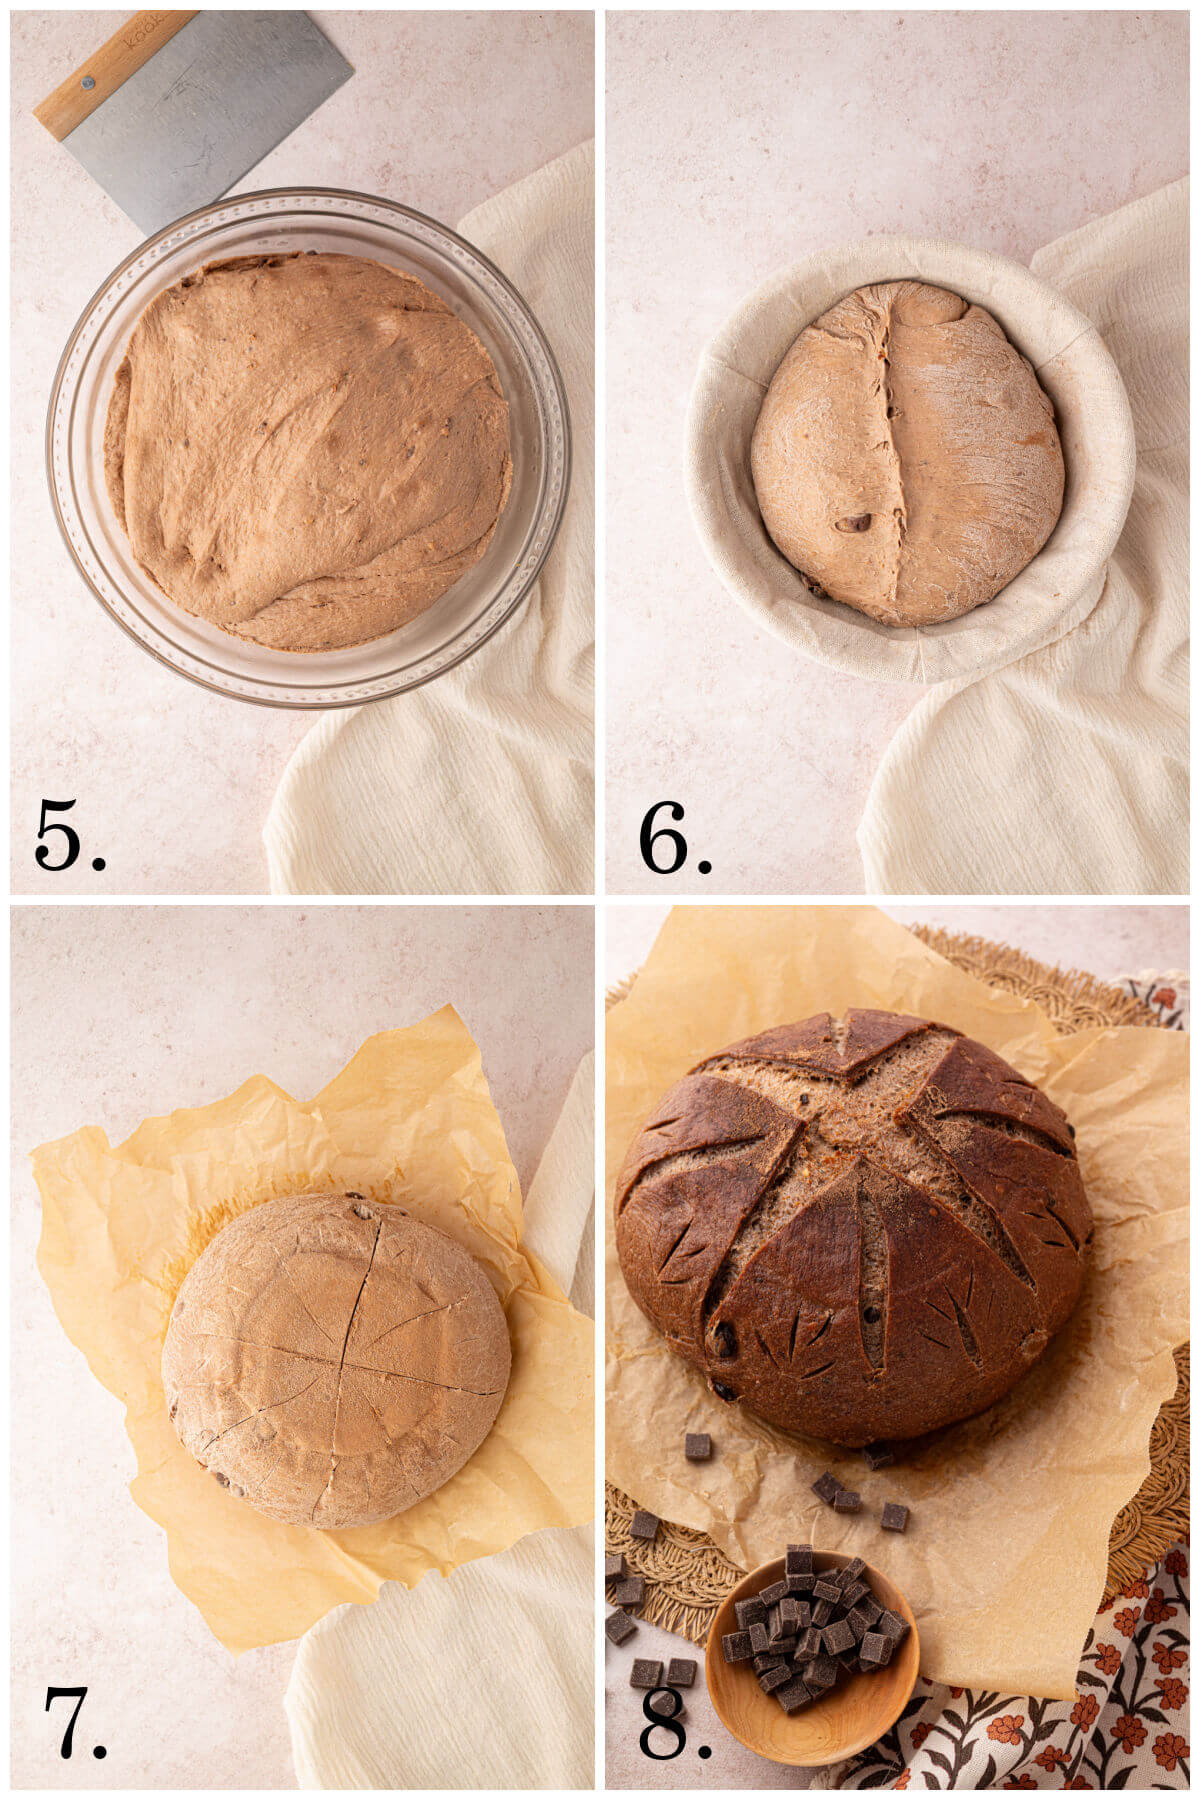
Step 6: Bulk fermentation with folds
Cover with a damp towel and let the dough rise at room temperature for 4–6 hours, or until doubled. During the first 2 hours, perform 3–4 sets of stretch and folds, spaced about 30 minutes apart (Photo 5).
Step 7: Pre-shape and rest
Turn the dough onto a lightly floured surface. Gently shape it into a round or oval, folding the edges into the center. Let it rest for 20 minutes uncovered.
Step 8: Final shaping
After resting, shape the dough into a tight boule or batard, depending on your preferred loaf shape. Place into a well-floured banneton or on a parchment-lined baking sheet (Photo 6).
Step 9: Final proof or cold ferment
Let the dough rise for 1–2 hours at room temperature, until puffy and slightly domed. Or, for a longer ferment and deeper flavor, refrigerate the shaped loaf for up to 3–4 days before baking.
Step 10: Preheat the oven and Dutch oven
When ready to bake, preheat the oven to 450°F (245°C) and place your Dutch oven inside to preheat for at least 30 minutes. Score the dough with a simple x or the whatever design you prefer.
Step 11: Bake
Carefully transfer the proofed dough (with parchment) to the hot Dutch oven. Add 2–3 ice cubes under the parchment for extra steam, cover with lid, and bake for 20 minutes. Remove the lid and bake another 25–30 minutes, until deeply golden and crusty.
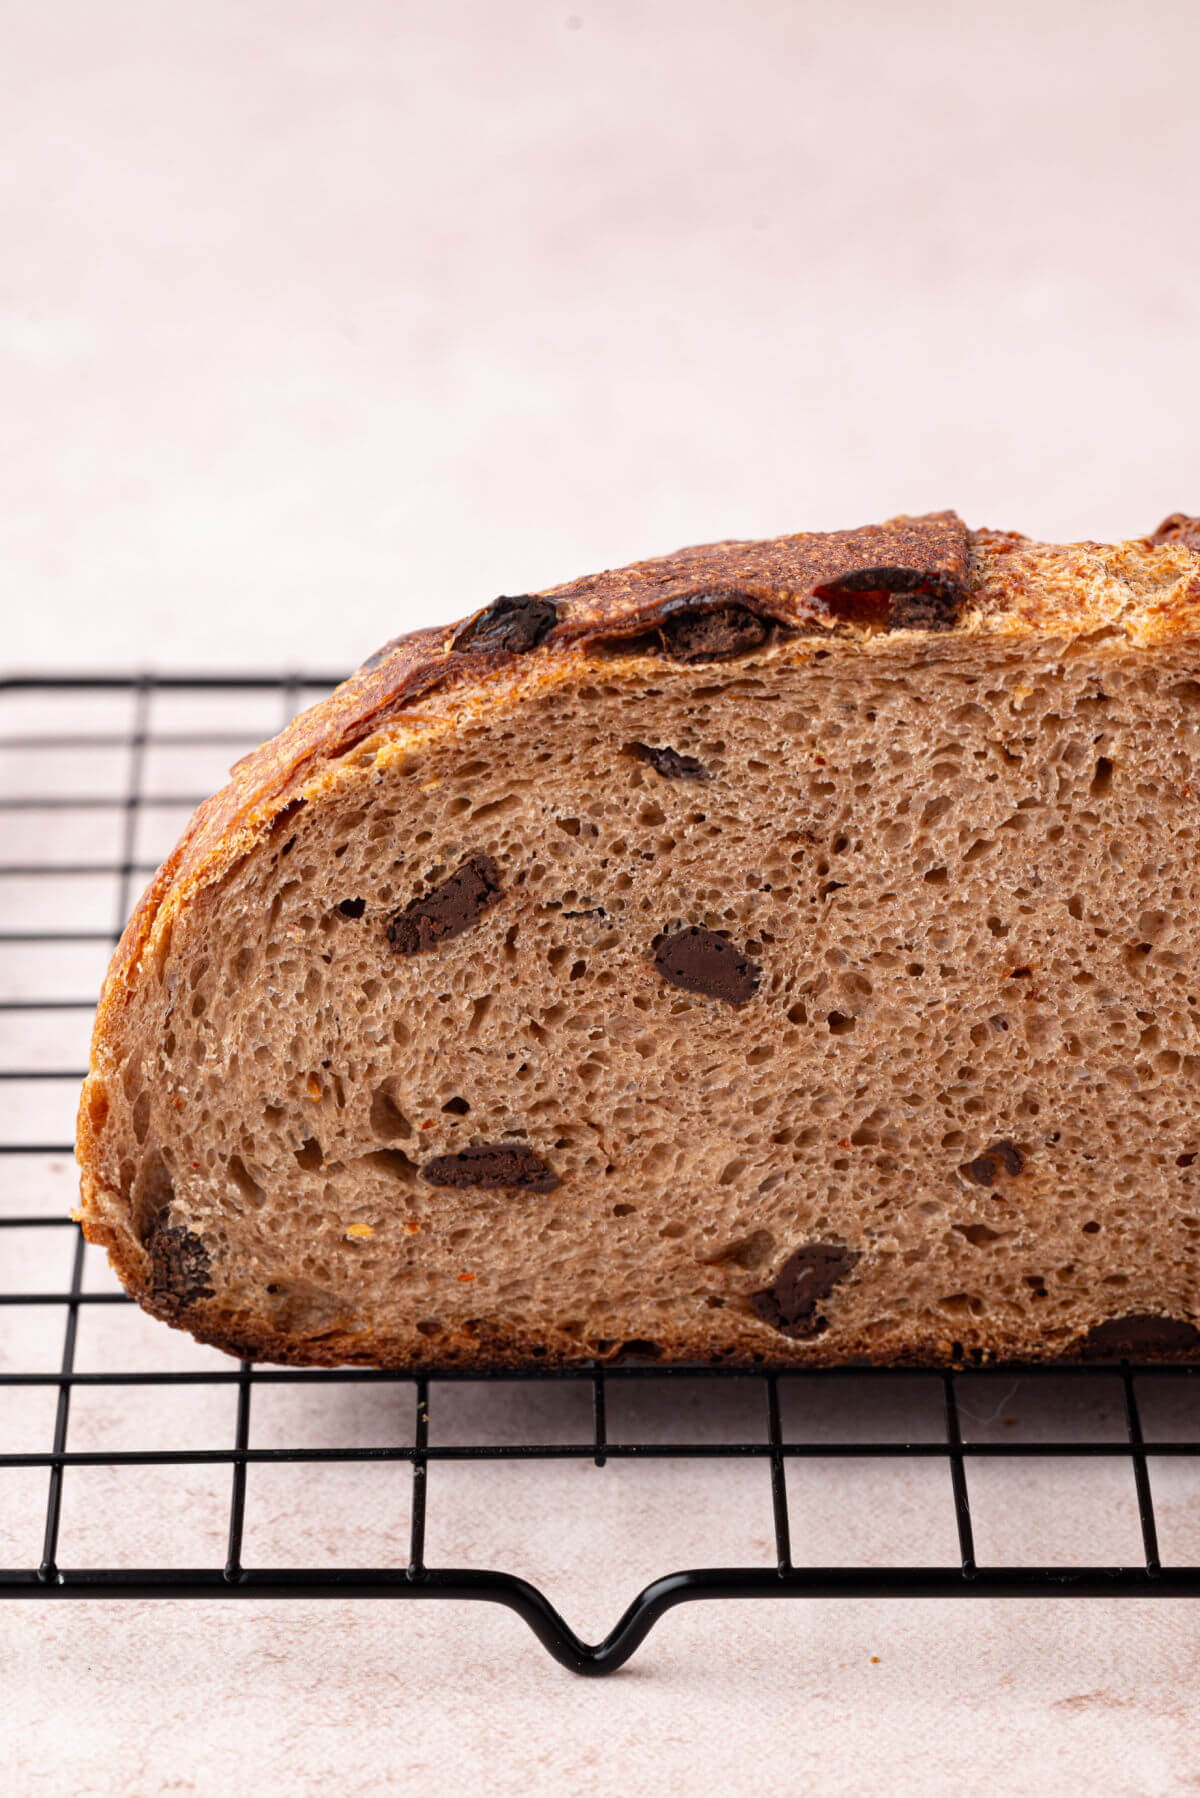
Step 12: Cool completely
Let the bread cool on a wire rack for at least 1 hour before slicing. This helps the crumb set properly and enhances the flavor.

How To Store
Best eaten within 2-3 days. Store in a bread box, bread bag, or wrap in a towel to maintain the crust.
Tips
- Chocolate: Use high-quality dark chocolate (70% cocoa or higher) for the best flavor. You can also add a small amount of cocoa powder to intensify the chocolate notes.
- Chili: Adjust the chili flakes to your preferred spice level. Use a milder chili for warmth, or go bold with cayenne or chipotle for a smoky, spicy kick.
- Sweetness: Honey or maple syrup adds a subtle sweetness that balances the heat and deepens the flavor. Skip it for a more savory, bitter-dark chocolate style loaf.
- You can score the top of the dough right before popping the Dutch oven into the oven if desired.
- Using warm water when combining the water and flour will speed up the fermentation process. Just make sure it isn’t too warm that it could kill the starter. Using lukewarm water is the best way to boost the bulk fermentation speed.
Recipe FAQs
Yes! Dark chocolate (70% or higher) works best, but bittersweet or even a hint of unsweetened cocoa powder can deepen the flavor.
Mild red chili flakes provide warmth, while cayenne or chipotle gives more spice and smokiness.
Yes! This sourdough recipe can be baked on a pizza stone or baking sheet with a tray of hot water in the oven for steam.

More Sourdough Recipes
- Everything Bagel Sourdough Bread
- Sourdough Biscuits
- Blueberry Cream Cheese Sourdough Bread
- Sourdough Focaccia
- Sourdough Hot Cross Buns
If you make this recipe and enjoy it, please leave a comment with a 5-star recipe rating and let me know! Thank you so much!
Sourdough Chocolate Chili Bread
Equipment
Ingredients
Levain:
- 17 grams active sourdough starter
- 67 grams water
- 67 grams all-purpose flour
Dough:
- 400 grams water, room temperature
- 500 grams all-purpose flour
- 100 grams whole wheat flour, for added depth of flavor
- 10 grams salt
- 100 grams dark chocolate, chopped into small pieces or roughly grated
- 1-2 teaspoons chili flakes, adjust based on spice preference
- 20 grams honey or maple syrup, optional, for a hint of sweetness
- 25 grams olive oil, optional, for a slightly softer texture
Instructions
- Prepare the Levain (Sourdough Starter): The night before you plan to bake, mix the 17g sourdough starter, 67g water, and 67g flour in a bowl. Stir until fully combined, then cover and let it sit at room temperature for 8-12 hours or overnight.
- Mix the Dough: In a stand mixer bowl or large mixing bowl, combine the 400g water and the levain. Stir to dissolve the levain into the water.
- Add the 500g all-purpose flour, 100g whole wheat flour, and 10g salt. Mix until the dough comes together (about 2-3 minutes in the stand mixer, or you can use a bench scraper or your hands to mix).
- Once combined, add the 100g chopped dark chocolate, 1-2 teaspoons of chili flakes, and the optional honey or maple syrup. Mix until the chocolate and chili are evenly distributed throughout the dough. (2-3 minutes)
- Autolyse: Let the dough rest, covered, for 30 minutes. This is called the autolyse phase, which helps the flour absorb the water and improves the dough’s texture.
- Knead the Dough: After the autolyse, knead the dough for 5-10 minutes, either by hand or using a stand mixer. The dough should be smooth and elastic but slightly sticky. Add olive oil during this process if you want a softer crumb.
- Bulk Fermentation: Cover the dough and let it rise at room temperature for 4-6 hours, or until it has doubled in size. Perform 3-4 rounds of stretch and folds every 30 minutes for the first 2 hours.
- Shape the Dough: Once the dough has risen, gently turn it out onto a floured surface. Pre-shape the dough into a round or oval by folding the edges into the center and letting it rest for 20 minutes.
- After resting, shape the dough into a tight boule or batard, depending on your preferred loaf shape.
- Final Proofing: For same day bake: place the shaped dough into a well-floured banneton (proofing basket) or on a parchment-lined baking sheet. Cover it with a cloth and let it rise for 1-2 hours, or until it has puffed up and holds its shape.
- For additional depth of flavor, or for sake of time, cover the shaped dough in its proofing basket, and refrigerate it overnight or until you have time to bake it, waiting no more than 3-4 days.
- Preheat the Oven: When you’re ready to bake, preheat your oven to 450°F (245°C). Place your Dutch oven in the oven to preheat as well.
- Bake: Once the dough has finished proofing, carefully transfer it to a preheated Dutch oven. For extra steam, slip 2-3 ice cubes between the parchment and the Dutch oven and cover it with the lid. Bake for 20 minutes, then remove the lid and bake for another 25-30 minutes, or until the loaf is deep golden brown and sounds hollow when tapped on the bottom.
- Cool: Let the loaf cool on a wire rack for at least 1 hour before slicing to allow the crumb to set.
Notes
- Chocolate: Use high-quality dark chocolate (70% cocoa or higher) for the best flavor. You can also experiment with adding a small amount of cocoa powder to the dough for a more intense chocolate flavor.
- Chili: Adjust the chili flakes based on your heat preference. You can use a milder chili for just a hint of heat, or a spicier variety like cayenne if you want more kick.
- Sweetness: The optional honey or maple syrup adds a subtle sweetness that balances the heat of the chili and the bitterness of the chocolate. You can leave it out for a more savory loaf.
- Bake Without a Dutch Oven: If you don’t have a Dutch oven, this recipe can be baked on a pizza stone or baking sheet with a tray of hot water in the oven for steam.
Nutrition
Nutrition information is automatically calculated, so should only be used as an approximation.


Rich, savory, and deeply satisfying, this loaf combines hearty chili flavors with tender sourdough crumb into a comforting bread experience.