This post may contain affiliate links. Please read our disclosure policy.
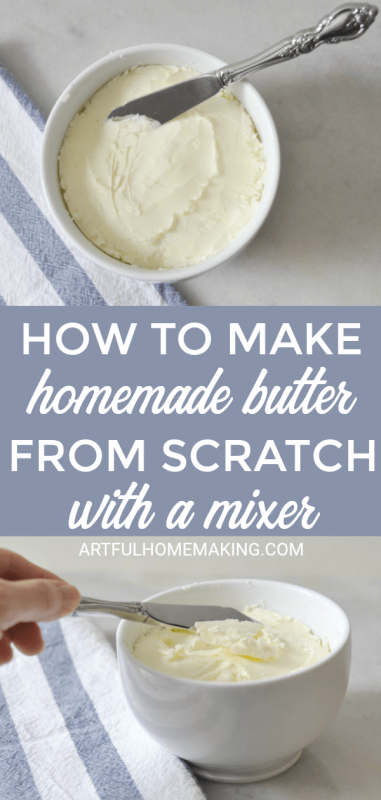
Learn how to make butter with a mixer the easy way! It’s actually pretty simple to make your own homemade butter. All you need is some heavy cream and a mixer.
The Pioneer Spirit
For years I’ve been fascinated with learning how to make everything from scratch. There’s just something about the do-it-yourself lifestyle that intrigues me.
This post contains affiliate links, which means I may make a small commission at no extra cost to you. Read my disclosure here.
Especially after reading the Little House on the Prairie books years ago, I wanted to know how to do everything that Ma did (and more!).
I wanted to make my own bread from scratch, can my own jams and jellies, and make yogurt.
Not because I had to make these things myself, from scratch. I just wanted the thrill of knowing I could.
Shortly after getting married, I started teaching myself how to do all these things. I read books and watched videos, learning all I could.
And once I learned a certain skill, I wanted to share that joy with my children, if possible.
Watch the Video How to Make Butter from Scratch
How to Make Butter
The first time I made my own butter, my kids were little. I found some instructions for making butter by shaking the cream in a Mason jar.
To make it this way, all you do is put your cream in the Mason jar, and shake, shake, shake!
After a while, the cream starts to thicken and turn into butter.
My kids thought this was so much fun!
They loved the fact that they could make butter just like Laura’s mom in the “Little House Books.”
Then we found this vintage butter churn, which allows you to make butter in as little as ten minutes! My kids love using this thing!
One of my children in particular regularly asks to make butter with this. He thinks it’s a special treat!
If you’re looking for a fun “homesteading” type of activity for your kids, I highly recommend this churn! Not only is it fun, but it looks so cute and vintage-y in the kitchen.
How to Make Butter with a Mixer
Even though the other methods for making butter work well (and they’re great for kids), I wanted to be able to make a large quantity of butter at a time.
And, it’s really pretty simple to make butter with your mixer!
All the recipes I’ve seen recommend using a stand mixer, but I’ve never actually used ours for making butter.
A regular hand-held mixer works just fine for this.
It does take a while to get the cream to the right texture, but it’s a pretty simple process if you’re willing to wait.
Supplies Needed
All you need to make your own homemade butter are the following supplies:
- Mixer (hand-held or stand mixer)
- fine mesh strainer or cheesecloth
- rubber spatula
- 1 quart of heavy whipping cream or cream from raw milk
- salt, to taste
Instructions
- Pour the cream into a large mixing bowl (or the bowl of a stand mixer).
- Beat the cream at a medium/high speed. Cover the bowl with a kitchen towel if it’s spattering out of the bowl.
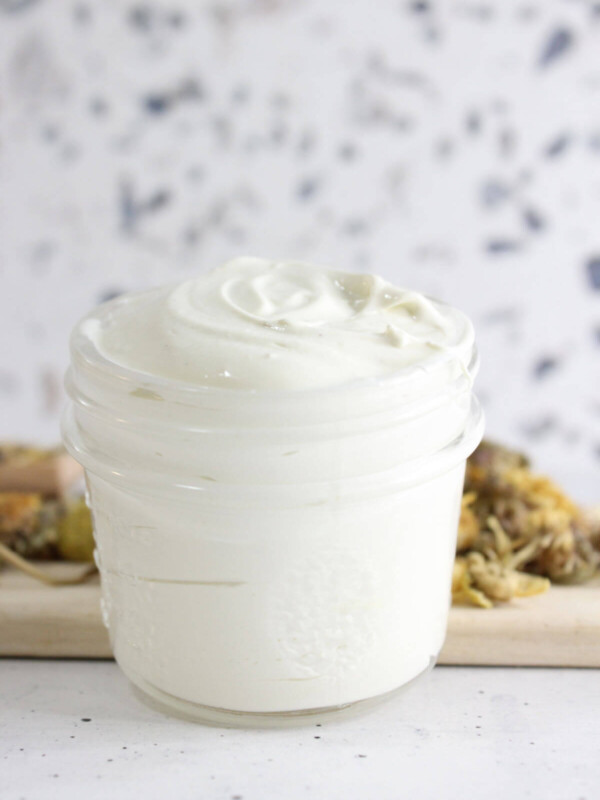
- Continue mixing until the cream thickens and starts to separate into chunks of butter and buttermilk. This takes quite a bit of mixing before you get to this point.
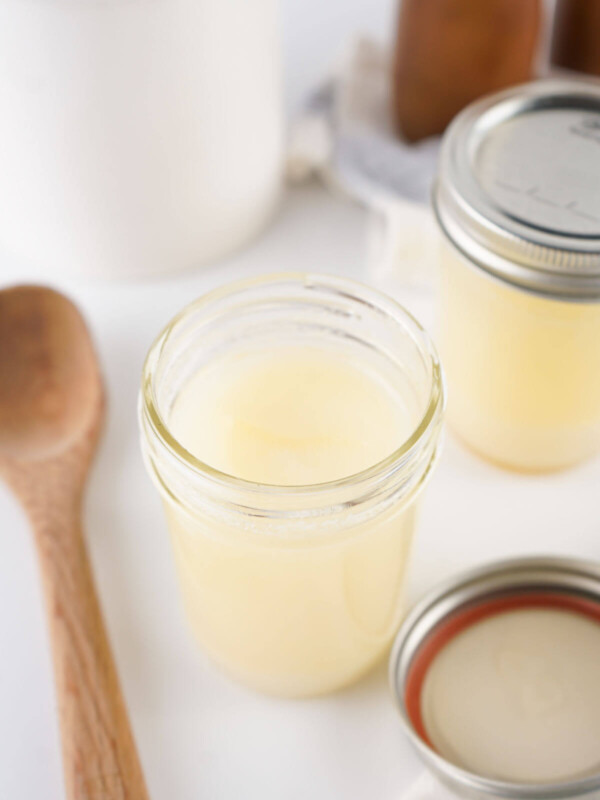
- Drain the buttermilk off of the butter, using a fine mesh strainer or a piece of cheesecloth draped over a bowl. Save and refrigerate the buttermilk for use in recipes.
- Cover the butter in the bowl with a bit of cold water. Then mix it again with your mixer. Pour off the cloudy water, and add fresh water to the bowl. Mix again, and continue this until the water remains clear. Pour off any excess water.
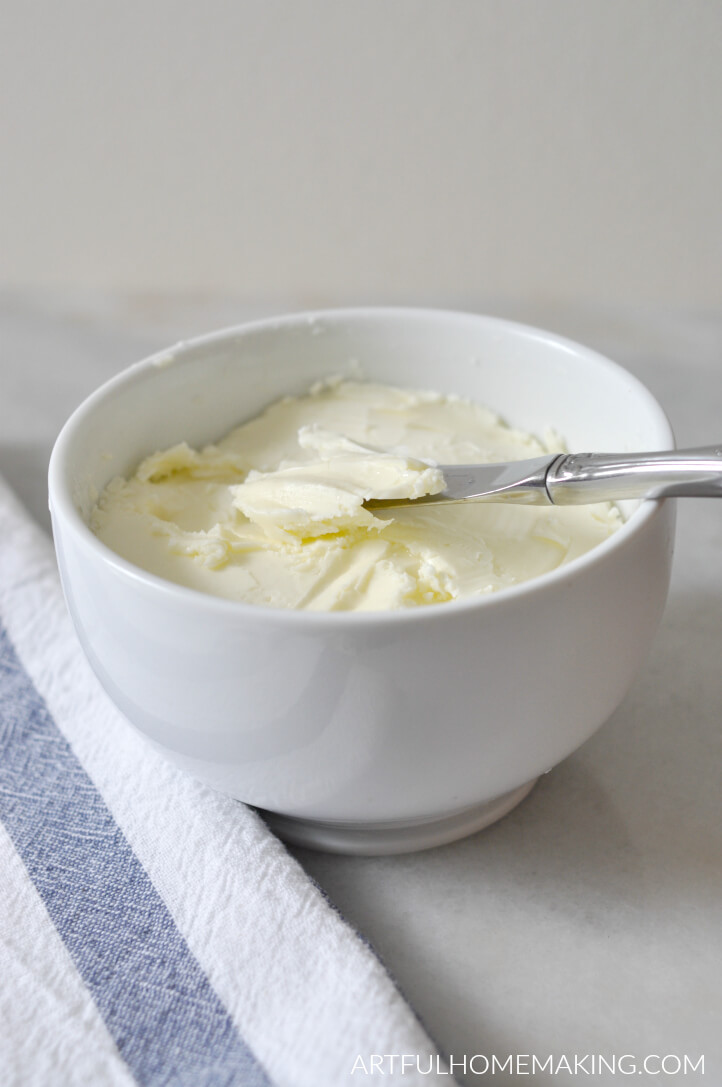
- Add the salt, if using. We use about 1/2 teaspoon of salt. Mix the salt in with your mixer.
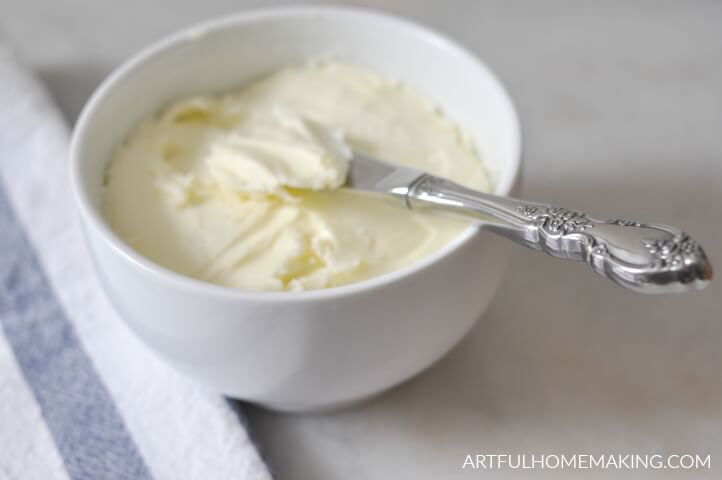
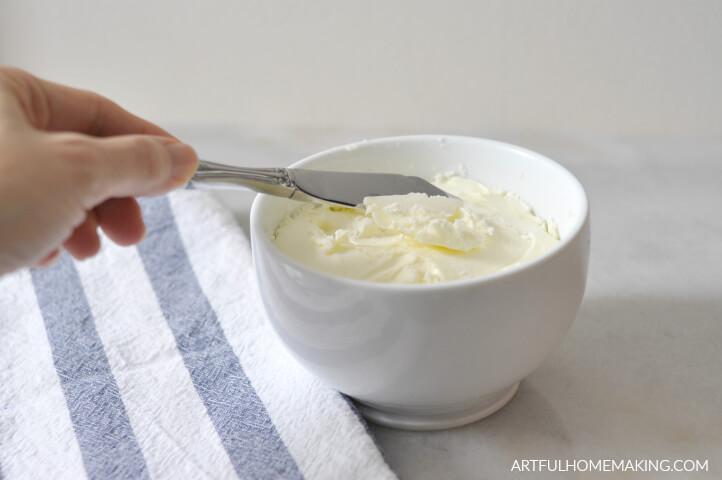
- Drain any remaining excess water off the butter, using a rubber spatula or cheesecloth to squeeze out the water.
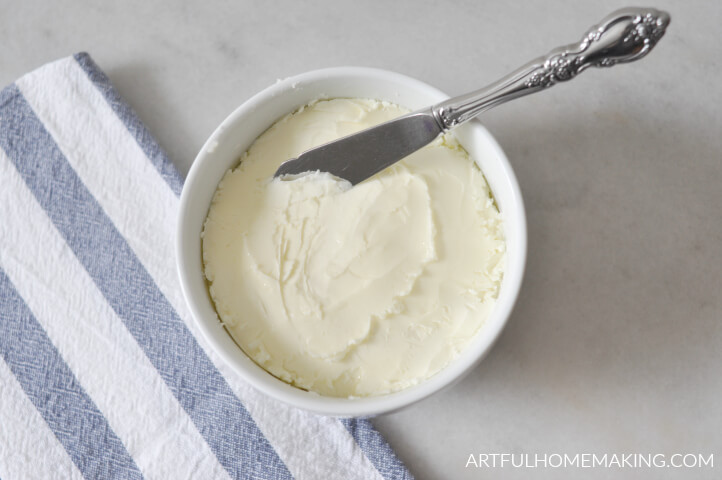
- Store your completed butter in the refrigerator for a week or two.

How to Make Butter with a Mixer
Equipment
- Mixer (hand-held or stand mixer)
- fine mesh strainer or cheesecloth
Ingredients
- 1 quart heavy cream or cream from raw milk
- salt, to taste
Instructions
- Pour the cream into a large mixing bowl (or the bowl of a stand mixer)
- Beat the cream at a medium/high speed. Cover the bowl with a kitchen towel if it's spattering out of the bowl.
- Continue mixing until the cream thickens and starts to separate into chunks of butter and buttermilk. This takes quite a bit of mixing before you get to this point.
- Drain the buttermilk off of the butter, using a fine mesh strainer or a piece of cheesecloth draped over a bowl. Save and refrigerate the buttermilk for use in recipes.
- Cover the butter in the bowl with a bit of cold water. Then mix it again with your mixer. Pour off the cloudy water, and add fresh water to the bowl. Mix again, and continue this until the water remains clear. Pour off any excess water.
- Add the salt, if using. We use about 1/2 teaspoon of salt. Mix the salt into the butter with your mixer.
- Drain any remaining excess water off the butter, using a rubber spatula or cheesecloth to squeeze out the water.
- Store your completed butter in the refrigerator for a week or two.
Related Posts:
Pin This Post for Later
This post contains affiliate links, which means I make a small commission at no extra cost to you. Read my disclosure here. Sharing here.


Making butter from scratch is surprisingly easy and so much fun—the fresh, creamy flavor is totally worth the effort! Kids especially love helping with this project.
How much butter does this recipe make.?
I never remember to measure how much it makes (I’ll try to remember to do that next time!), but I think it should make about a pound.