This post may contain affiliate links. Please read our disclosure policy.
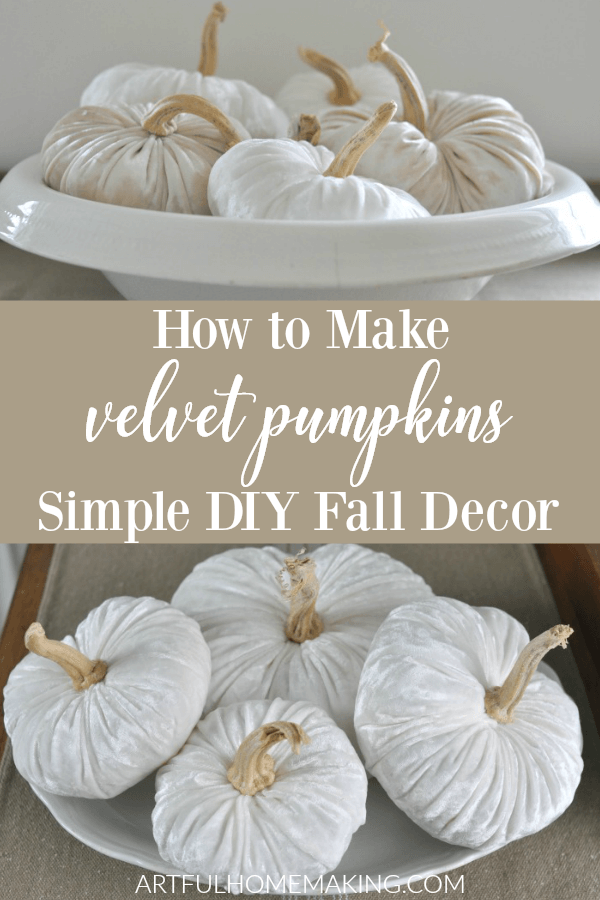
How to make velvet pumpkins to decorate your house this fall. This is a simple tutorial for making your own velvet pumpkins with real pumpkin stems!
Even though it’s technically still summer, it’s starting to look like fall at our house! Recently, I shared a tutorial for burlap pumpkins and a fall leaf book page banner.
What I love about these projects is that they add a touch of fall without going overboard since they’re made with neutral colors.
If you love neutral fall decor, you’ll love today’s tutorial! (And if you prefer color, you can make these any color you like!)
I’ve been wanting to learn how to make velvet pumpkins for a long time, so this was a very satisfying project to complete. And, they’re really simple to make. You can make a whole pile of them in an afternoon!
The process is pretty much exactly the same as the burlap pumpkin tutorial, but the velvet gives them a completely different, more elegant look.
How to Make Velvet Pumpkins
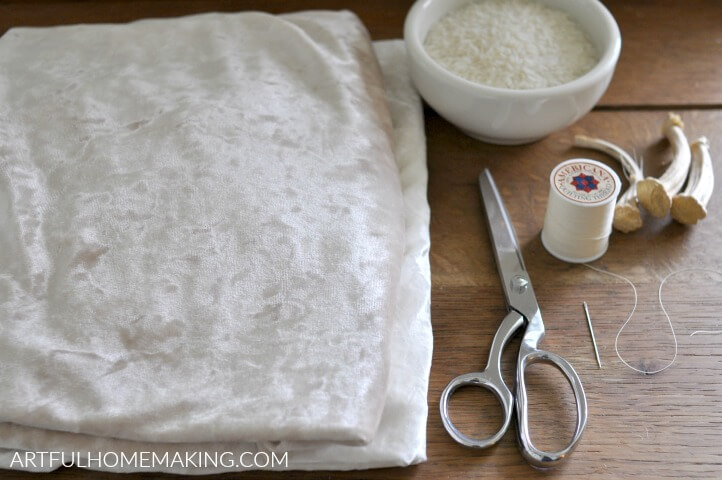
Here’s what you’ll need to make your own DIY velvet pumpkins.
Supplies Needed:
Affiliate links included below, which means I may make a small commission at no extra cost to you. Read my disclosure here.
- stretch velvet (I used off-white and natural)
- pumpkin stems (or dried stems from other squashes) find real pumpkin stems for sale here
- hand quilting thread
- sewing needle (any needle will work, but a longer one like this one works best)
- rice
- poly-fil
- tape measure
- scissors
- glue gun and glue sticks
1. Cut out a circular shape.
First, you’ll need to cut out a circle. Don’t worry about making it perfect. This is one craft where it really won’t matter!
I made my pumpkins 12″, 14″, and 16″ in diameter. If you can find something circular to trace that is the size you want, go ahead and use that. I couldn’t find anything big enough, so I just cut mine out freehand.
Here’s how I cut mine. First, I cut out a square that was about the size I wanted. The one in this example was 14″ x 14″.
Then, I just rounded the corners to make a circle shape.

2. Next, thread your needle with your heavy-duty thread.
You can use any sewing needle for this, but a longer one like this one will be easiest to work with when you go down through the center of the pumpkin (in a later step).
I have one of these longer needles (from when I made this doll years ago), but I couldn’t find it so I just used a regular one I had on hand.
The thread will need to be thick and sturdy enough that it doesn’t break as you cinch up the circle. I used a thread meant for hand quilting, which tends to be sturdy and thicker. You could also use upholstery thread.
The important thing is that your thread is thick enough that it won’t break when you pull on it to draw your circle closed.
I used a length of thread about 40″ long. Thread the needle and then make a knot at the end of your thread.
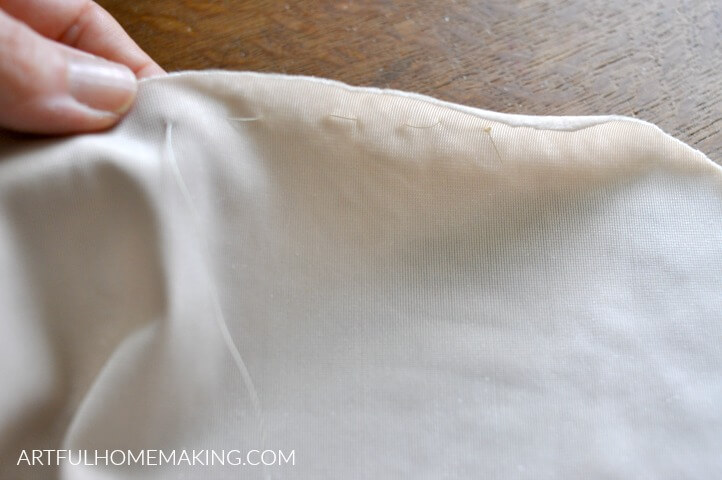
3. Sew a gathering stitch along the edge.
After you’ve threaded your needle, sew a large gathering/basting stitch about 1/2″ to 1″ away from the edge of your circle.
A basting stitch is just a very loose straight stitch that will allow you to pull the thread and cinch up the circle to make a little pouch. Make your stitches about 1/2″ to 1″ long.
I started on the wrong side of the fabric so that the knot will be hidden on the inside of the pumpkins.
Your stitches don’t have to be perfect either. You just need them to be loose enough to gather your circle into a pouch.
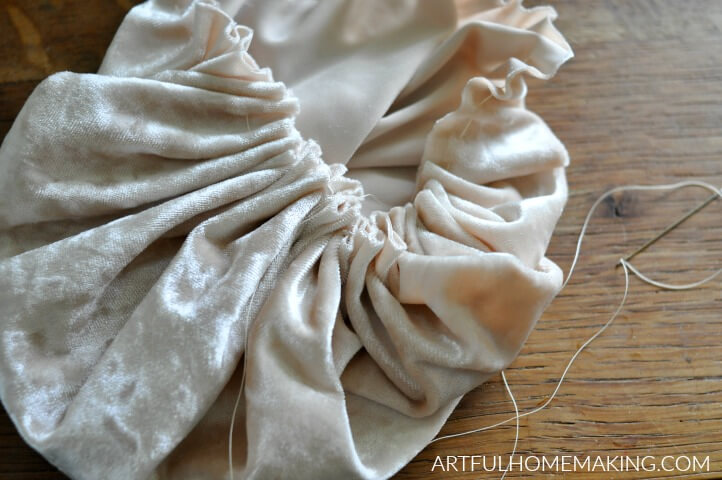
4. Cinch up the circle.
Now pull on your gathering stitch to cinch up the circle and make a little pouch. Leave an opening big enough to fill with rice and stuffing.
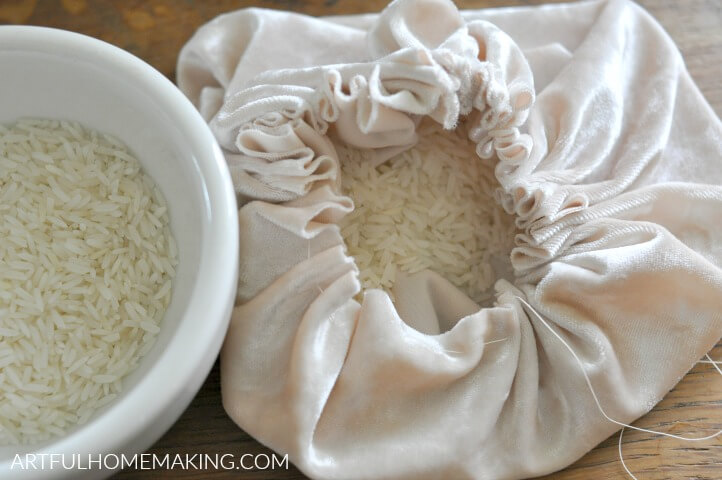
5. Add some rice.
Don’t cut the thread yet, just leave it hanging. Add some rice to the bottom of your pumpkin. I don’t measure mine, I just fill the bottom about 1/4 of the way full with rice.
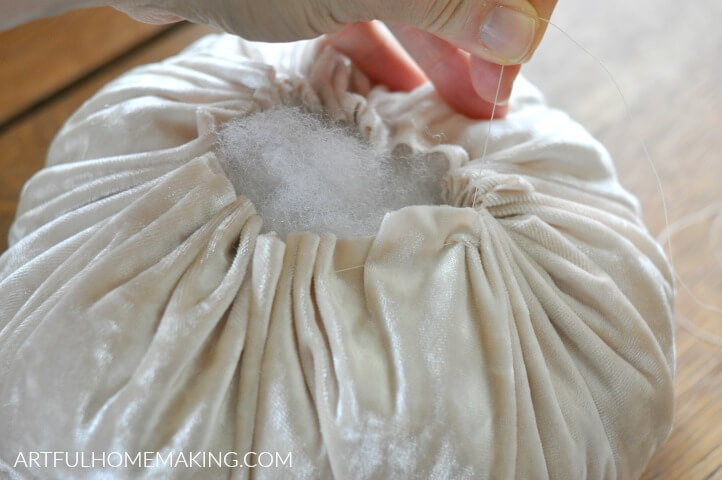
6. Stuff your pumpkin.
Now fill the pumpkin the rest of the way up with poly-fil. Pull on the gathering thread to close the opening.
7. Sew across the top.
Now it’s time to stitch the top of your pumpkin closed. To do this, just cinch your pumpkin tightly together by pulling on the gathering thread.
Then sew across the top several times to secure it. Put your needle in on one side and go across to the other side and catch the fabric in the stitching.
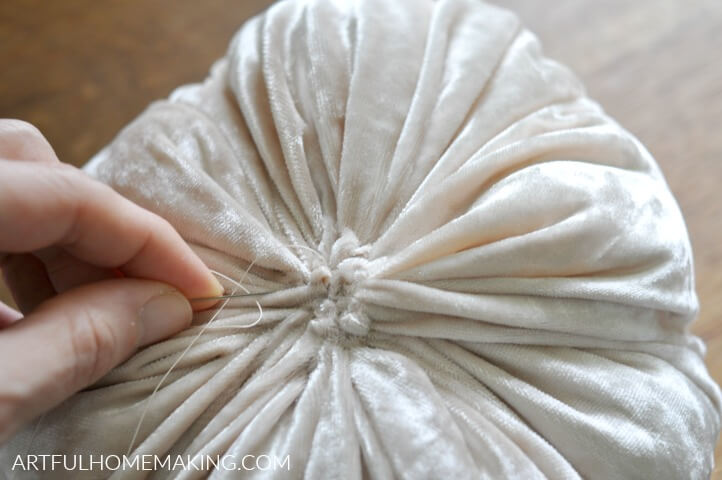
8. Sew down through the center.
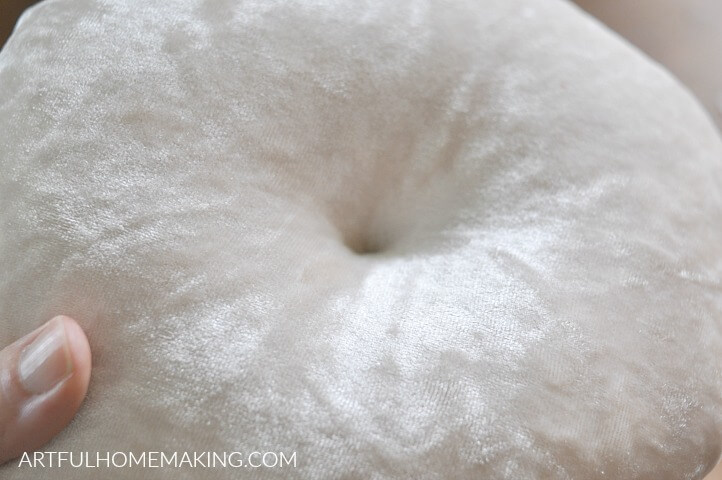
Now stick your needle straight through the center of the pumpkin at the top, and come out on the bottom end.
Stick your needle back up through the bottom and come up at the top. Pull the threads tightly. Do this several times to make an indentation at the top where your stem will go.
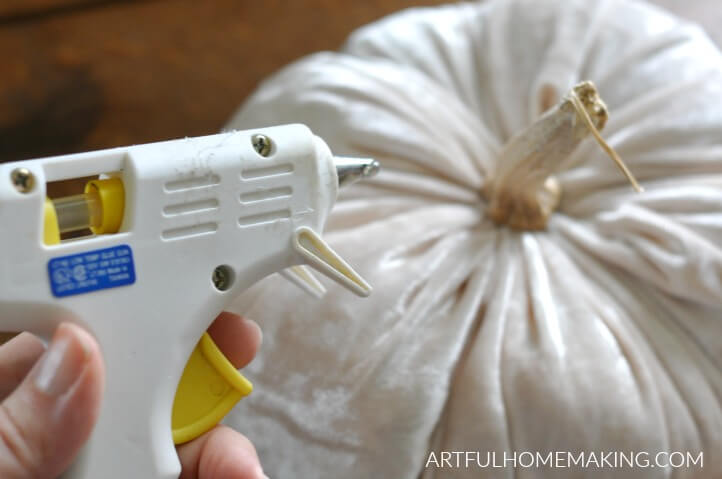
9. Finish sewing and glue on the stem.
After going through the center of the pumpkin several times (in the previous step), end up at the top of the pumpkin and tie off your thread and cut it off.
Using your glue gun, glue a pumpkin stem on the top of the pumpkin. Don’t use too much glue, or it will ooze out and show. Just use a small amount and hold it on for a few seconds so it adheres to the velvet securely.
I used real pumpkin stems for this project, but you could also use a stick if you don’t have a dried pumpkin stem handy. (Or, you can find real pumpkin stems for sale here.)
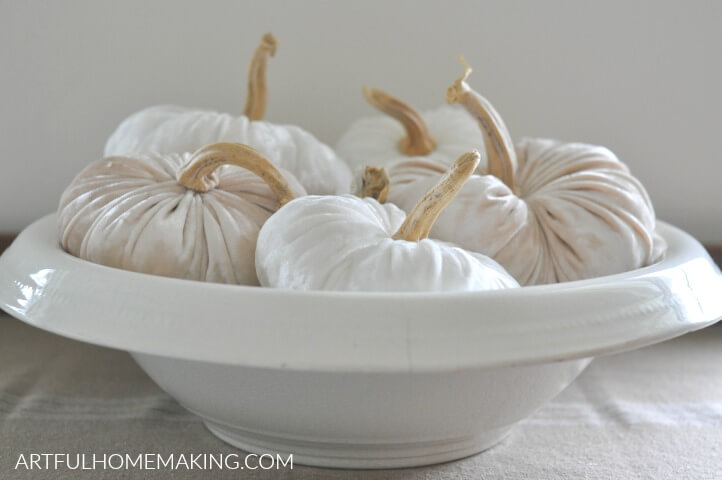
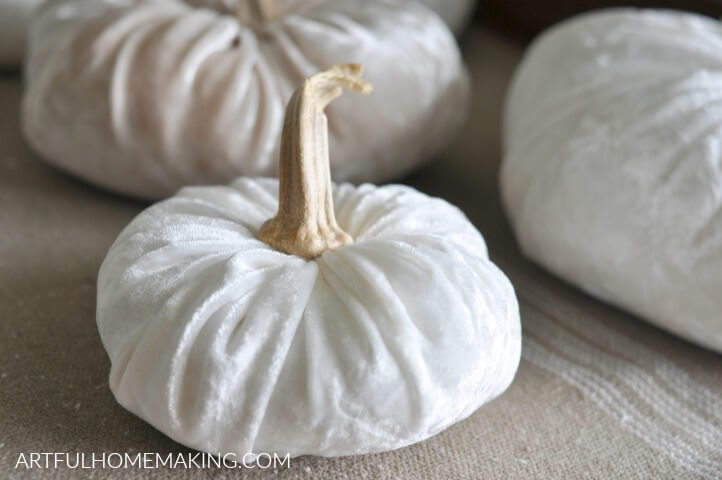
That’s it! Now it’s time to enjoy decorating with your new handmade pumpkins!
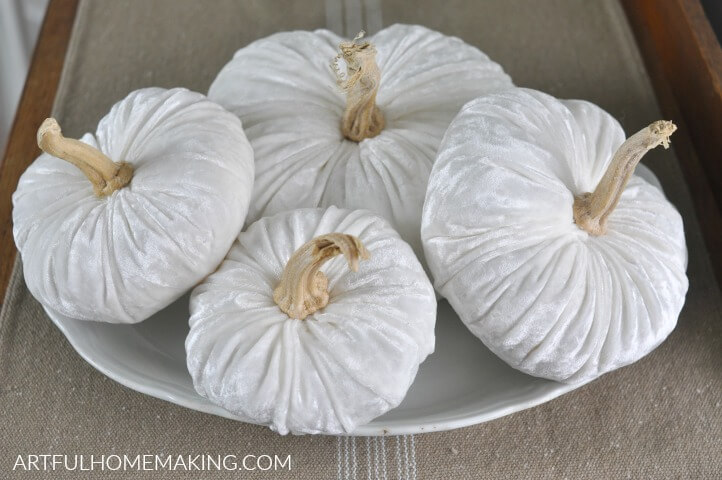
I’m loving the way these velvet pumpkins look all piled up together in an ironstone wash basin.

They also look great on an ironstone platter.
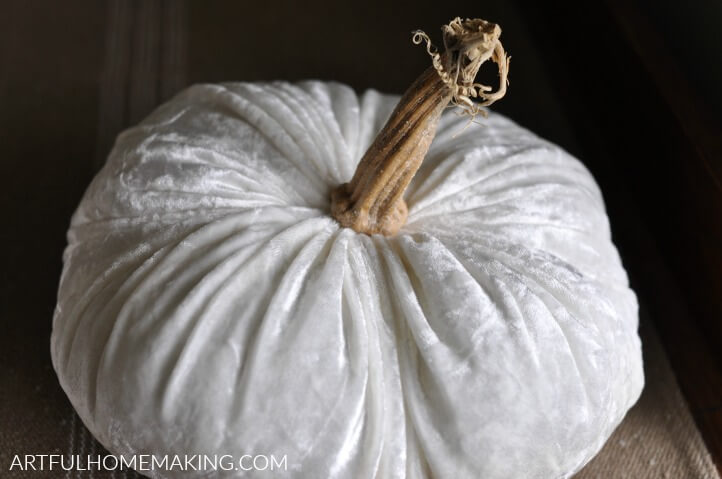
My favorite pumpkin stems are the ones that have a bit of character to them, like this one below:
Now that you know how to make velvet pumpkins, you’ll want to save your own pumpkin stems so you can make more!
Supplies Needed for This Project
Affiliate links included below, which means I make a small commission at no extra cost to you. Read my disclosure here.
- stretch velvet (I used off-white and natural)
- pumpkin stems (or stems from other squashes) find real pumpkin stems for sale here
- hand quilting thread
- sewing needle (any needle will work, but a long one like this one works best)
- rice
- poly-fil
- tape measure
- scissors
- glue gun and glue sticks
I hope you’ve enjoyed learning how to make velvet pumpkins! Thanks so much for stopping by!
Pin it for Later:
This post contains affiliate links, which means I make a small commission at no extra cost to you. Read my disclosure here. Sharing here.


Velvet pumpkins are always something I’ve wanted to make. These are just lovely Joy!
Thank you so much, Maria!