This post may contain affiliate links. Please read our disclosure policy.
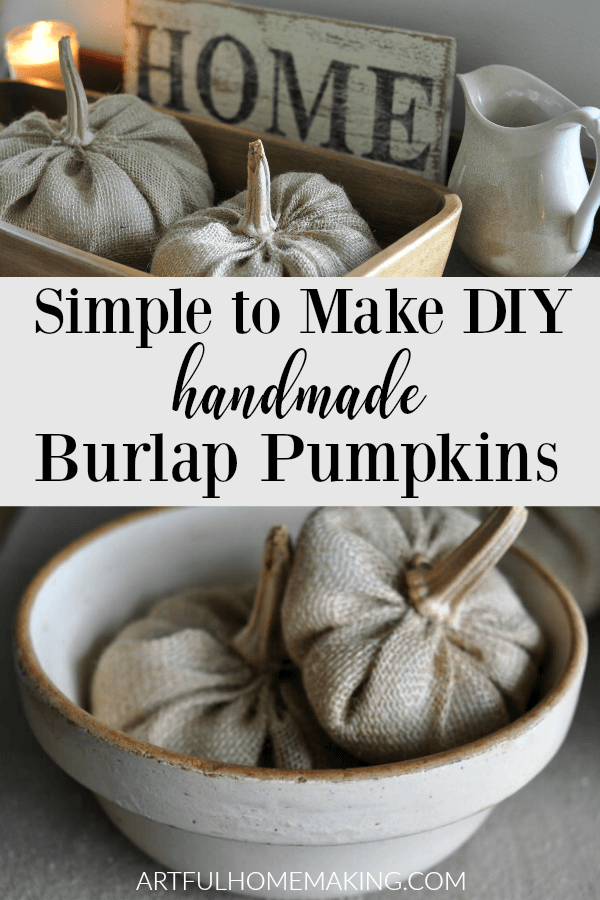
How to make burlap pumpkins with real pumpkin stems for your fall decor.
This past week we had some fall weather roll in. Well, it wasn’t exactly fall weather, because it was still warm, but the skies were overcast and it cooled off a bit.
While the skies were gray, I felt inspired to do a bit of early fall crafting.
I decided to make these DIY burlap pumpkins to decorate our house for fall. I never decorate for fall this early, and I intended to save them until September or October, but they’re so cute that I left them sitting out.
My mom gave me this huge roll of burlap several years ago, and I’ve been trying to find creative ways to use it. This project was perfect!
If you’d like to learn how to make burlap pumpkins, continue reading for the full DIY tutorial.
How to Make Burlap Pumpkins
Here’s what you’ll need to make your own DIY burlap pumpkins.
Affiliate links included below, which means I make a small commission at no extra cost to you. Read my disclosure here.
Supplies Needed:
- burlap
- dried pumpkin stems (or stems from other squashes) find pumpkin stems here
- embroidery floss (mine came from this package) or twine thread (you could also try this burlap string)
- embroidery needle (I used one of these)
- rice
- poly-fil
- tape measure
- scissors
- glue gun and glue sticks

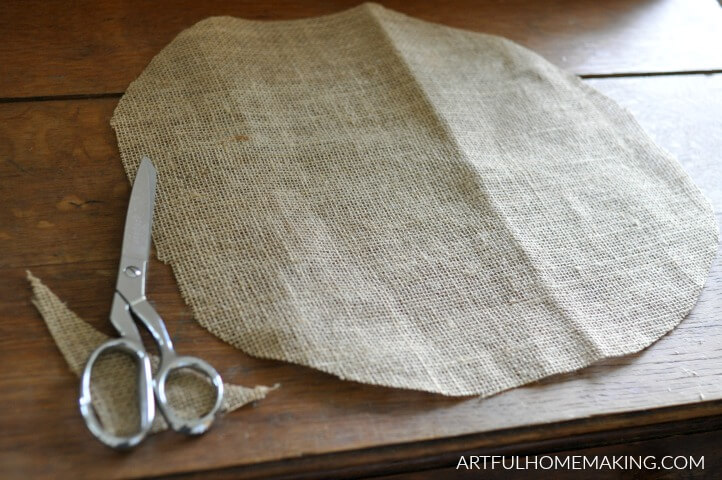
1. Cut out a circular shape.
First, you’ll need to cut out a circle. Don’t get hung up on making it perfect. Seriously, this is one craft where it really won’t matter!
I made my pumpkins 12″, 14″, and 16″ in diameter. If you can find something circular to trace that is the size you want, go ahead and use that. I couldn’t find anything big enough, so I just cut mine out freehand.
Here’s how I cut mine. First, I cut out a square that was about the size I wanted. The one in this example was 14″ x 14″.
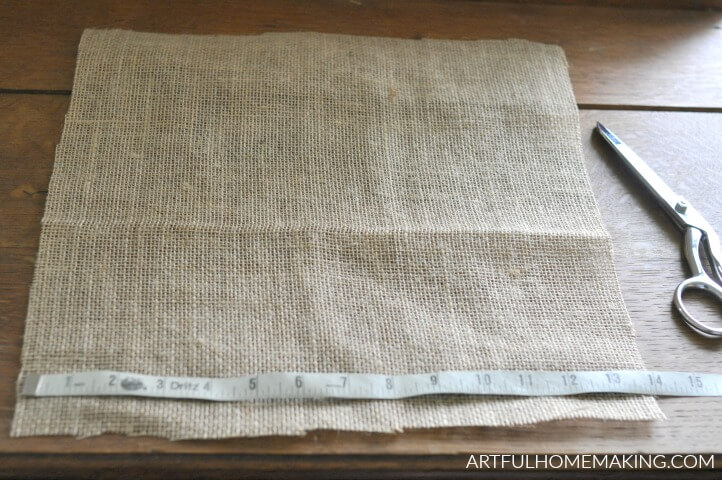
Next, I just rounded the edges of my square, to make a circular shape. You can see in the photo below that my circle isn’t perfect! It really won’t make a difference for this craft.
2. Next, thread your needle with your heavy-duty thread.
The thread will need to be thick and sturdy enough that it doesn’t break as you cinch up the circle. I used this embroidery thread that I found in my craft cupboard. It just happened to match the burlap and it worked well.
I cut about a 40″ long piece of thread and made a big knot at the end.
Important Tip: Be sure to make a very big knot at the end of your thread. I just knotted mine several times in the same spot until I had a big knot. If you don’t make it big enough, it will just slip through the large squares in the burlap, and your circle won’t cinch up.

3. Sew a gathering stitch along the edge.
After you’ve threaded your needle, sew a large gathering/basting stitch about 1/2″ to 1″ away from the edge of your circle.
A basting stitch is just a very loose straight stitch that will allow you to pull the thread and cinch up the circle to make a little pouch.
I made my stitches about 1″ long.

4. Cinch up the circle.
Now pull on your gathering stitch to cinch up the circle and make a little pouch. This is where the size of your knot matters. If you didn’t make it big enough, it will slip through the holes.

5. Add some rice.
Don’t cut the thread yet, just leave it hanging. Add some rice to the bottom of your pumpkin. I didn’t measure mine, I just fill the bottom about 1/4 of the way full with rice.
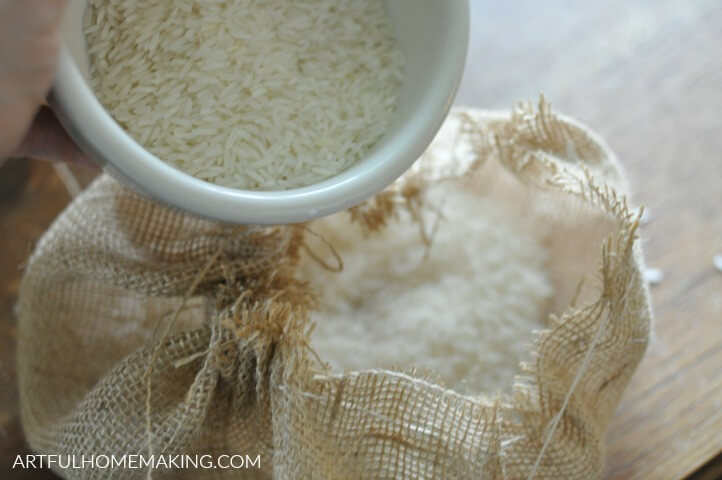
You may find that some of the rice is poking through the holes of the burlap if your burlap has a very loose weave (like mine).
This didn’t bother me (since these are rustic burlap pumpkins after all!), but if it bothers you (or you want them to be more finished-looking), here’s an idea to fix it.
You could cut a circle out of natural muslin or a similar fabric, and make a circle the same size as your burlap circle. Then just sew them up together at the same time, and your pumpkin will have a lining, which will keep the rice securely inside.
The only difficulty with lining your pumpkin is that then you would probably need a smaller/sharper needle (depending on the size of the needle you used).
I just left mine rustic and didn’t line them because it’s simple and they look fine to me!
6. Stuff your pumpkin.
Now fill the pumpkin the rest of the way up with poly-fil.

7. Sew across the top.
Now it’s time to stitch the top of your pumpkin closed. To do this, just cinch your pumpkin tightly together by pulling on the gathering thread.
Then sew across the top several times to secure it.

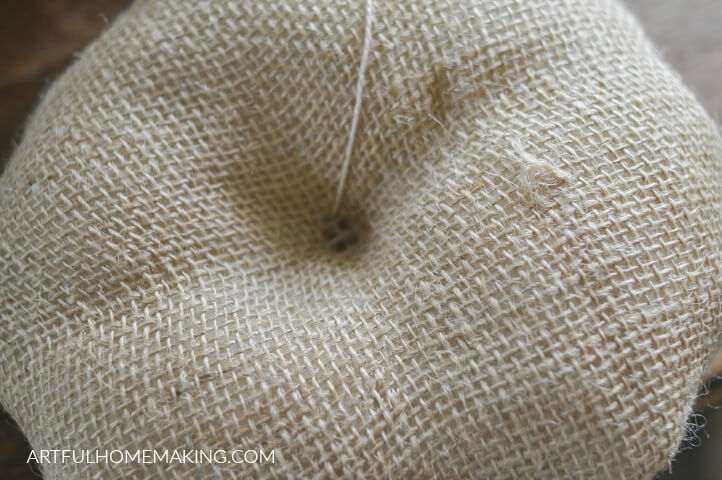
8. Sew down through the center.
Now stick your needle straight through the center of the pumpkin at the top, and come out on the bottom end.
Stick your needle back up through the bottom and come up at the top. Pull the threads tightly. Do this several times to make an indentation at the top where your stem will go.
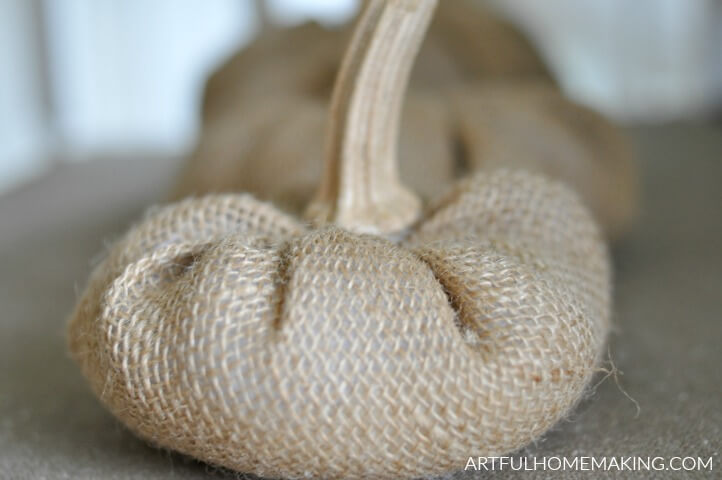
9. Finish sewing and glue on the stem.
After going through the center of the pumpkin several times (in the previous step), end up at the top of the pumpkin and tie off your thread and cut it off.
Cut off any loose threads and burlap strings at the top.
Using your glue gun, glue a pumpkin stem on the top of the pumpkin. Don’t use too much glue, or it will ooze out and show. Just use a small amount and hold it on for a few seconds so it adheres to the burlap securely.
I used real pumpkin stems for this project, but you could also use a stick if you don’t have a dried pumpkin stem handy. (Or, you can find real pumpkin stems for sale here.)
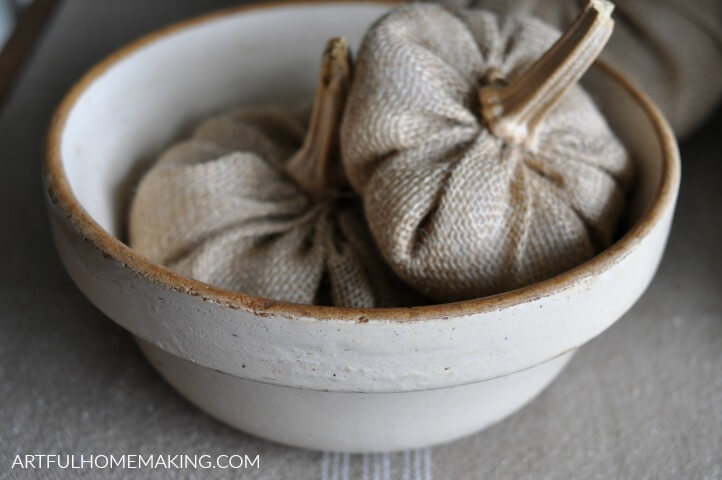
That’s it! Now it’s time to enjoy decorating with your new handmade pumpkins!
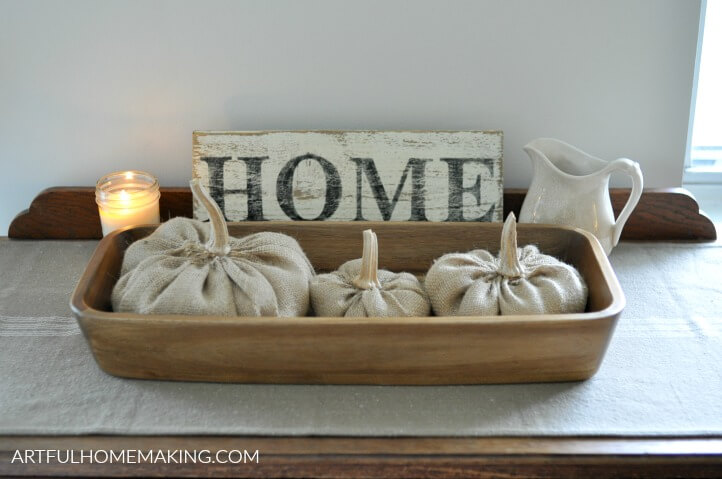
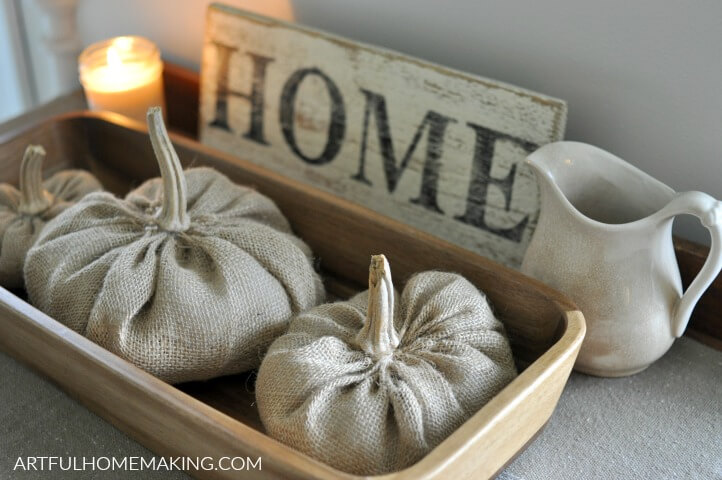
I love the way they look in this antique stoneware bowl. This would look perfect as farmhouse fall kitchen decor.
The neutral color of burlap fits right in with my ironstone pitcher and reclaimed barn wood home sign. Find the acacia wood tray here.
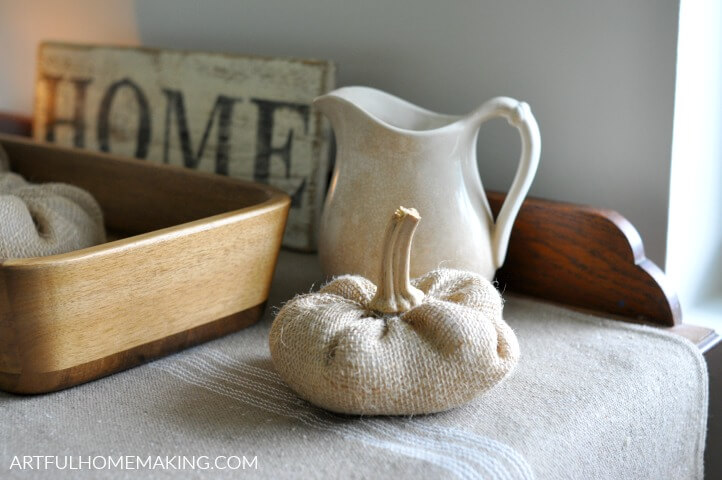
I also think they look nice with my handmade soy candles (find the tutorial for those here).
Supplies Needed for This Project
Affiliate links included below, which means I make a small commission at no extra cost to you. Read my disclosure here.
- burlap
- pumpkin stems (or stems from other squashes) you can find dried pumpkin stems here
- embroidery floss (mine came from this package) or twine thread (you could also try this burlap string)
- embroidery needle (I used one of these)
- rice
- poly-fil
- tape measure
- scissors
- glue gun and glue sticks
I hope you’ve enjoyed learning how to make burlap pumpkins! Thanks so much for stopping by!
Pin it for Later:
This post contains affiliate links, which means I make a small commission at no extra cost to you. Read my disclosure here. Sharing here.


They really are so cute Joy and the perfect little pumpkins for fall décor.
Thank you for sharing your DIY burlap pumpkins at Create, Bake, Grow & Gather this week. I’m delighted to be featuring them at this week’s party and pinning too.
Hugs,
Kerryanne
Thank you, Kerryanne!