This post may contain affiliate links. Please read our disclosure policy.
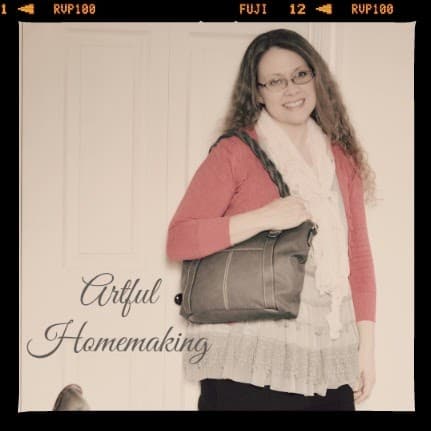
A few years ago, my husband gave me a DSLR for Christmas. I had been wanting one for a long time, so it was kind of a dream come true.
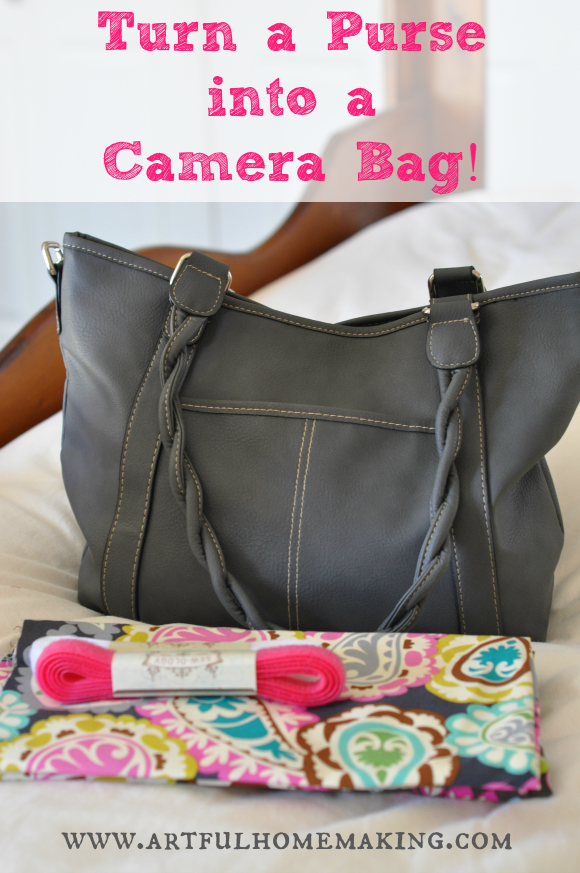
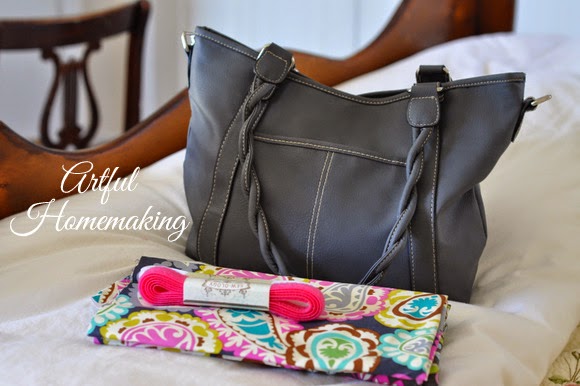
It wasn’t new, but almost. It had been very gently used by one owner, who then decided to sell it on Ebay. It came with one (50mm) lens (which is still my only lens!) and a huge, manly-looking camera bag.
I loved the camera–but I hated that camera bag!
The result of my dislike for the camera bag was that I almost never took my camera anywhere. I would instead just take my little point-and-shoot camera, which fit nicely inside my purse. Sometimes that’s all you need in a camera. But other times, you’d like to get some nicer-quality photos, which requires a higher-quality camera.
Several years ago, I saw a blog post about turning a purse into a camera bag. At the next opportunity, I bought the supplies to make it. Then life got busy and I never got around to it. But when I finally decided to dive into this project a couple of months ago, the instructions I planned to use were gone!
So, the following instructions were the ones I wrote down as I totally winged this project. Even though the instructions aren’t precise, this was a very simple project to do, and I could have completed it in an afternoon if I hadn’t had lots of interruptions!
Supplies:
- A purse that your camera fits into nicely (I wanted one that would zip closed.)–I actually took my camera to the store with me and tried it out in several purses to see which one I liked best.
- 1″ foam
- 1/2″ foam for the inserts (I just used the 1″ foam I had, but I realized later that some thinner foam would have worked better for the inserts.)
- 1/2 to 1 yard of fabric (I just used a half yard piece that had been in my fabric stash for a few years, but there isn’t much margin for errors with a half yard, and depending on how big your purse/bag is, you may need more.)
- Velcro
- Thread, scissors, and other sewing notions
Directions:
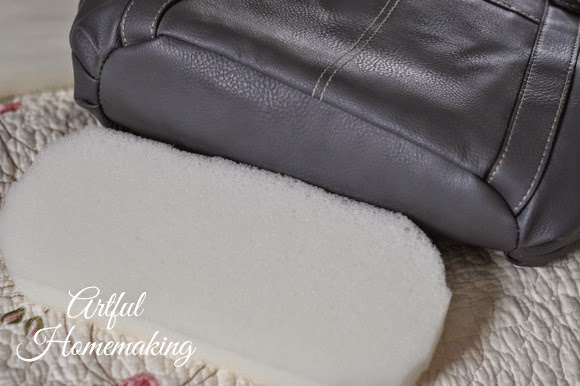
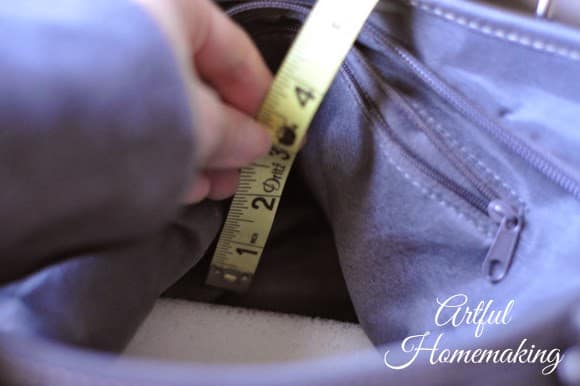
1. Copy the shape of your purse bottom. I just used a piece of paper and traced around mine.
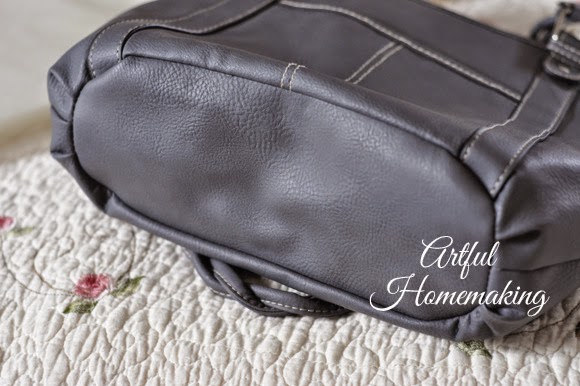
2. Cut a piece of 1″ foam the size and shape of the purse bottom you just measured. Then put it inside the purse to make sure it fits. I also put my camera inside to see if it fit right.
3. With the foam piece still in the bottom of the purse, measure how tall you want the other foam to come up on the sides. You’re going to cut two pieces of foam (one for each side) to pad the sides of the purse.
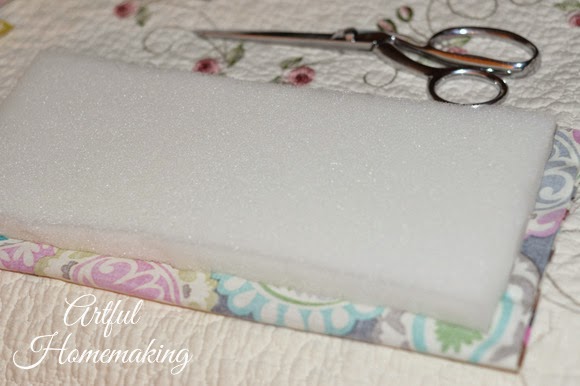
4. Cut two pieces of foam for the sides (one for each side). Cut foam for dividers. I just guessed on the size of this.

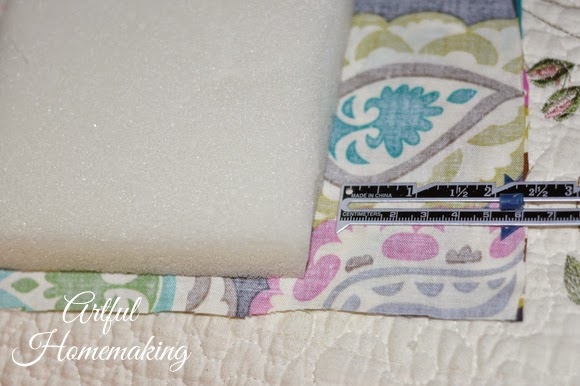
5. Lay the foam pieces on your doubled fabric and cut around them. Be sure to add enough for a seam allowance. I also found that I needed to add a bit more to the seam allowance measurement to make sure that there was enough room to fit the bulkiness of the foam (if you use a thinner foam than the 1″ foam I used, you won’t need as much room).

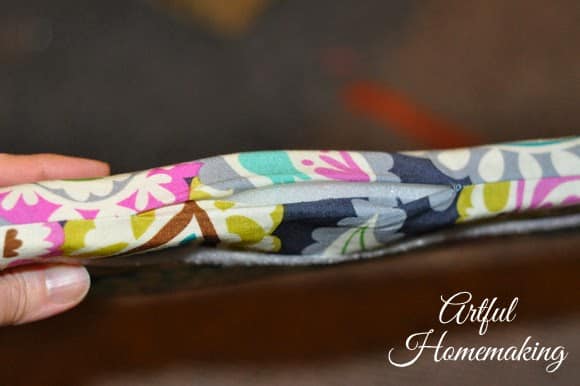
6. When you’re ready to cut the dividers, add about 2″ to the ends. This extra fabric will become the flaps that the velcro is sewn onto.
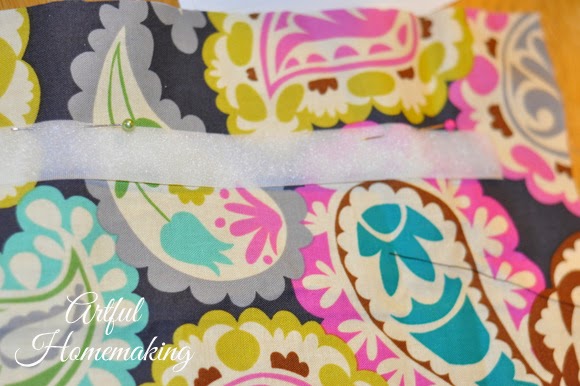
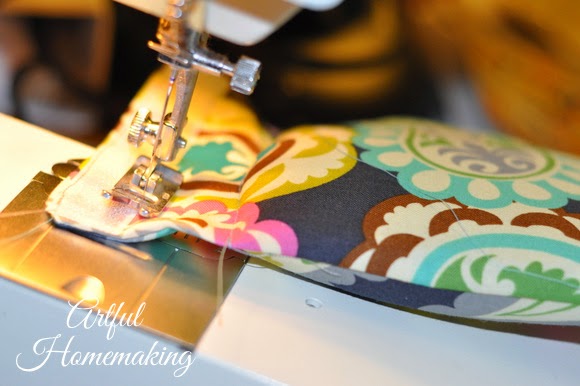
7. Take the velcro and measure where you want it to be on the two side pieces (on the fabric). I just figured out where I thought it would go, and it worked fine. It doesn’t have to be perfect! Sew a length of velcro to one side of each side pad. Be sure to use the soft side of the velcro, otherwise it will scratch your camera! Also, don’t go into your seam allowance with the velcro–only put it part of the way to the edge, otherwise you won’t be able to sew and turn the fabric as easily.
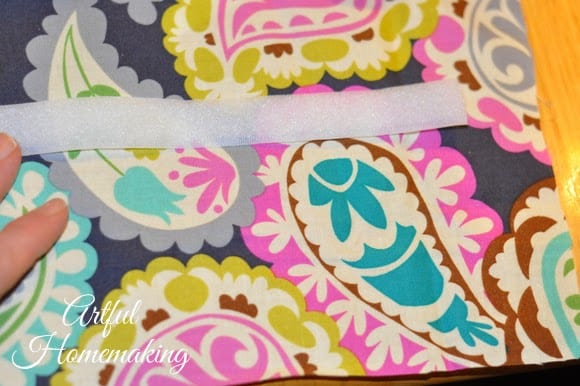
I used pins to hold the velcro securely while I was sewing it:
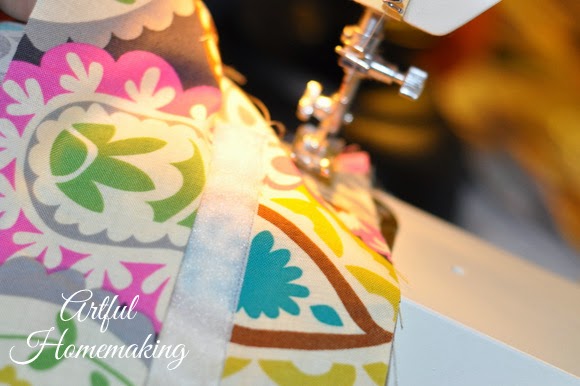
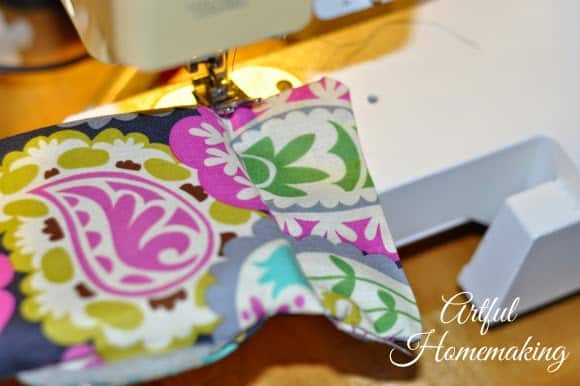
8. Once you get the velcro sewn onto one side of your first rectangle, take your fabric pieces to the sewing machine. With right sides together, sew around the edge of each rectangle, leaving an opening large enough to fit your foam into. I used about a 3/8″ seam allowance (which I allowed for when I cut out my fabric):
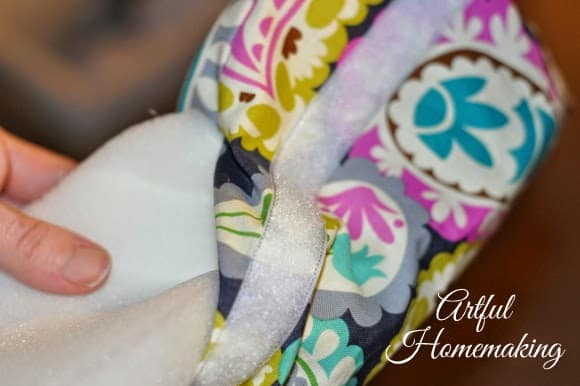
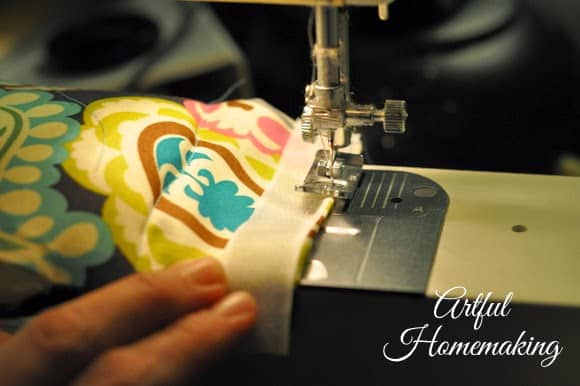
9. Once your rectangle is sewn together, turn it right side out and insert one foam piece into the hole you left open:
10. Then you’ll have a small opening you need to hand sew together:
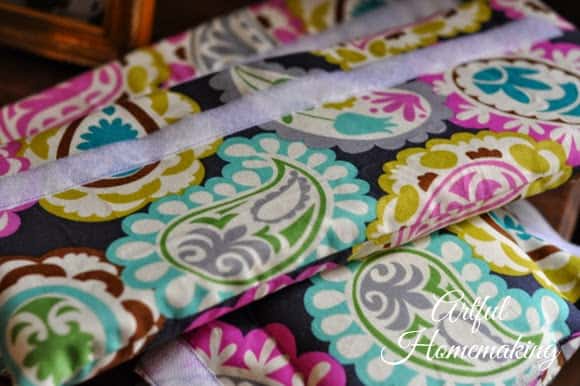
One pad is finished! Now repeat the above instructions to make the other side pad. Sew the bottom oval-shaped pad the same way, except leave off the velcro part.
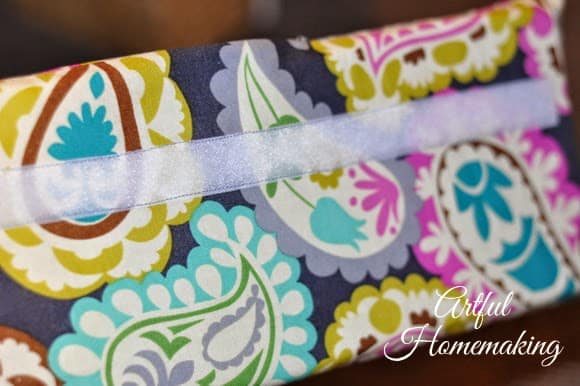
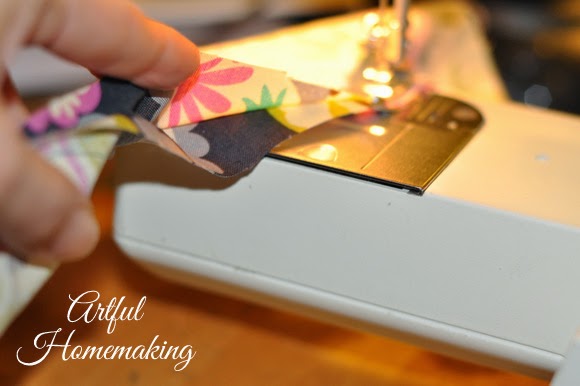
11. When you get to the dividers (I just made one, but you can have several if you want), sew the little rectangle just the same as the above instructions. Then insert the piece of foam into the hole you left open for that purpose. Then, sew right up next to the piece of foam in the center, on both sides of it. This makes the two flaps on each side of the foam piece:
12. Now cut a piece of velcro (the scratchy side this time) to fit the sides of the flaps, and sew the velcro to the flap:
When you’re done, you will have a pile of padding that looks like this (2 long rectangles with velcro to line the sides of the purse, 1 oval-shaped pad (or whatever your purse shape is) for the bottom, and however many dividers you made):
Now, simply insert the padding into your purse!
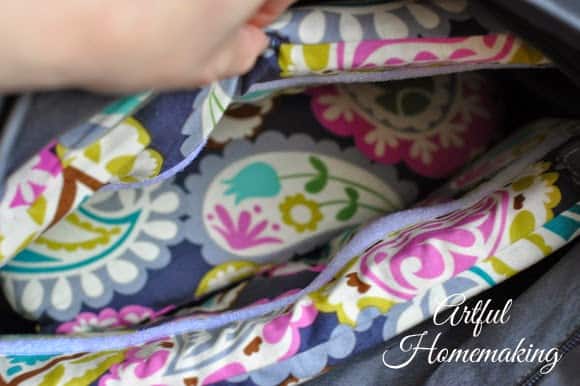
And then insert the divider wherever you want it:
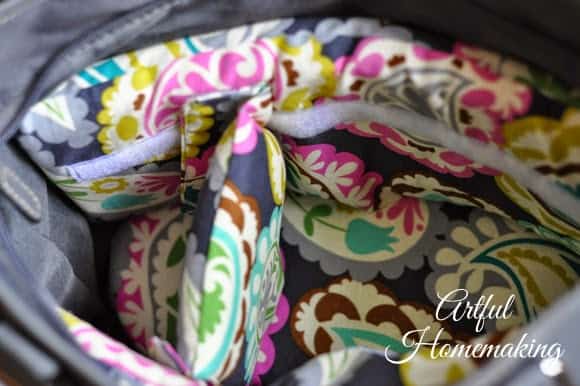
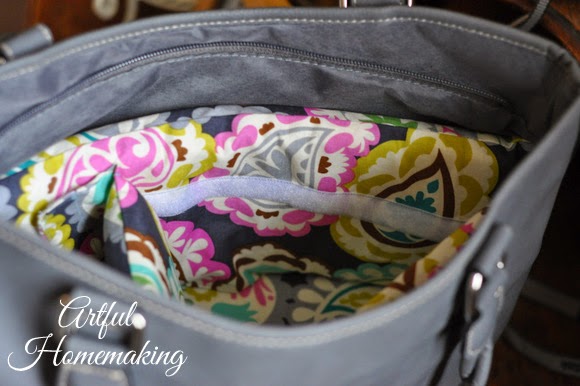
Since I only have one lens, and it stays on my camera, I’m using this extra space for my keys and phone:

And then the camera goes into the other side (this is just my point-and-shoot, shown as an example of what it would look like with the camera in this space):

Have fun with your new, cute camera bag!


I will definitely be trying this. I bought a large purse on sale for the purpose of making it into a camera bag. I figured I would find diy padding for the camera.
I had fun making mine! Enjoy!
What a great idea!! I am going to have to do this! I hate lugging my ugly camera bag around and I love that you can still use it for keys and wallet and phone!
Thanks! It was simple to make and very handy to have on hand!
Genius!… and so cute. 🙂
Thanks, Carol! 🙂