This post may contain affiliate links. Please read our disclosure policy.
These healthy no-bake cookies with honey are so good! They’re a huge hit at our house. My kids love to mix up a batch of these easy cookies.
Chocolate no-bake cookies are a traditional, classic treat in my family. My mom usually makes them for get-togethers, and everyone loves them.
Even though I love the traditional cookie just the way it is, I wanted a healthier version. I was looking for a cookie I would feel good about my children eating on a regular basis.
Enter this chocolate no-bake cookie with honey recipe. This recipe is one we’ve been making for over 15 years now!
I discovered this recipe when my children were little, and they loved helping me mix up a batch. Now that they’re older, they make them for me!
This cookie is sweet enough for a simple dessert, but they’re also great for a snack. They’re made with real food ingredients like milk, butter, oats, and honey, which are ingredients I feel good about feeding my family.
Chocolate No-Bake Cookie Notes
- The recipe calls for butter, but you can substitute coconut oil for the butter.
- Instead of cocoa powder, you can substitute carob powder.
- Either old fashioned oats or quick oats will work in this recipe.
- For a gluten-free option, use gluten-free oats.
- Use any milk for this recipe. We usually use whole milk, but you can also try nut milk or coconut milk (I haven’t tried the coconut milk yet).
Affiliate links included below, which means I may make a small commission at no extra cost to you. Read my disclosure here.
Supplies Needed for This Recipe
Here are some basic supplies needed to make chocolate no-bake cookies with honey:
- Glass measuring cup
- Measuring cups
- Measuring spoons
- Large saucepan
- Cookie sheet
- Waxed paper or parchment paper
How to Make Chocolate No-Bake Cookies with Honey
One of the great things about this recipe is how simple it is.
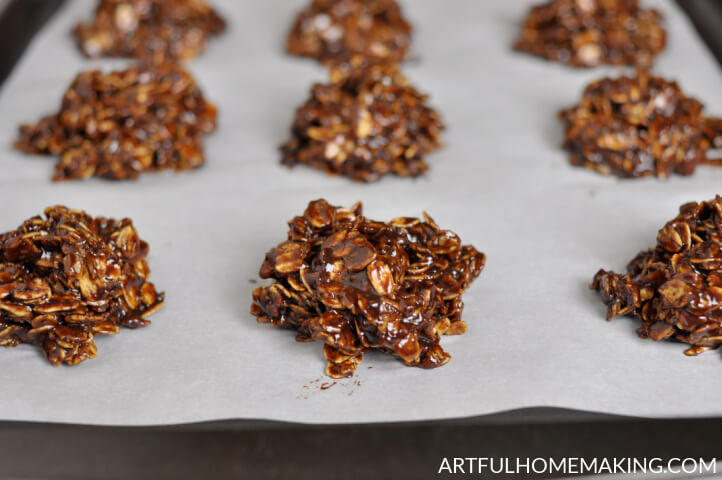
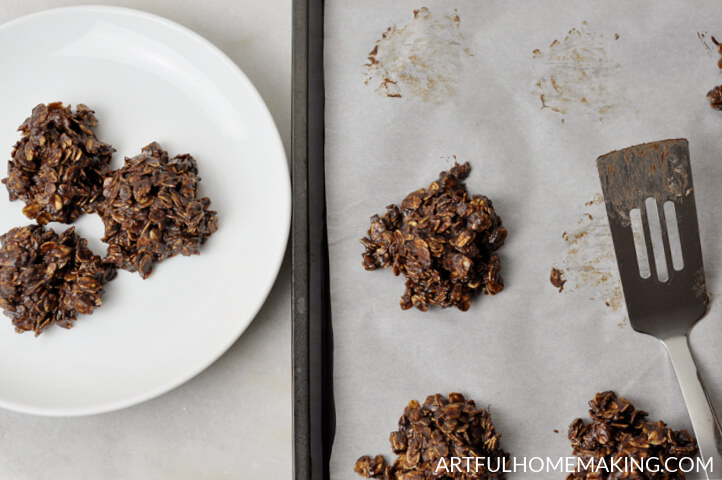
First, line a cookie sheet with waxed paper or parchment paper.
Mix the first four ingredients (milk, butter, cocoa powder, water) together in a saucepan. Bring to a boil and boil for 1 minute.
Remove from heat and add honey, vanilla, and oats, mixing well.
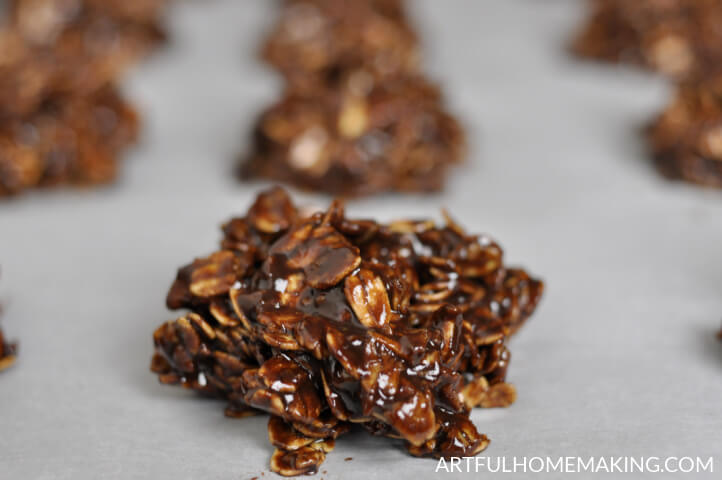
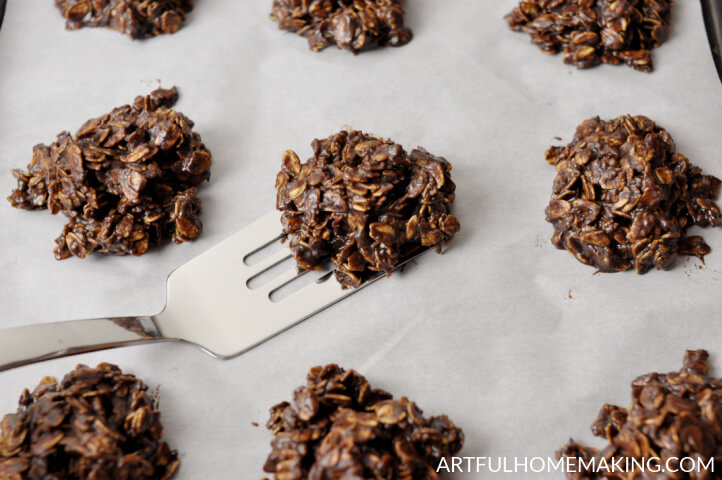
Drop spoonfuls of the mixture onto the lined cookie sheet.
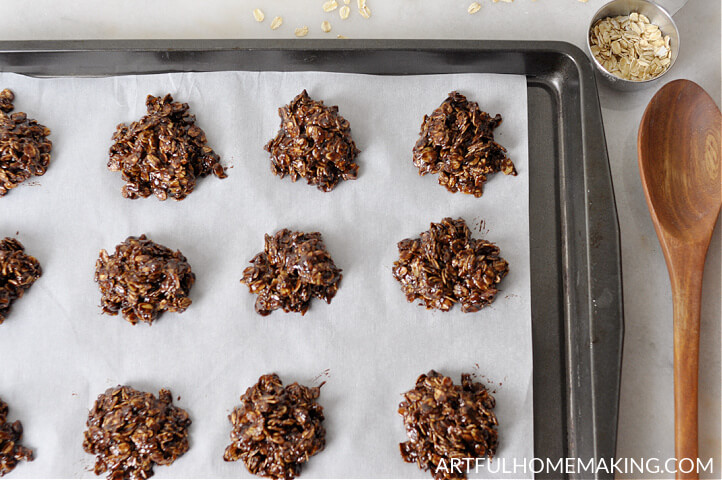
Chill until firm in refrigerator or freezer (usually takes a couple of hours for them to firm up). That’s it!
More Naturally-Sweetened Recipes to Try:
- Easy Healthy Homemade Granola with Honey
- Easy Healthy Hot Cocoa Recipe
- Gluten Free Homemade Honey Popcorn Balls
- Strawberry Pie Sweetened with Honey
Chocolate No-Bake Cookies with Honey Recipe
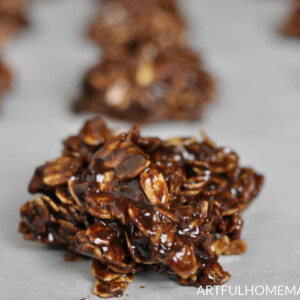
Healthy No-Bake Cookies with Honey
Ingredients
Instructions
- Line a cookie sheet with waxed paper or parchment paper. Set aside
- In a large saucepan, whisk together the milk, butter, cocoa powder, and water. Heat until butter melts, then bring to a boil and boil for one minute.
- Remove from heat and add the honey, vanilla, and oats. Mix well.
- Drop spoonfuls of the mixture onto the prepared cookie sheet.
- Chill until firm in the freezer or refrigerator.
- Store cookies in the refrigerator in an airtight container.
Nutrition
Nutrition information is automatically calculated, so should only be used as an approximation.


While I was on a sugar fast I decided to try these and I was not disappointed! Sprinkle a little sea salt on top and it’s even better.
I’m so glad they were win! Thank you so much for the positive review, Tasha!
This is one of my family’s favorite healthy snacks!
Wondering why no peanut butter? Could you sub peanut butter for butter?
Hi Cindy! You could definitely try adding peanut butter to the recipe. Here’s a modified version if you want to try it:
Ingredients:
1/2 cup milk
1/2 cup butter (or coconut oil)
1/3 cup cocoa powder
1/4 cup water
1/2 cup peanut butter (creamy or crunchy)
1/2 cup honey
1 tsp vanilla
3 cups oats
Instructions:
Line a cookie sheet with waxed paper or parchment paper. Set aside.
In a large saucepan, whisk together the milk, butter, cocoa powder, and water.Heat until the butter melts, then bring to a boil and boil for one minute.
Remove from heat, then immediately stir in peanut butter, stirring until fully melted and smooth. Then add the honey, vanilla, and oats. Mix well until everything is fully combined.
Drop spoonfuls of the mixture onto the prepared cookie sheet. Chill until firm in the freezer or refrigerator.Store cookies in the refrigerator in an airtight container.
1/2 cup peanut butter should give it a noticeable flavor without overpowering the chocolate. If you want a stronger peanut butter flavor, you could go up to 3/4 cup, but reduce the butter slightly (to 1/3 cup) to keep the texture firm.
If you try this peanut butter version, I’d love to know how you like it!
SO good! My toddler and husband love these! They can be made gluten & dairy free which accommodates all of our allergies, and they are so quick/simple to make which is perfect for us SAHM’s!
I’m so glad they work well with your allergies and your family loves them!
My cookies did not set up and I followed the recipe exactly. Any way of saving the soft globs (they taste awesome) just won’t hold together.
I’m so sorry to hear that, Margaret! Did you chill them until firm in the refrigerator or freezer? If they are chilled they should set up and get firm. Unlike traditional no-bake cookies, these require being chilled and stored in the refrigerator or freezer. My kids prefer when I keep them in the freezer as they are at their firmest then.
Can you substitute maple syrup for honey in this recipe? Real maple syrup isn’t as thick as honey so perhaps it might not work…
So sorry I’m just now seeing this, Kaitlin! Yes, I think that should work, although I haven’t tried it myself. I’d love to know how they turn out if you try it!
I didn’t see any measurements listed.
Hi Wendy! The measurements are in the printable recipe card at the bottom of the post.
can you freeze these
Yes, they freeze well. I just usually put them in the fridge to let them soften up a bit before serving.
Oh, I love this, and need to read it again! you have the basics laid out so clearly! Great job,
Thank you!