Grandmother’s Favorite Kitchen Towel Knitting Pattern

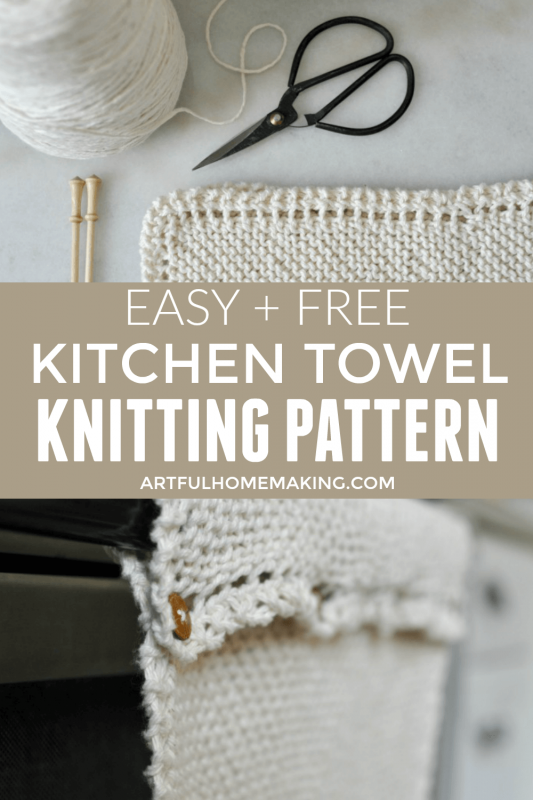
This kitchen towel knitting pattern is based off of my favorite dishcloth pattern. It’s pretty simple to knit, and this pattern is free!

Kitchen Towel Knitting Pattern

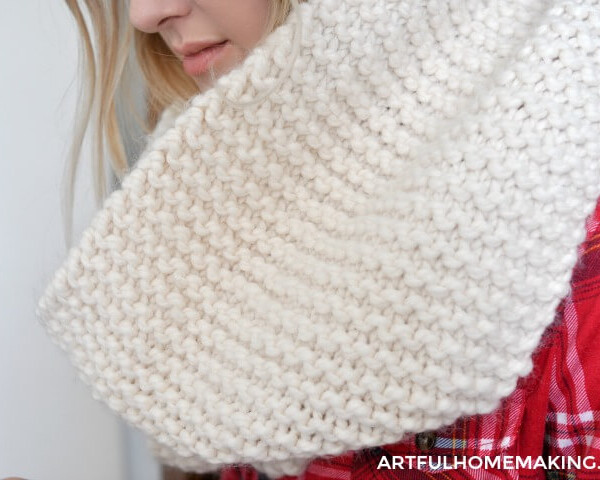
This pattern makes a rectangular knitted “cloth,” which can also work as a table runner or doily of sorts.

kitchen towel knitting pattern

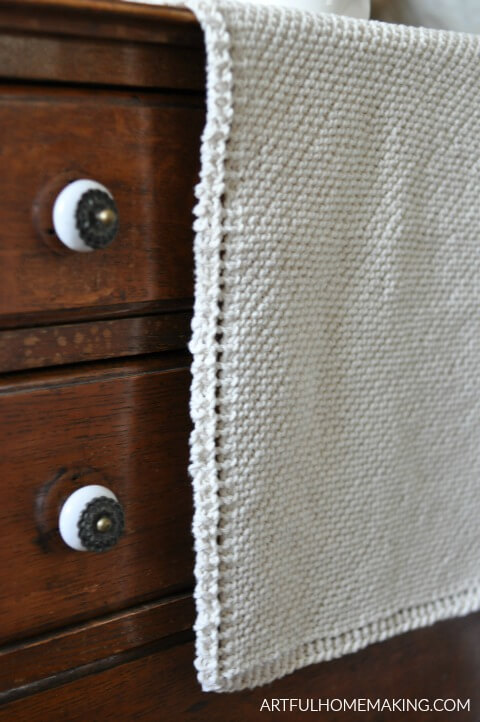
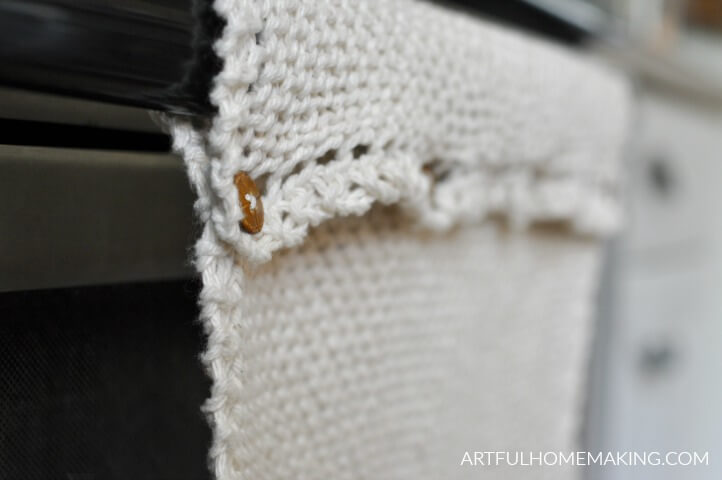
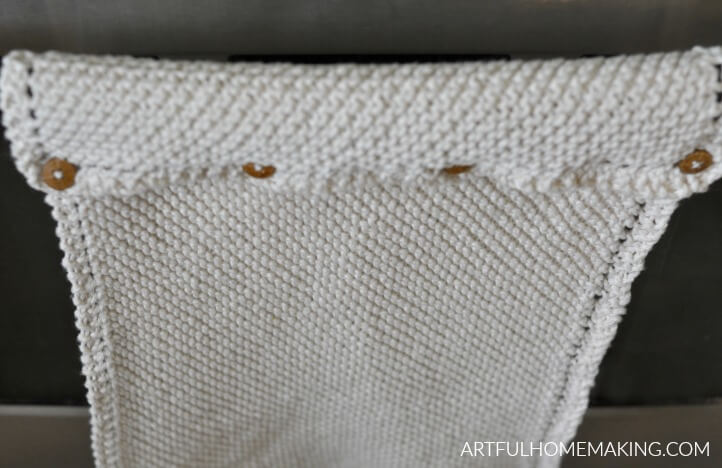
If you want to use this as an actual kitchen towel, you can add buttons to hang it on your oven door or towel rack.

kitchen towel knitting pattern

The possibilities are endless for this knitted kitchen towel!

How Do You Knit a Kitchen Towel?

This kitchen towel is based off of the classic dishcloth pattern called Grandmother’s Favorite Dishcloth.

kitchen towel knitting pattern

RELATED: Grandmother’s Favorite Knitted Dischloths Pattern

That favorite basic dishcloth pattern is a square, but now it has been slightly altered to make it a rectangular shape.

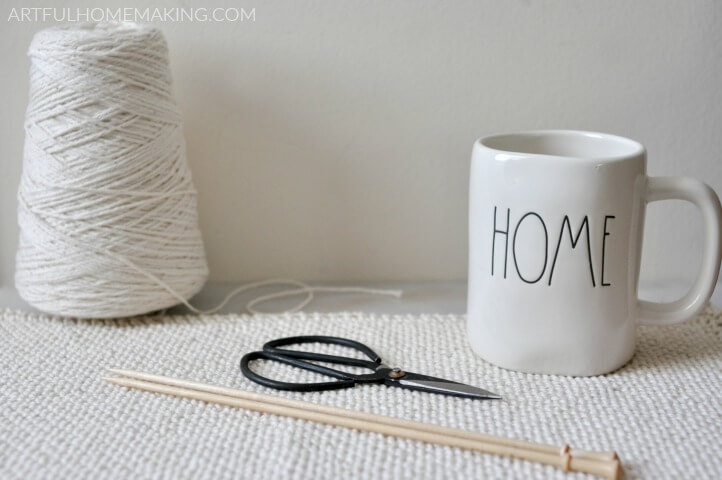
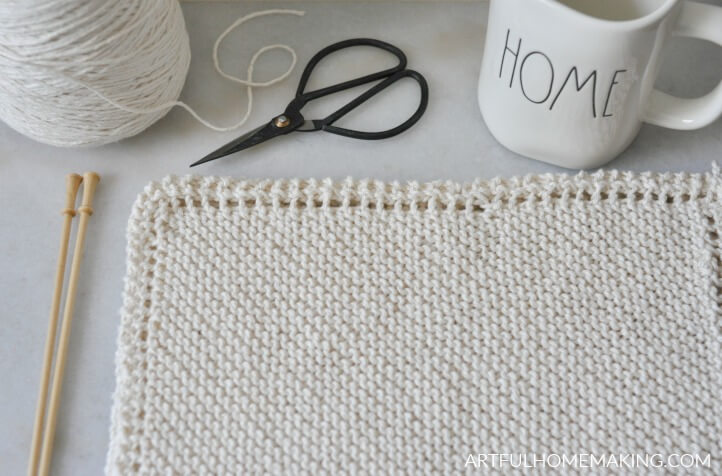
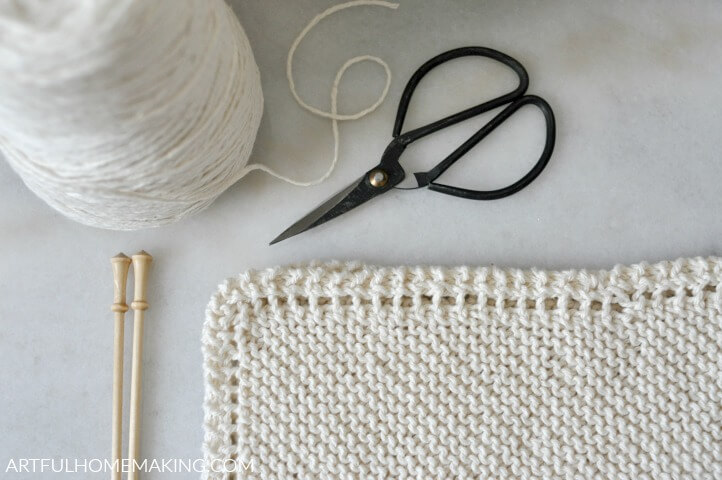
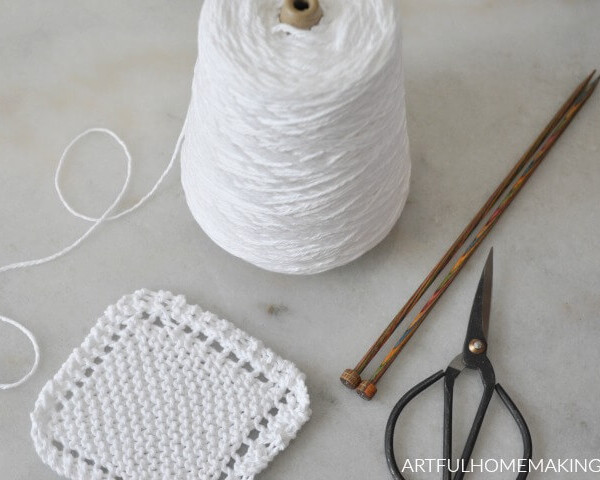
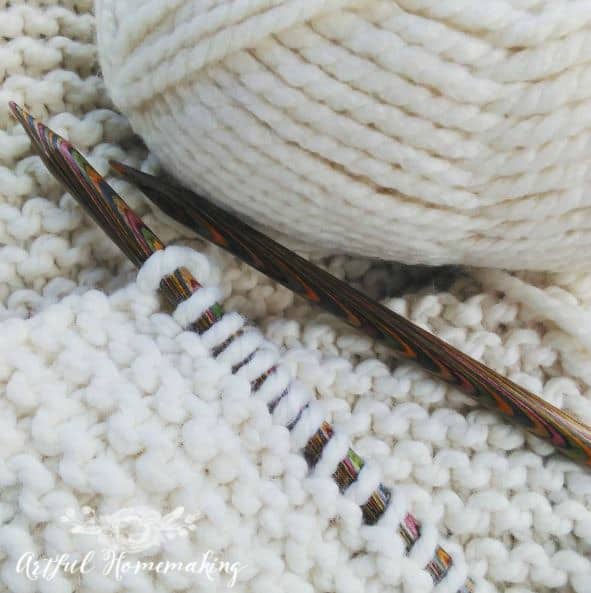
I used cotton yarn (just like I usually use for the dishcloths), and size 7 knitting needles.

kitchen towel knitting pattern

Supplies Needed for Knitted Kitchen Towels

Affiliate links included below. Read my disclosure here

kitchen towel knitting pattern

Kitchen Towel Knitting Pattern

Cast on 4 Stitches

Row 1: knit 4

Row 2: k2, yo, k to end of row

Repeat Row 2 until you have 70 stitches on the needle

Row 3: k2, yo, k to end of row

Row 4: k1, k2Tog, yo, k2Tog, k to end of row

Repeat Rows 3 and 4 (alternating rows) 20 times.

“Alternate rows 20 times” means doing both rows 3 and 4 for a total of 20 times. So, knit row 3, and then do row 4. That’s one time. Then do row 3 again, and then do row 4. That’s two. Knit row 3 again, and then do row 4. That’s three. And continue this cycle 20 times.

Note: (In order to keep this straight, I make myself a chart. On a piece of paper, I write “Row 3” at the top, and “Row 4” below that. Each time I do Row 3, I make a tick mark next to “Row 3.” Then, I switch to Row 4, and make a tick mark next to “Row 4.” This is the easiest way for me to keep track of which row I’m on. However, you may find it helpful to use a stitch marker. It’s up to you. The key is to keep alternating rows, 20 times.)

Row 5: k2, yo, k to end of row.

Row 6: k1, k2Tog, yo, k2Tog, k to end of row.

Repeat Row 6 until you have 5 stitches on the needle.

Row 7: k2, k2Tog, k1

Bind off the 4 stitches.

kitchen towel knitting pattern

Finishing

After binding off, then cut your thread, leaving a 5-6 inch tail. Weave the ends of the tail into the dishcloth with the yarn needle.

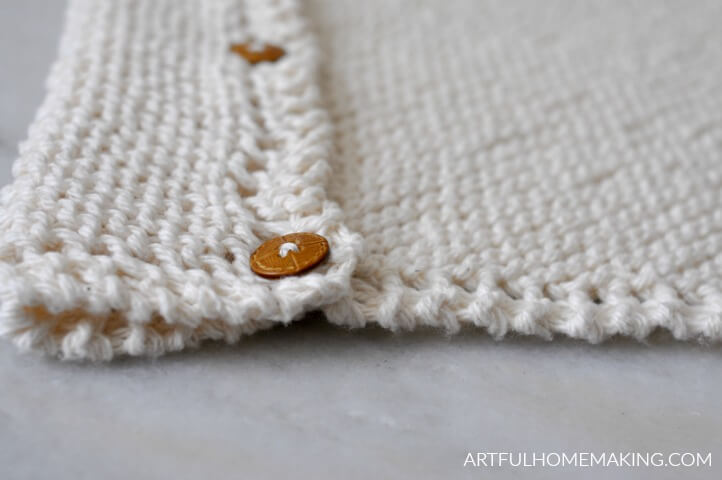
If you want to hang your kitchen towel, you can sew buttons to the top.

In order to figure out where to sew on the buttons, I draped the finished kitchen towel over my oven handle. Then I marked the overlap, and used a measuring tape to evenly space the buttons. After marking where I wanted them, then I sewed them on with regular sewing thread and a sewing needle.

I raided my button stash and found these four matching buttons I didn’t even remember I had. They were the perfect size to fit through the holes in the edging of the towel.

If you want to use this knitted piece as a table runner or doily, you can leave it as-is.

You can also block it if you’d like it to lay straighter.

kitchen towel knitting pattern

I hope you enjoy making this kitchen towel knitting pattern!

Related Posts

Pin This Post for Later

Kitchen Towel Knitting Pattern

Disclosure: This post contains affiliate links. Read my full disclosure policy. Sharing here.

38 Comments

  1. no, it was “operator error” (hiding from embarrassment). looks like i did a decrease on the wrong side & that’s what made the indent.
    i got it all sorted.
    thanks!

  2. i keep getting the same indentation that others have mentioned in the row 3&4 repeat. i’m wondering if R4 should actually be K2, yo, K2Tog, K to end?

    1. Hi Vicki! I have only knitted the towel as written, so I’m not sure how a different combination of stitches would turn out. I need to make it again and see if I can come up with clearer instructions.

  3. Loving this pattern! I love using knitted washcloths, so I can’t wait to finish this towel! BTW, where did you get your scissors? I would so love to find a pair like that!

    1. I’m so glad you’re enjoying the pattern, Sue! I found the scissors on Etsy several years ago, and I love them too! I just checked the shop I purchased them from, and sadly they’re not open anymore.

  4. I made this and I absolutely loved it. I decided to make another one but I did 80 stitches and 25 rows of three and four alternating. I wanted one a little bit wider and longer. It looked the same as the first one until I started decreasing my stitches. Do you have any recommendations?

    1. I’m so glad you loved the first one you made! Thank you so much for the positive feedback on the pattern! I’m sorry I’m not sure how to fix the altered one. I’ve only ever made the pattern as written. Since this pattern is a rectangle, it’s a little harder to re-size.

      1. Joy

        I figured out what I did wrong. I had 80 stitches and 25 rows when I broke it down and started over I did 75 stitches & 25 rows, alternating lines 3 & 4, and it came out perfect. It was a little bit wider and longer.

  5. Just an FYI … made this and it takes just shy of 180 yards. Used 1 skein of I love this cotton from Hobby Lobby in dark blue.

  6. I really like this pattern Joy.
    Thank you for sharing the kitchen towel kitting pattern at Create, Bake, Grow & Gather this week. I’m delighted to be featuring it at the party tomorrow and pinning too.
    Hugs,
    Kerryanne

  7. Thank you for suggesting using cotton yarn on a cone. That way, you don’t have to join cotton knitting. There are less knots on cones,. And, you have ends to use up, compost, or put in the garbage. I have pretty much quit buying dishcloth cotton in those tiny amounts. I got spoiled from only buying on cones from the old Peaches and Creme by Pisgah.

  8. I had a pattern for something similar to this but is was a tapered hanging towel with a button closure. I love that pattern but can’t find it again and wish I could.

  9. Love the look of the towel. So I have read all the commits and replies. A what I would like to know, is how do you knitit longer before the turns start. I want a long table runner.
    Thank you,
    Sandy

    1. Hi Sandra! If you want it longer, just continue alternating rows 3 and 4 until it is a few inches less than what you want the finished length to be. The length will continue to grow a little as you decrease the stitch count with Row 6. To keep track of which row you are on (it can get a bit confusing if you don’t keep track of it), either put a stitch marker on the edge of the knitting for Row 3, or make yourself a little chart.

      When it’s as long as you want it, after your last Row 4, then start Row 5 (which is only knitted once).

      Row 6 decreases the stitches and gets you back to the number you started with, which will then be bound off.

      Hope that helps!

  10. I see what everyone else is talking about. Rows 3 and 4 are exactly the same as 5 and 6. Nothing changes in the pattern. Is it supposed to be decreased every row? Currently, rows 5 and 6 are still maintaining 70 stitches yet the pattern says to continue until you have 5 stitches. If that is the case, there has to be a decrease in stitches. Please correct me if I’m wrong, I’m very interested in completing this correctly. Thanks!!

    1. Hi Sasha! So, you’re knitting Rows 3 and 4, maintaining the 70 stitches. This is what is giving you the length of the towel. You’re repeating these rows over and over to make it a longer rectangle. After you’ve completed the cycle of knitting rows 3 and 4 twenty times, then you knit Row 5 once. Then, you’re going to knit Row 6 until you just have 5 stitches on the needle. Row 6 is the decrease row. You’re not alternating between rows 5 and 6. Row 5 only happens once, and then you switch to Row 6, and repeat that row until you have 5 stitches on the needle. This will decrease the stitches. Hope that helps!

  11. Hi, I am currently in the process of knitting this tea towel. I just wanted to make sure I’ve got it right. When repeating rows 3 and 4 are the k2tog always on the same side? That’s how I have been going along, but I just want to be sure before I get to far. Thank you.

    1. I’m not positive, but yes, I think they would end up on the same side as you’re working on rows 3 and 4. So, after you have 70 stitches on the needle, then knit Row 3. Then knit Row 4. Then knit Row 3 again. Then knit Row 4 again. Since you’re turning the work each time you start a new row (and you’re alternating between rows 3 and 4), I would think all the k2tog (in Row 4) would end up on the same side. Then, once you reach rows 6 and 7, the k2tog may end up being on different sides.

      I’m planning to make a video (hopefully soon) of how to knit this towel, since I’ve had several questions about it. Hopefully a video will make it a bit easier to visualize.

      Hope that helps!

  12. Love this and am super excited. I am at Rows 3 and 4 and alternating 20 times. Is ‘One time’ considered both rows 3 and 4 or is each row separate so row 3 is counted as one time and row 4 is one time, equally 2? Sorry if it’s an obvious question. I’m super new to this. 🙂 thanks for the great pattern!

    1. Hi Christy! Not an obvious question. 🙂 I can totally see how that could be confusing. So, one time is considered both rows 3 and 4. So, do row 3, and after you come to the end of that row, then switch to row 4. That’s one. Then, do row 3 again, and after you come to the end of that row, switch to row 4. That’s two. And continue in that way until you’ve alternated those two rows a total of 20 times. I use a piece of paper to keep this straight. Hope that helps!

  13. I am confused. Alternating rows 3 and 4. Only one side is curving. I understand marking off each row as your doing but the remark “alternating” is confusing me. Please explain a little more. Thank you.

    1. Hi Carole! I’m sorry it’s confusing. This pattern knits up in a rectangular shape, so it’s a bit different than the dishcloth, which is square. So, once you have 70 stitches on the needle, then you do row 3. When you come to the end of row 3, you do row 4. After finishing row 4, you go back to row 3. Continue on in this way 20 times.

      Once the pattern starts to take shape, it won’t seem as confusing. It starts to form the rectangular shape, and then it makes sense. I hope that helps!

  14. After manyattempts I am still having trouble with pattern. After my seventy stitches are on needle and I start with rows three and four it appears only one side is decreasing to make the square. Any input would be helpful thanks!

    1. I’m so sorry to hear that, Mary! After you have 70 stitches on the needle, then you start alternating rows 3 and 4. I highly recommend making a little chart or using a stitch marker to keep the rows straight. I prefer to use a chart. I just take a piece of paper and write “Row 3” at the top, and “Row 4” below that. Each time I do Row 3, I make a tick mark next to “Row 3.” Then, I switch to Row 4, and make a tick mark next to “row 4.” This has been the easiest way for me. I found that this pattern requires a lot more concentration for me than the dishcloth pattern.

      Also, it turns out to be a rectangular shape, rather than a square, like the dishcloth. So, it looks a bit different when you’re knitting it.

      Hope that helps!

  15. Hi there!

    I’ve been attempting your pattern for a while now, but it still looks funky shaped. I can get up to the 70 stitches just fine but its after that, it ends up being confusing. I’m sure its user error as I do knit while watching the TV. How can I rip out my stitches and start over from the first row 3? Just to verify I’m alternating between having 70 to 71 on my needle correct?

    Thanks

    1. Hi Crystal! So, you repeat Row 2 until you have 70 stitches on the needle. And then you start alternating rows 3 and 4. I highly recommend making a little chart or using a stitch marker to keep the rows straight. I prefer to use a chart. I just take a piece of paper and write “Row 3” at the top, and “Row 4” below that. Each time I do Row 3, I make a tick mark next to “Row 3.” Then, I switch to Row 4, and make a tick mark next to “row 4.” This has been the easiest way for me.

      Due to the nature of this pattern, I don’t consider it a “mindless knitting” pattern like the dishcloth pattern. That one requires very little focus, and I can work on it while watching something or having a conversation. But this kitchen towel pattern isn’t as easy to keep track of, especially during rows 3 and 4.

      I’m not sure how you would go about ripping out the stitches. Personally, I’m not good at doing that with my own knitting! I usually just start over if I realize I’ve made an obvious mistake. Unless my mom is around. She’s an expert knitter, and she’s great at knowing how to rip out stitches and where to pick them back up.

Leave a Reply

Your email address will not be published. Required fields are marked *

This site uses Akismet to reduce spam. Learn how your comment data is processed.