This post may contain affiliate links. Please read our disclosure policy.
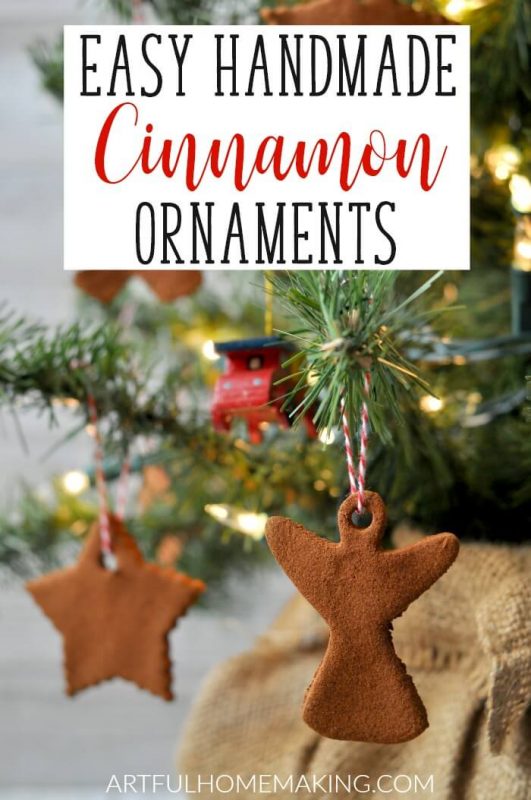
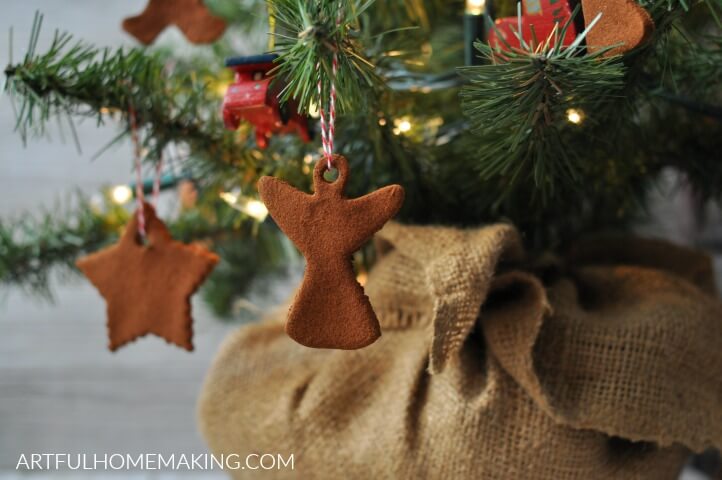
I absolutely love making Christmas ornaments with my kids! These easy handmade cinnamon ornaments are simple to make and look lovely on the tree or decorating a gift!
My mom was the one who introduced cinnamon ornaments to us. Several years ago, my mom came to babysit the kids and brought all the supplies to make cinnamon ornaments. The kids had a blast, and the ornaments lasted for a long time.
They even retained their cinnamon smell through the years!
Since it had been so long and some of the ornaments had gotten cracked after years of use (and maybe some rough handling!), I decided it was time to make them again.
Affiliate links included below.
Easy Handmade Cinnamon Ornaments
When my mom first told me about these, I felt like it was a little bit wasteful to use a whole cup of cinnamon just for ornaments!
Trust me, they’re worth it. To help save money, you can get cheap cinnamon at the dollar store or buy it bulk online.
This year we just made plain ones, for a more farmhouse country look, but in previous years the kids decorated the dried ornaments with glitter glue, which they thought was very fun.
How to Make Them
This is another easy recipe your kids will want to help with!
Supplies Needed:
- 3/4 cup applesauce
- 1 cup cinnamon
- plastic wrap
- parchment paper
- cookie cutters
- drinking straw
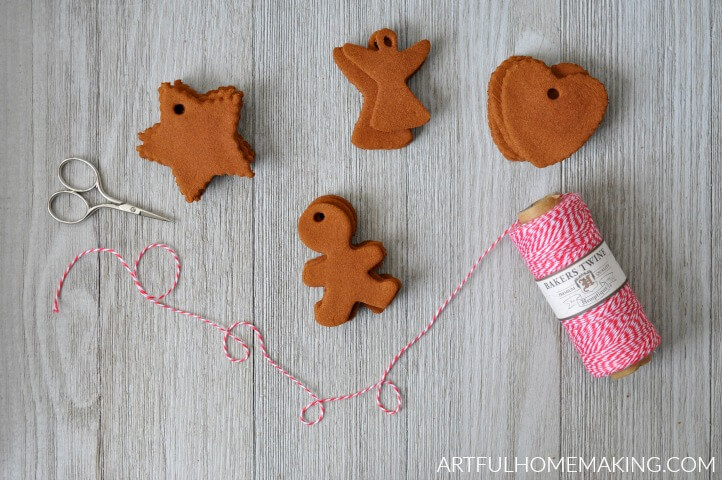
- ribbon or baker’s twine, for hanging (I used this baker’s twine)
Instructions:
- Add the applesauce and cinnamon to a mixing bowl, and mix together until you can form it into a ball. Ours was a bit dry and not sticking together well, so we added a bit more applesauce to get it the right consistency. You don’t want it gooey, just add enough applesauce so that it holds together.
- Divide the dough into thirds. Get out some plastic wrap and put 1/3 of the dough between two pieces of plastic wrap. This is optional, but it’s a lot easier to roll out with the plastic wrap. Otherwise, it tends to stick to the rolling pin.
- Roll out the dough to about 1/3″ or 1/4″ thick. I wanted smaller ornaments, so we used smaller cookie cutters and made them about 1/4″ thick. The thinner ornaments dry faster, but they are a bit more fragile, so keep that in mind when you’re deciding how thin to roll them out.
- While still on the plastic wrap, use the drinking straw to make a hole near the top of the ornament. This will allow you to add ribbon or twine for hanging (after they are baked).
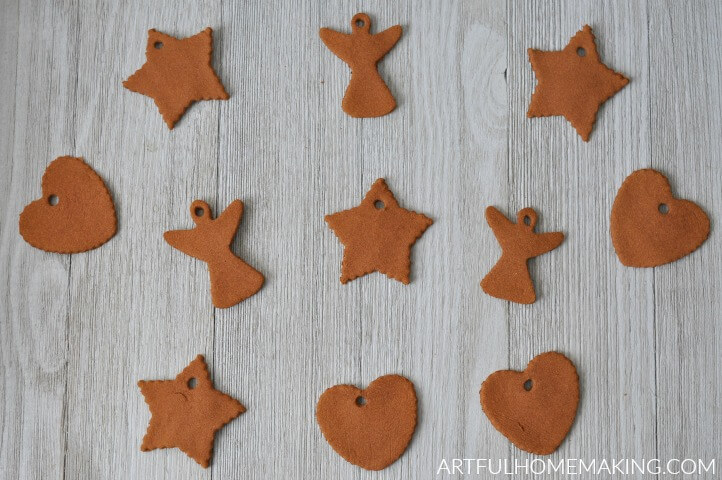
- Transfer cutout shapes to a parchment-lined cookie sheet.
- Bake at 200° F for 2 to 2 1/2 hours. The amount of time required for them to dry depends on how thick they are. They smell so good when they’re baking!
- After they’ve thoroughly dried in the oven, add ribbon or twine. Enjoy your handmade cinnamon ornaments!
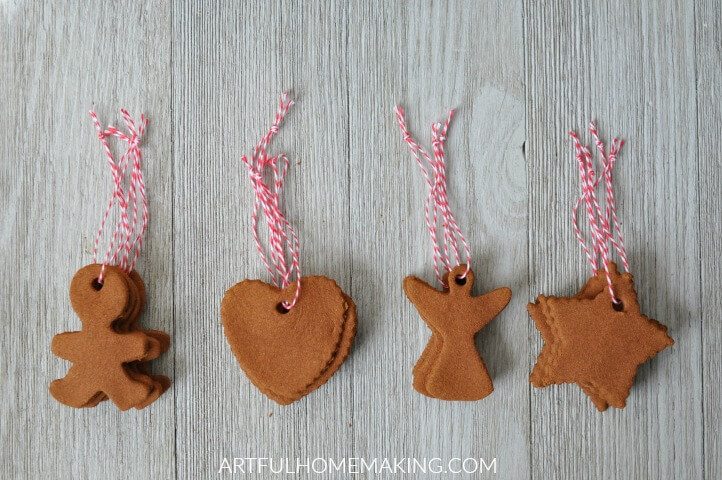
We used these to decorate our small tree in the school room. They look so cute!
Easy Handmade Cinnamon Ornaments Recipe

Easy Handmade Cinnamon Ornaments
Ingredients
- 3/4 cup applesauce
- 1 cup cinnamon
- plastic wrap
- parchment paper
- cookie cutters
- drinking staw
- ribbon or twine
Instructions
- Add the applesauce and cinnamon to a mixing bowl, and mix together until you can form it into a ball. Ours was a bit dry and not sticking together well, so we added a bit more applesauce to get it the right consistency. You don't want it gooey, just add enough applesauce so that it holds together.
- Divide the dough into thirds. Get out some plastic wrap and put 1/3 of the dough between two pieces of plastic wrap. This is optional, but it's a lot easier to roll out with the plastic wrap. Otherwise, it tends to stick to the rolling pin.
- Roll out the dough to about 1/3" or 1/4" thick. I wanted smaller ornaments, so we used smaller cookie cutters and made them about 1/4" thick. The thinner ornaments dry faster, but they are a bit more fragile, so keep that in mind when you're deciding how thin to roll them out.
- While still on the plastic wrap, use the drinking straw to make a hole near the top of the ornament. This will allow you to add ribbon or twine for hanging (after they are baked).
- Transfer cutout shapes to a parchment-lined cookie sheet.
- Bake at 200° F for 2 to 2 1/2 hours. The amount of time required for them to dry depends on how thick they are. They smell so good when they're baking!
- After they've thoroughly dried in the oven, add ribbon or twine. Enjoy your handmade cinnamon ornaments!
Related Posts:

Air Dry Clay Christmas Ornaments

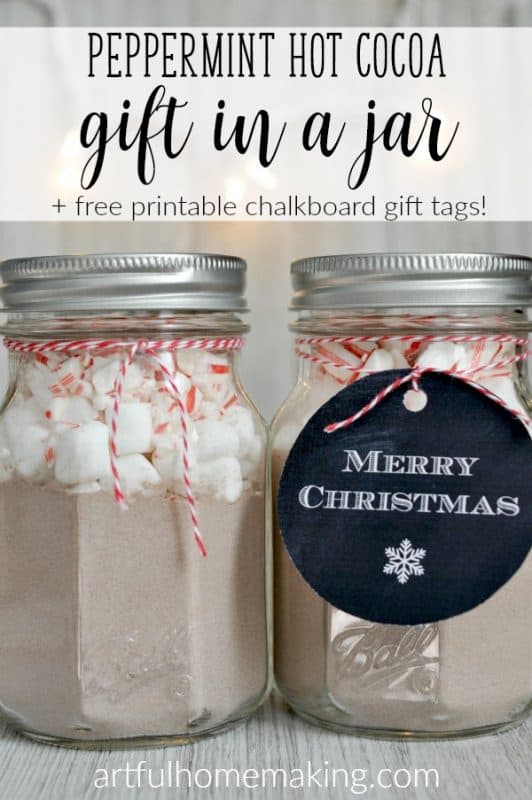
Peppermint Hot Cocoa Gift in a Jar
Disclosure: This post contains affiliate links. Read my full disclosure here. Sharing here.


How long will they last??? Don’t they rot with the apple sauce…
Ours have lasted for many years!
These look great, thanks for posting on the Homestead Blog Hop!
I love this!!! And the house must smell so yummy when you are baking them! Can not wait to give it a try!
Thanks for linking up @LiveLifeWell!
Blessings,
Amy