This post may contain affiliate links. Please read our disclosure policy.
Learn how to dip leaves in beeswax to preserve the fall color of your leaves! This is a fun activity for kids, but adults will love it too.
Have you ever wished you could preserve fall leaves and make them last a little bit longer? Try dipping them in melted beeswax!
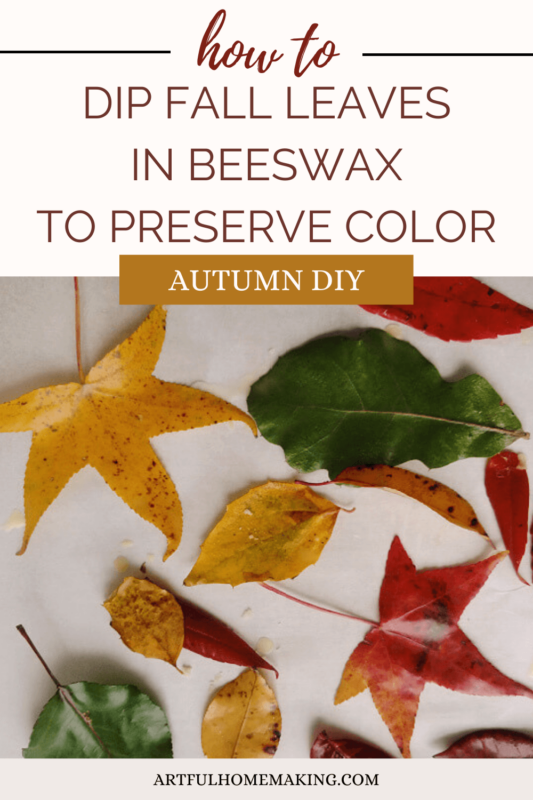
Dip Leaves in Beeswax to Preserve Fall Color
There’s something about all the colorful fall leaves that inspires me. And it makes me want to preserve all that beauty. To make it last just a little bit longer!
I’ve used several different methods to preserve autumn leaves through the years, but dipping fall leaves in melted beeswax is one of my ways to preserve them.
Dipping fall leaves in beeswax is an easy fall craft idea that will help you bring the beauty of nature into your home, and preserve the fall color.
Can You Preserve Leaves with Beeswax?
Leaves can definitely be preserved for a bit longer after being dipped in beeswax. They don’t last forever, but it does make the fall color last a bit longer.
How Long Do Leaves Preserved in Beeswax Last?
It depends somewhat on the type of leaf, but in my experience, leaves preserved in beeswax last about two to three weeks.
Affiliate links are included below, which means I may make a small commission at no extra cost to you. Read my disclosure here.
Supplies You May Need
Here are some basic supplies you may need for this project.
- Double boiler
- Wide mouth jar (if you don’t have a double boiler) in a saucepan
- Beeswax
- Wax paper
- A pair of tongs or tweezers (helpful, but not required)
- Cookie sheet or other tray to lay wax paper on
How to Dip Leaves in Beeswax
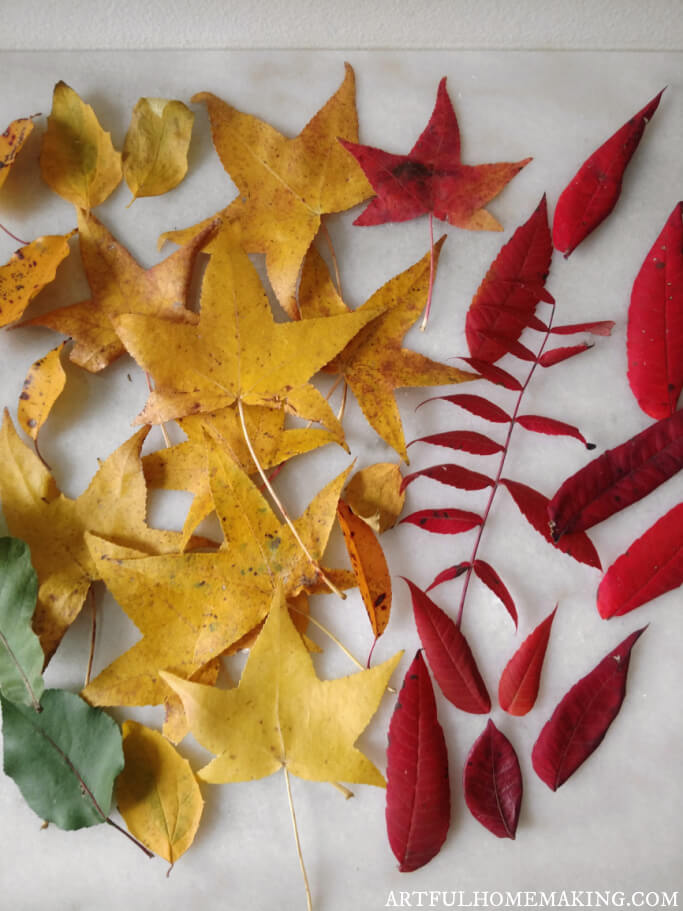
1. First, gather some fall leaves!
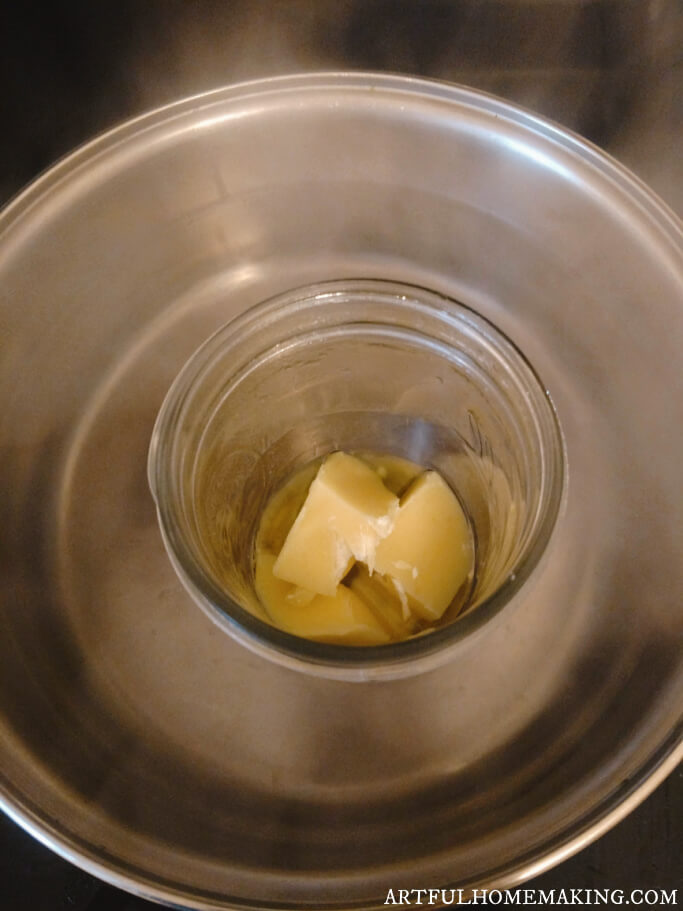
2. Then, gather your supplies. You’ll need a double boiler of some type.
I like to use a saucepan with a jar inside. (A wide mouth jar makes it easier to dip your leaves into.)
This is a jar that had a chip in the rim, so I didn’t mind using it for beeswax. The beeswax will not wash out, so it’s a good idea to use a container that you’re fine with leaving some wax residue inside.
You can also check thrift shops or garage sales for a double boiler that you dedicate just to beeswax projects (because beeswax is very difficult to remove from the melting container!).
You can also use a wax melting pot (like those used in candle making) for this project. I have one that I use whenever I make beeswax candles, but for this project I just used a jar in a saucepan about halfway filled with water.
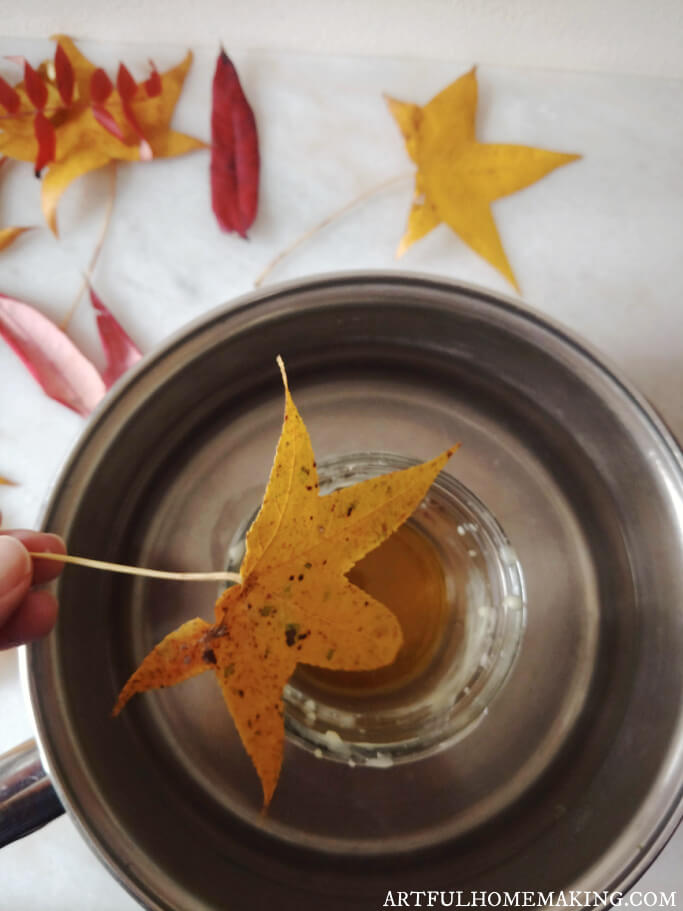
3. Melt the beeswax in the double boiler. You don’t want it to boil, just melt it gently until it becomes liquid.
4. While you’re waiting for the beeswax to melt, line a cookie sheet with wax paper or parchment and set aside.
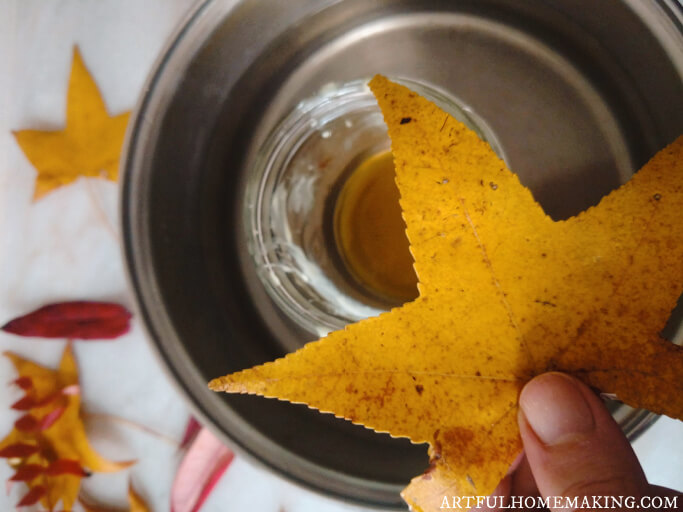
5. Dip fall leaves in beeswax allowing the wax to coat the leaf. Allow the excess melted beeswax to drip off.

A pair of tweezers or tongs would make this a bit easier, especially if your leaves have short stems, like this one.
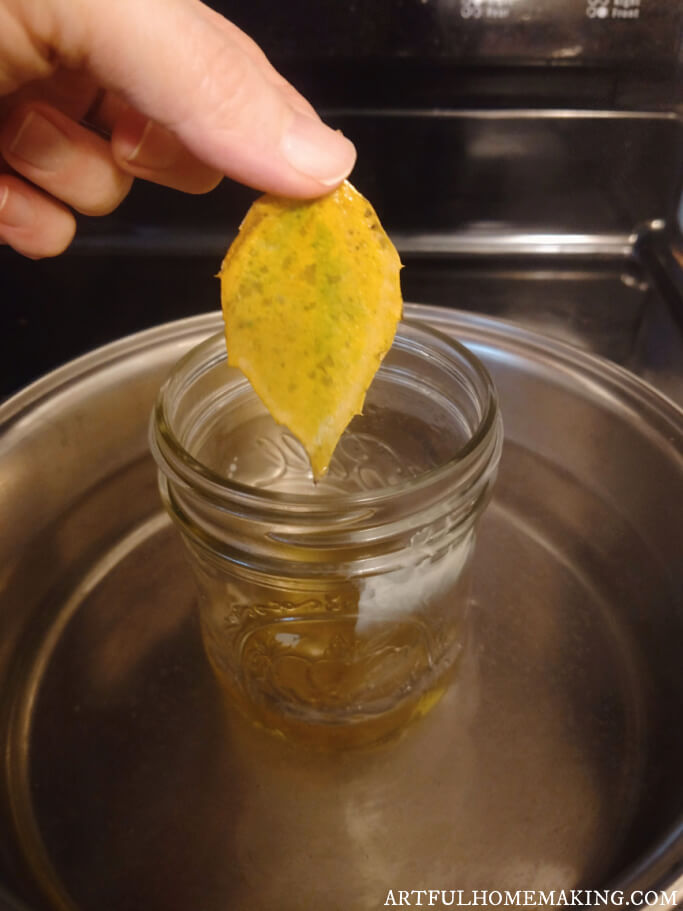
6. Lay beeswax coated leaves on wax paper to dry.
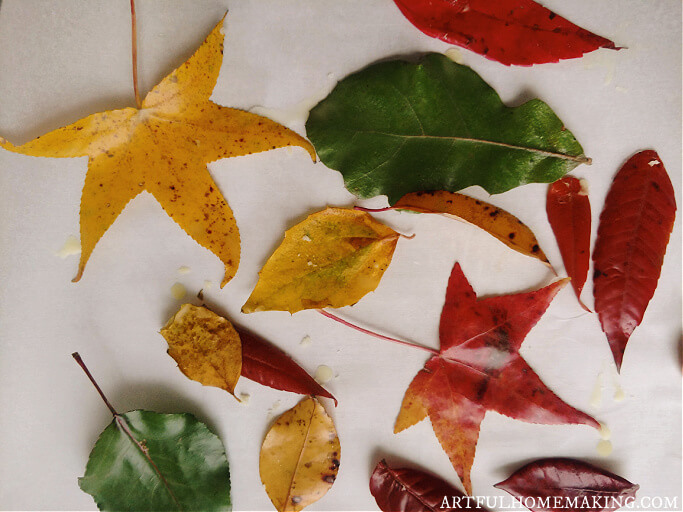
7. After the first layer of wax is dry, you can dip the waxed leaves in the beeswax a second time if you wish.
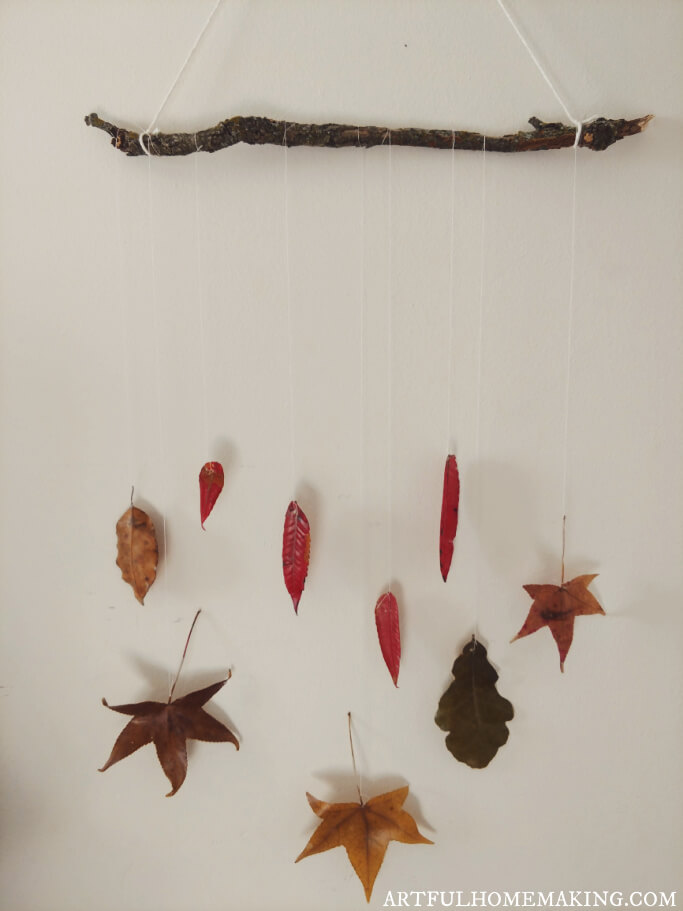
8. That’s it! Now you can decorate with your beeswax preserved leaves any way you like! We love making a mobile with them, using a stick and some string.
Continue reading below for more ideas and the printable instructions!
More Fall Craft Projects
How to Make Oven Dried Orange Slices
How to Make Rolled Beeswax Candles
How to Decorate with Beeswax Dipped Fall Leaves
There are so many ways to decorate with your preserved autumn leaves!
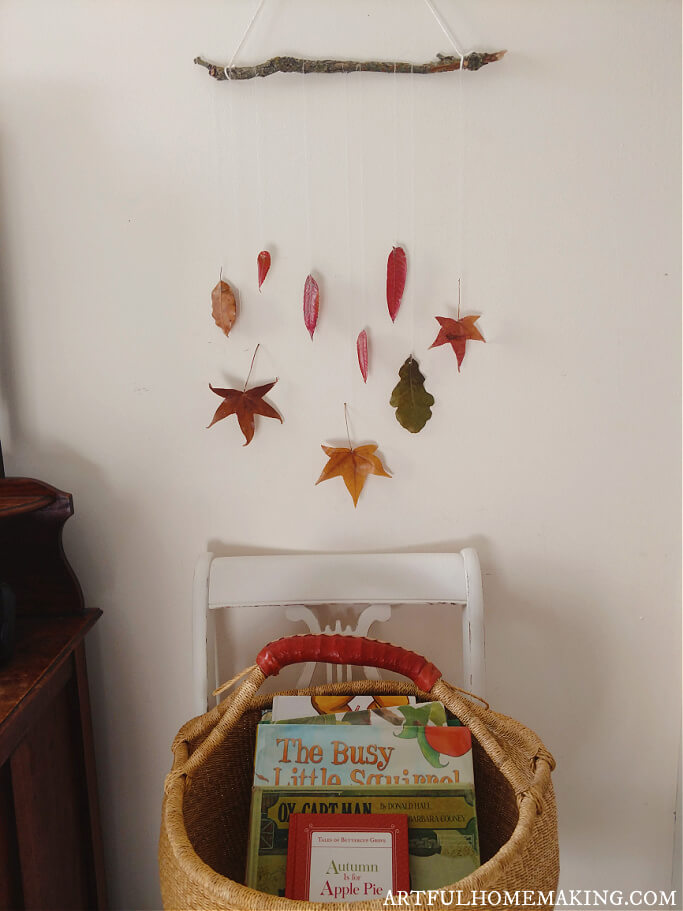
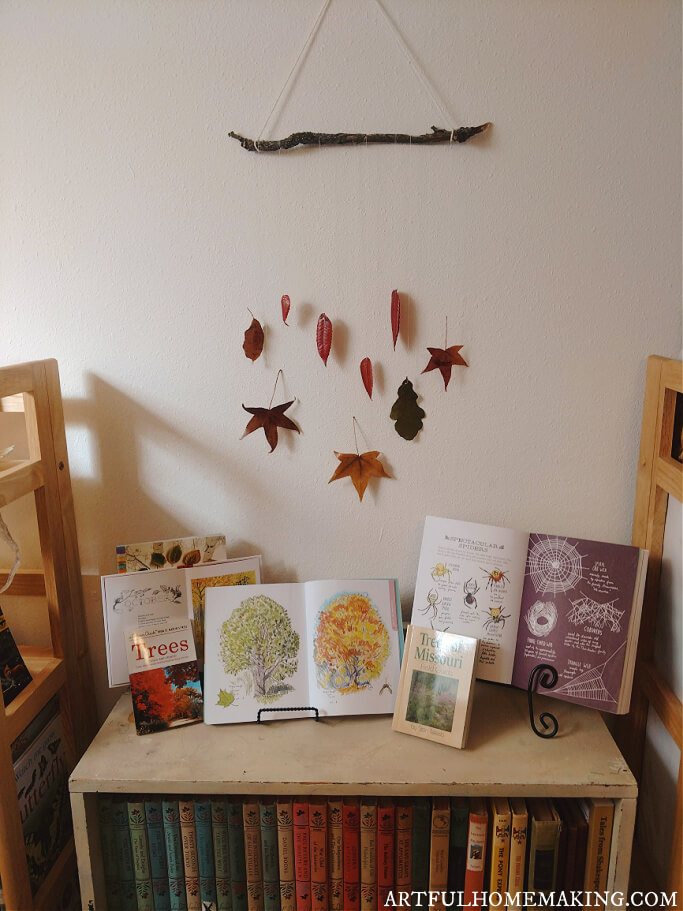
Beeswax Fall Leaf Mobile
Once you have dipped your leaves in beeswax, and the beeswax has dried, you can use a needle and thread to hang the leaves on a hanger.
The hanger can be made of a wooden dowel or a stick found in the yard or on a nature walk. We love the rustic look of the stick!
We like to vary the lengths of the thread so that the leaves on the leaf mobile are hanging at different levels.
This looks so pretty, and I love decorating our homeschool room with these beautiful fall leaf mobiles!
Beeswax Preserved Leaf Garland
Or, you can thread your leaves on a piece of sting or thread, and make a garland! This is another beautiful way to display the fall leaves preserved in beeswax.
Using different colored leaves, thread the leaves together on a long string, and hang them up. This is so simple, and so lovely!
Display in a Basket on a Table
Another idea is to spread the fall leaves in a shallow basket and display it on a table. It makes a great fall table centerpiece, or it would also be great on your nature table.
Thanks so much for stopping by!
How to Dip Leaves in Beeswax Printable

Dip Leaves in Beeswax to Preserve Fall Leaves
Ingredients
- double boiler or jar and saucepan
- cookie sheet
- wax paper
- 2-4 oz beeswax
- 10-20 fall leaves
Instructions
- Gather fall leaves.
- Lay a piece of wax paper on a cookie sheet and set aside.
- Melt beeswax in a double boiler or a jar placed in a saucepan with a bit of water. Don't allow to boil, just heat until it melts.
- Dip a leaf into the melted wax, just enough to coat the leaf. Allow the excess beeswax to drip off, if needed.
- Lay the beeswax covered leaf on the piece of wax paper and allow to dry. Once it has dried, you can dip it again, to add another layer of wax.
- After leaves have dried, decorate with them however you like!


Using beeswax to preserve fall leaves is such a simple, fun project. Kids especially love the process of collecting leaves and dipping them in beeswax on a cozy fall day!