This post may contain affiliate links. Please read our disclosure policy.
Dried orange slices are easy to make and beautiful for Christmas décor and crafts!
Learn how to make oven dried orange slices with this simple DIY tutorial.

Dried Orange Slices
Every Christmas I love to spend time in the kitchen with my family making cookies and other treats. Some of our best Christmas memories are made in the kitchen!
Our Christmas traditions include making gingerbread houses, chocolate star cookies, and cinnamon ornaments.
A few years ago we added dried orange slices to our list of Christmas traditions.
These are so simple to make that you’ll want to make them every year!
Although you don’t have to make them every year, as they often last for a long time.
Why You’ll Love This Christmas DIY
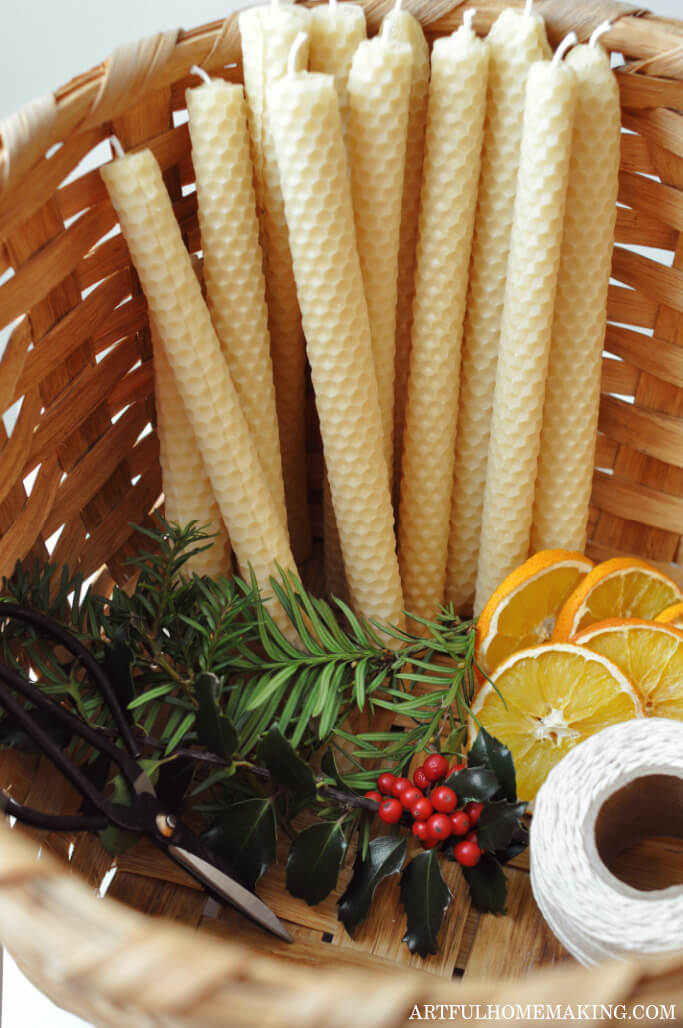
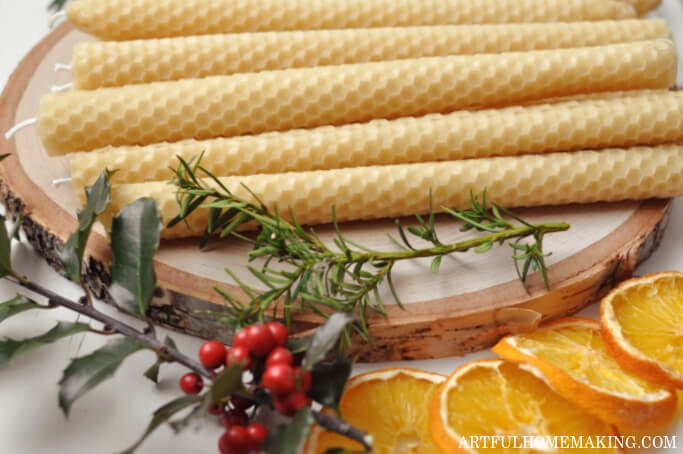
There are so many fun crafts to make for the holiday season. Homemade ornaments, Christmas wreaths, and Christmas decorations like beeswax candles.
Whenever possible, I love using natural elements in my seasonal decor.
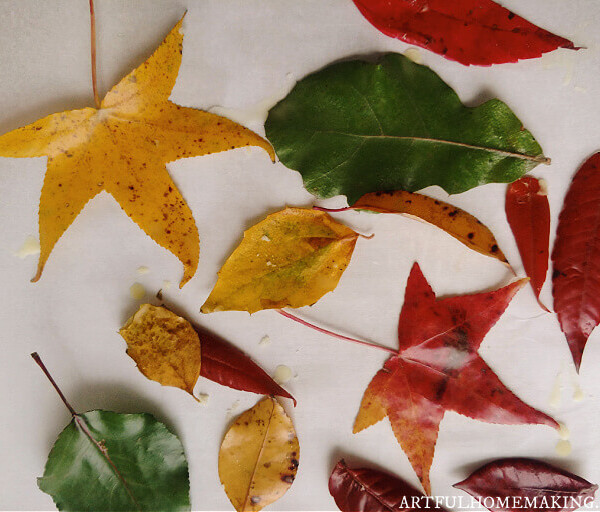
For fall, we decorate with pinecones, dried flowers, pumpkins, and beeswax dipped leaves.
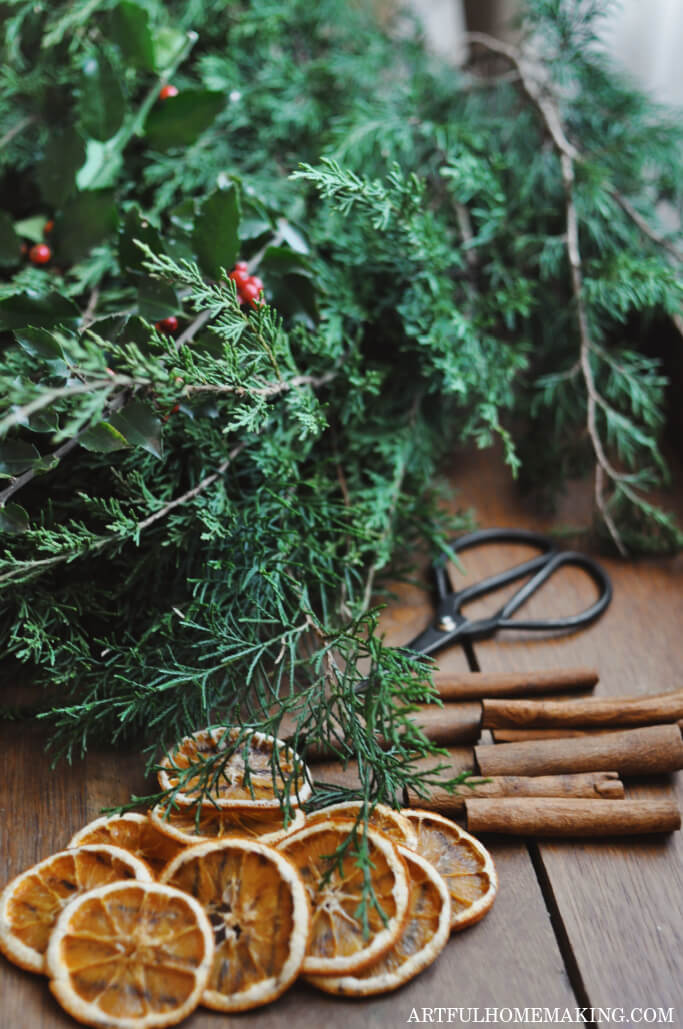
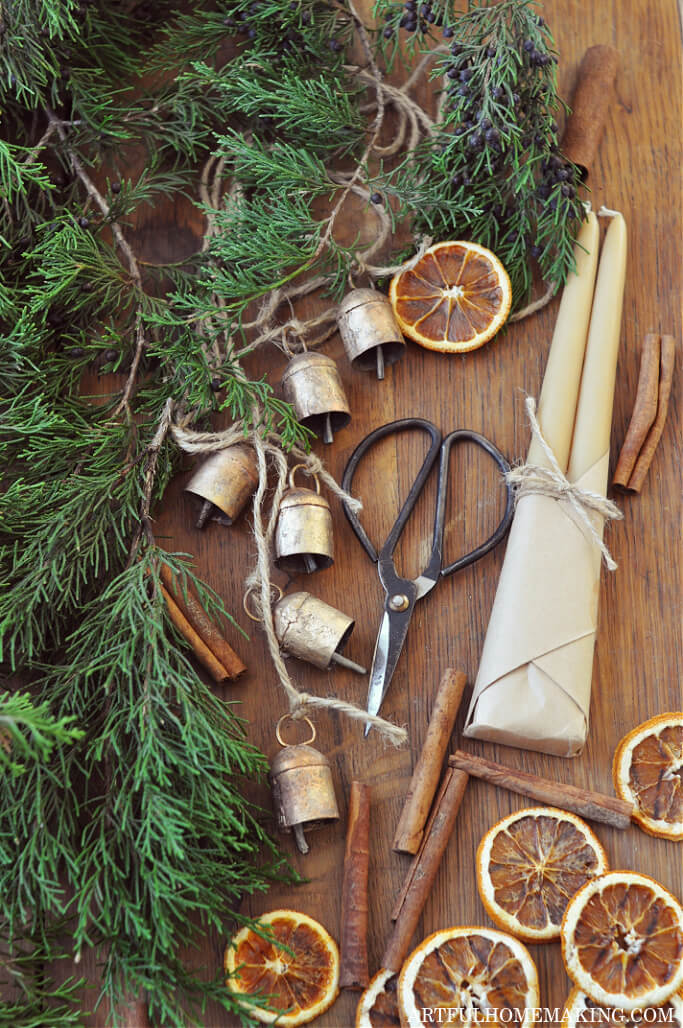
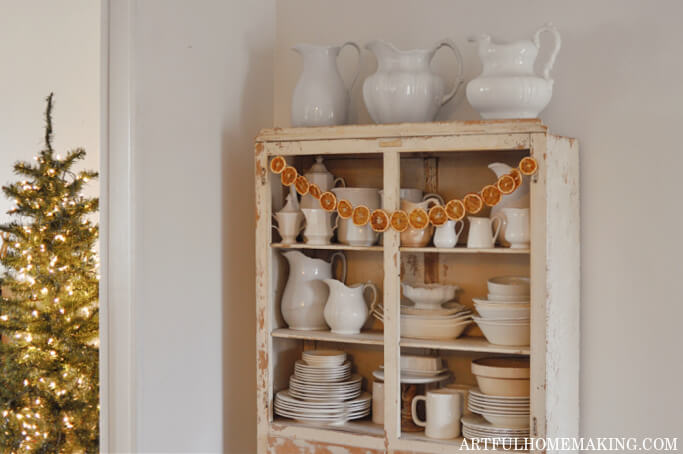
For Christmas, we dry orange slices and use them in a dried orange slice garland, or nestle them in evergreen boughs collected from our yard.
Orange slice garlands are also beautiful combined with popcorn, cranberries, and other natural elements.
Making your own dried orange slices in the oven couldn’t be easier.
Basically you’re just slicing oranges and drying them on a very low setting in your oven.
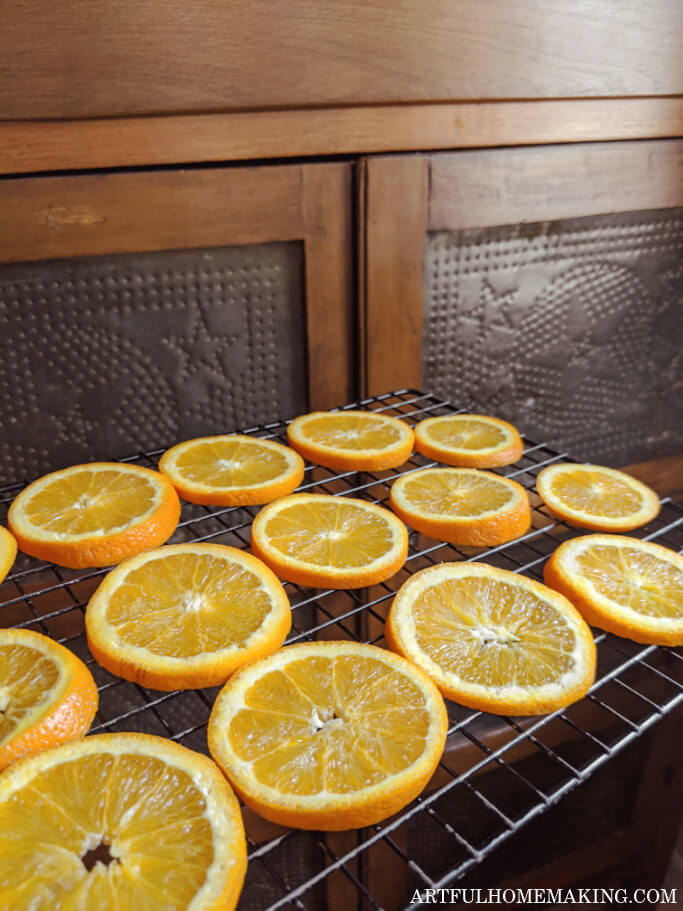
You can also use a dehydrator, but I find this is the easiest way to make dried oranges for decor.
Making dried orange slices is an easy project, and something the whole family can enjoy.
Dried Orange Slices Tips
- You can dry other citrus fruits the same way you dry oranges. Lemons, limes, and blood oranges are other options to consider.
- This tutorial will show you how to dry orange slices in the oven for decor. But you can also use a food dehydrator for the same effect.
- For best results, you want thin slices rather than thick ones.
- Fresh oranges are better than old ones for this craft. Old oranges are soft and extra juicy and won’t slice as well.
- However, you don’t need to use top-quality oranges for this project. As long as they’re still firm enough to be sliced, they should work fine.
- Store your dehydrated orange slices in an airtight container to keep them looking nice for next year.
Ways to Decorate with Dried Orange Slices
There are so many different ways to decorate with dried orange slices.
They are easily incorporated into your holiday decor.
You can make Christmas garlands with them, or add them to a popcorn-cranberry garland.
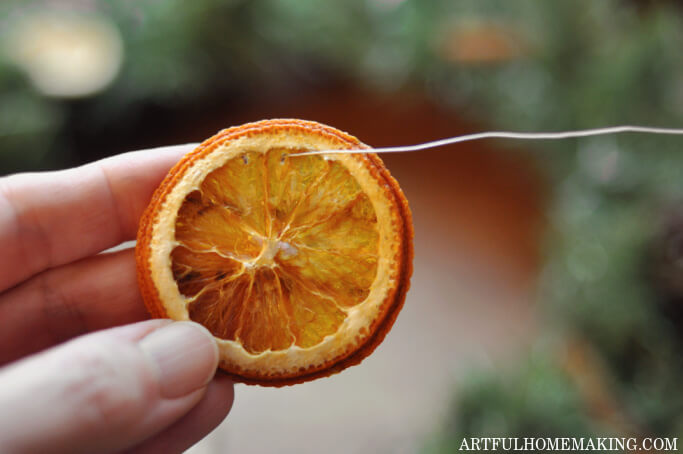
You could also just put a string through one and hang it on the Christmas tree. Or pair them with pine cones!
I’ve also seen a single orange slice with a cinnamon stick made into a Christmas ornament.
Add them to Christmas presents! I love the idea of adding a dried orange slice to a gift wrapped with plain brown wrapping paper for a farmhouse Christmas gift wrap idea.
One year I made a Christmas wreath and decorated it with dried orange slices and cinnamon sticks.
You can also add them to potpourri and combine with cinnamon sticks, star anise, and maybe scented with some cinnamon essential oil.
Supplies Needed for This Project
This post contains affiliate links. Read my full disclosure here.
- Oranges
- Serrated knife or other sharp knife
- Wire cooling racks
- Oven
- Twine (optional, for hanging) or jute
How to Make Dried Orange Slices
Find the full list of supplies and instructions in the printable recipe card below.
1. Preheat the oven to 175 to 180 degrees F.
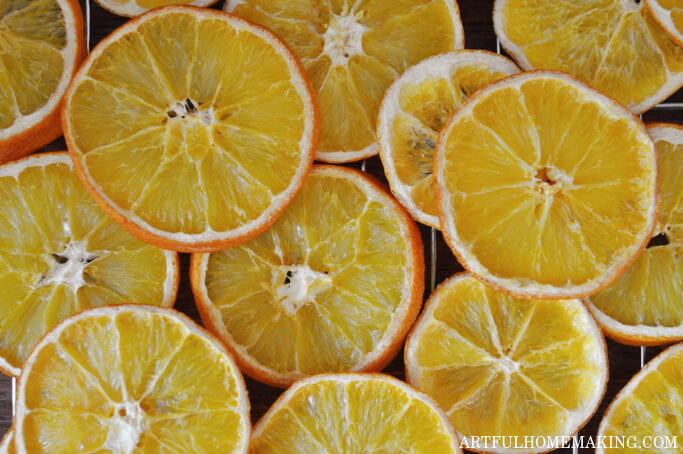
2. Slice the oranges with a sharp serrated knife to make round slices. You want to slice them fairly thin, but you also want them to not fall apart. Most of mine ended up about 1/4 of an inch thick. Some were a little thicker than this, but they still worked. The thing is, the thicker your slices are, the longer it will take them to dry.
3. Pat the oranges dry with a paper towel. Don’t squeeze them, but remove as much excess moisture as you can. This also aids the drying process.
4. Lay the oranges on a wire rack in a single layer with space between the oranges. Set the cooling rack directly on the oven rack in the preheated oven.
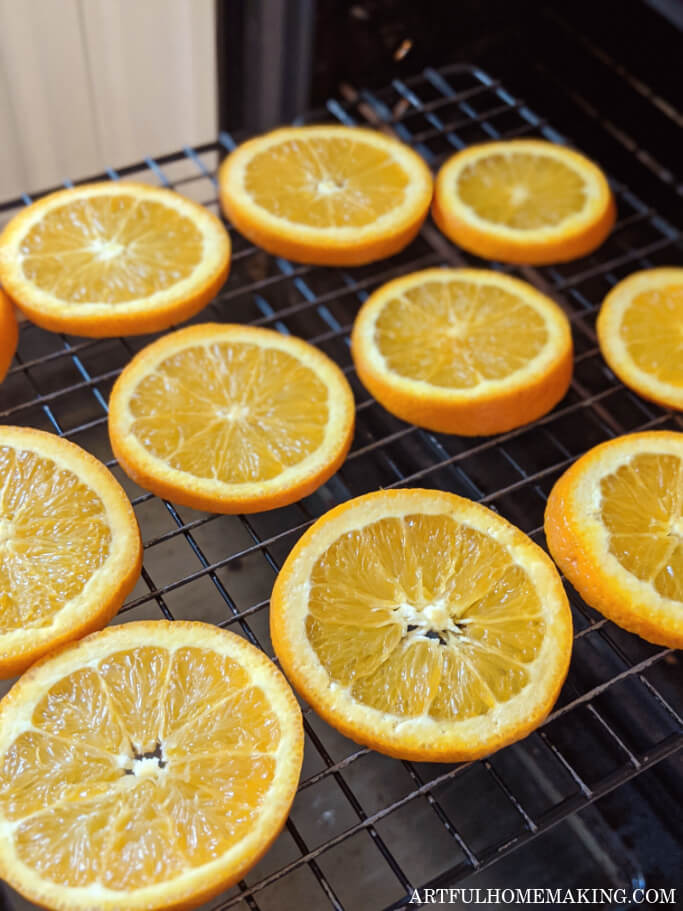
If your oranges are still moist, you can set the cooling rack on a cookie sheet lined with parchment paper.
Mine didn’t drip in the oven at all, even though I placed the cooling rack directly on the oven rack.
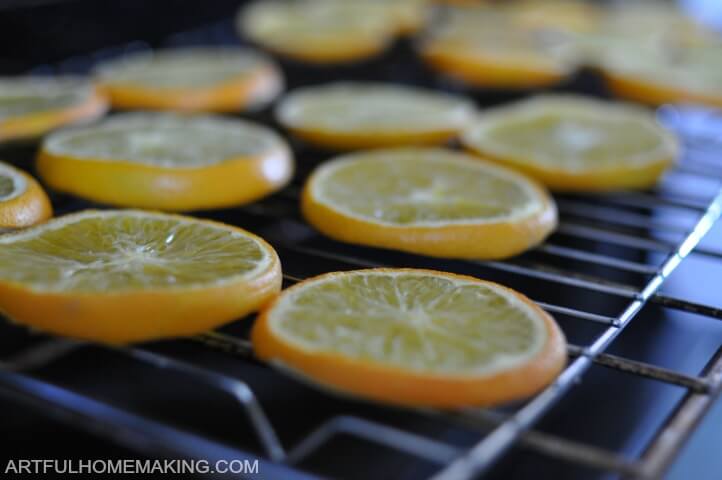
5. Bake for 4-6 hours or until done, turning every hour or so to help aid the drying process. The time it takes for the oranges to dry will vary, depending on how thick your slices are and your oven temperature.
You can see in the photo above that a few of mine were a bit too thick. They still dried, but it took a long time!
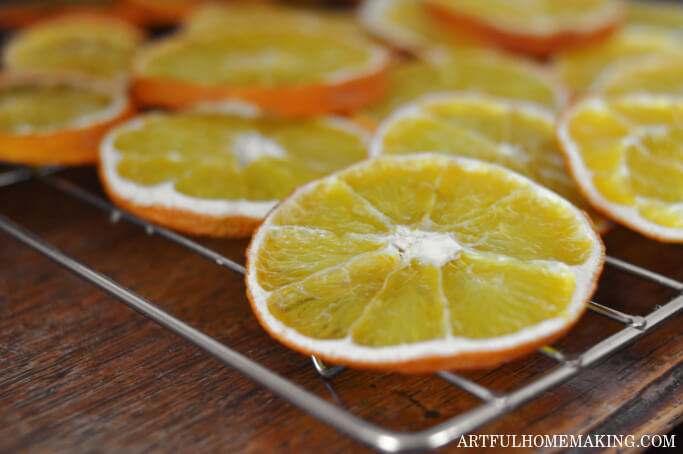
6. The oranges may still have some moisture in them, but they’ll continue to dry even after removing from the oven. I left mine on the cooling rack for a few days to complete the drying process.
More DIY Christmas Crafts
- Air Dry Clay Christmas Ornaments Tutorial
- Wood Slice Christmas Ornaments Tutorial
- Easy Handmade Cinnamon Ornaments
- DIY Grain Sack Christmas Ornaments
- How to Make Beeswax Candles
- Handmade Wooden Nativity Set Tutorial
- Rolled Tapered Beeswax Candles Tutorial
Dried Orange Slices DIY Recipe

Dried Orange Slices
Ingredients
- 5 oranges, (You can use as many oranges as you wish!)
Instructions
- Preheat the oven to 175 to 180 degrees F.
- First, slice the oranges to make round slices. You want to slice them fairly thin, but you also want them to not fall apart. Most of mine ended up about 1/4 of an inch thick. Some were a little thicker than this, but they still worked. The thing is, the thicker your slices are, the longer it will take them to dry.
- Pat the oranges dry with paper towels. Don’t squeeze them, but remove as much excess moisture as you can. This also aids the drying process.
- Lay the oranges on a wire cooling rack with space between the oranges.
- Set the cooling rack directly on the oven rack in the preheated oven. You can also place the rack on a cookie sheet if your oranges are dripping.
- Bake for 4-6 hours, turning every hour or so to help aid the drying process. The time it takes for the oranges to dry will vary, depending on how thick your slices are and your oven temperature.
- The oranges may still have some moisture in them, but they’ll continue to dry even after removing from the oven.


These dried orange slices are such an easy and inexpensive DIY holiday decoration to make!
I tried this last year and my oranges were not pretty they were more brown than orange when they were finished. Any tips on them looking like an orange still? I may try again this year because I love the look .
I’m not sure, maybe they were baked too long? I put mine on a cooling rack and put the cooling rack in the oven on a cookie sheet. They’re still looking pretty good several years later! This year I used them on a wreath on the front door.
Great instructions. Thank you for sharing at Party In Your PJ’s!
Thank you!
I love this! I definitely will be doing this – thanks for sharing!
They’re such a fun and easy craft!
Loving this idea! I need to go get some oranges!
They make great natural holiday decorations!
Yum, I can smell those from here. I never knew you could dry oranges in the oven. I will be giving this a try. Happy New Year, Kippi
Happy New Year to you, Kippi!
What a wonderful idea! I love the smell of oranges! Thanks for sharing!
Thanks for linking up @LiveLifeWell!
Blessings,
Amy